


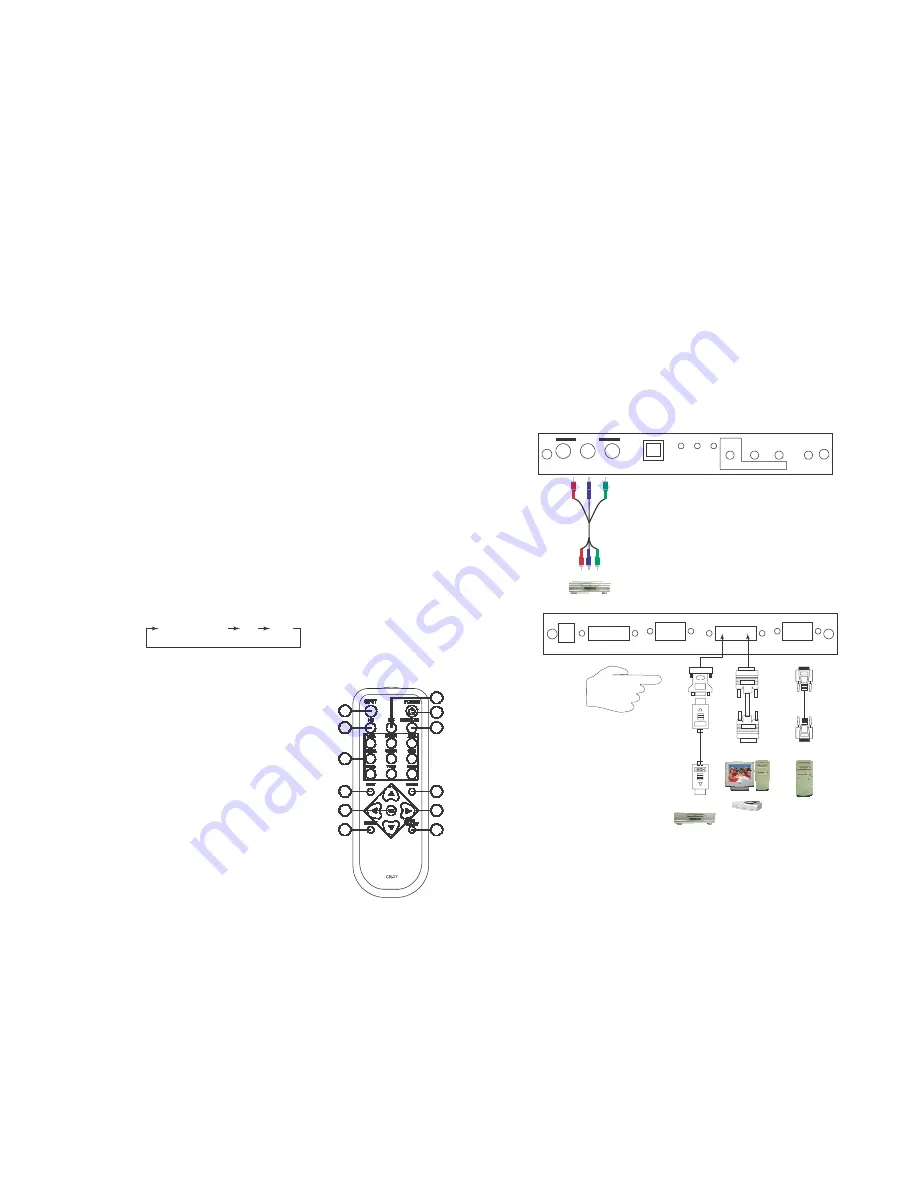
2. DVI/HDMI input:
Connects this DVI input connector to the DVI output of your
DVI source to the HDMI out of the HDMI device via HDMI to DVI cable. The DVI
or HDMI input should be digital only and should not include analog RGB signal.
The use of DVI-I connector is to ensure both DVI-I and DVI-D male connector
of the DVI cable can fit into this input connector. The digital DVI input
resolution can range from 480i~1080p, or VGA~WUXGA.
3. PC- D-sub out:
The connector for scaled analog RGB output.
Connect this output port to the analog PC RGB input of your monitor, or
connect it to the RGBHV input of your HD display using D-sub to 5 BNC
adaptor cable. (not included in the package)
Note:
When input is a HDCP encrypted DVI signal this analog output will be
10. OK (Enter):
Press the button to confirm your selection.
11. Reset:
Press the button to reset the unit's firmware setting to the factory
default value.
12. Auto Adjust:
Press the button to optimize the position of the picture
(picture centering) on the screen.
Installation:
Input Connection
turned off.
4. DVI output:
Scaled digital DVI output. Connect this output to the DVI input or
INPUT
MENU
AUTO
ADJUST
INPUT
POWER
HD PC DVI
HDMI input of your Digital display.
Note:
When input is a HDCP encrypted DVI signal the DVI output is also HDCP
encrypted. The monitor/display that connected to this output also need to
be HDCP compliant in order to get a nice and clean picture. A non-HDCP
compliant display can only display non-HDCP signal and picture will
become noise when input is a HDCP-encrypted signal.
5. Power jack:
Connect to the 5V 2A DC power adaptor.
Cr/Pr
Cb/Pb
Y/HD
Component in
ENTER
-
+
Remote Control and functions:
1. Power:
Press the button once to power on the HDV5. Press again to enter
standby mode.
2. Input:
Press the button repeatedly to toggle through various input sources as
Component out
DVD or Set Top Box
follows.
Component PC DVI
3. HD input:
Press the button to select component input.
4. PC input:
Press the button to select PC input.
5. HDMI/DVI input:
Press the button to select DVI (or HDMI) input.
4
DC 5V
DVI OUT
HDMI to DVI
connector
adaptor
PC OUT
DVI
HDMI
DVI IN
PC IN
DVI
Cable
6. Output resolution
Select buttons:
Pre
6. Output resolution:
ss any one of the button to directly
2
1
or
-
PC-in
select output resolution.
3 5
For other output resolutions that are not
covered by these buttons please enter
6
Menu/Output page to select them.
7. MENU:
Press the button to bring up OSD main menu page.
8. Exit:
Press the button to exit from a sub menu or main
8 7
HDMI
Cable
HDMI
DVI out
menu.
10 9
9. Up/Down/Left/Right:
Press the Up/Down button to move
the highlight bar to your desired
11 12
HDMI out
DVD
PC
PC
STB
parameter during the OSD operation.
Press the Left/Right button to increase/
decrease the setting value of a
selected parameter.
3
4


