background image


                                                          Manual  of  ALT382


23 


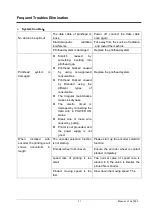
Frequent Troubles Elimination 


System troubles


No dot can be split out   

The  data  cable  of  printhead  is 

loose 

Power  off,  connect  the  data  cable 

once again   

Electromagnetic 

radiation 

interference. 

Far away from the source of radiation 

and restart the machine   

Printhead system is damaged 

Replace the printhead system   


Printhead 

system 

is 

damaged 


Scratch 

caused 

by 

something  inserting  into 

printhead gap. 


Printhead  blocked  caused 

by 

using 

non-approved 

consumables. 


Printhead  blocked  caused 

by 

Blended 

using 

the 

different 

types 

of 

consumable.   


The  irregular  maintenance 

makes ink dryness. 


The 

electro 

circuit 

is 

damaged by connecting the 

data  wire  in  POWER  ON 

status. 


Break  wire  or  loose  wire 

caused by pulling. 


Printer is not grounded, and 

the  power  supply  is  not 

good. 


Replace the printhead system 

When 

installed 

with 

encoder, the printing result 

shows 

nonuniform 

in 

length. 

The  encoder  selection  function 

is not startup. 

Please  start  up  the  encoder  selection 

function 

Encoder wheel rolls uneven 

Ensure  the  encoder  wheel  is  contact 

product completely. 

speed  rate  of  printing  is  too 

small 

The  normal  value  of  speed  rate  is 

around  in  8,  the  value  is  smaller,  the 

printed file is shorter. 

Product  moving  speed  is  too 

fast. 

Slow down the moving speed. The   

Содержание ALT382

Страница 1: ...ALT382 HANDHELD INKJET PRINTER MANUAL SHANGHAI YUCHANG INDUSTRIAL CO LTD ...

Страница 2: ...odes description 10 system 11 1 Printhead management 12 2 Authority 12 3 disk 13 4 Inklook 5 Calibrate 6 System Information 13 14 15 2 1 6 date time 13 2 1 7 calibrate 13 2 1 8 idle jet 14 2 1 9 counter continue 14 2 2 Parameter 14 2 3 Print 16 2 4 Browse 17 2 5 Edit 18 Image file 18 Create bar code 19 Create date time serial No shift group 20 Text Text Feature 23 Module operation 24 Eliminate Tro...

Страница 3: ...hich includes appearance structure hardware and software has already got patent Any piracy shall bear the legal liability Our company reserves the right of final interpretation If you have any questions please feel free to contact us Our company reserves the right of update at any moment and unnecessary to notify the users Copyright reserved by CYCJET Any unauthorized reproduction articles picked ...

Страница 4: ...tion materials 2 Purge the inside and outside of printhead and plug up the ink inlet The printhead shall be covered by cap and packed by anti vibration film to prevent from scratch 3 Just left an empty cartridge in Ink system before loading The warranty claims will not be accepted in the following situations 1 Printhead or inks system damages caused by using unauthorized inks and cleaners 2 Printh...
Страница 5: ...Manual of ALT382 4 Packing List Name Quantity Handheld ink Jet Printer 1 PC Intellectual Charger 1 PC Touch pen 1 PC Manual 1 Copy ...

Страница 6: ...e Time Character Photo Shift group Serial number and bar code Storage 1000 text messages together with one 256 126 bitmap Operation Color touch screen with photo menu Edit in screen English input Basic drawing function Graphical function Module design Independence Printing Parameter Display 7inch color touch screen Inks Porous ink Non porous ink UV anti counterfeit inks food grade ink invisible in...

Страница 7: ...ctrical Requirement Electrical requirement AC100 240V 10 50 60Hz connect the ground cord Max Power 30W average 15W Temperature 5 40 Humidity 10 90 non condensing Electromagnetic interference far away from electromagnetic radiation zone ...

Страница 8: ...y 3 Fasten the three screw nuts by spanner 3 Host Machine Installation 1 Put small steel pipes into large ones and put large steel pipes into triangle stands after adjusted the height fasten the star shape holders 2 Put the host machine onto the adjusted stands and collimate each other 3 Fasten the host machine to the stands by screws 4 Ink container Stand Installation only effective in independen...

Страница 9: ...5 seconds to access the system 8 Printing Test 1 Put the ink cartridge into the ink system in correct position 2 Remove the cap of the printhead and squeeze the ink cartridge to drain out the air and cleaner until no bubbles 3 Clean up the surface by blotting paper 4 Tested by blank papers with more details see page 26 9 Product moving position the speed of production line shall be slower than the...

Страница 10: ... inks When using solvent base inks please purged printhead and drained out the dry inks by blotting paper After that test the printing result by a blank paper More details see page24 The procedure for using solvent base inks purge squeeze clean test Switch off Press the power button off and cover up the print head cap Note Before switch off ensured the printhead in normal condition Forbid to purge...

Страница 11: ...is what will be printed out The counter of printer is located in the bottom part of the screen It can count the printing number of times It is kept at correct deenergizing the printer Filename of current printing content is in a left bottom corner of the screen System date time is in a middle bottom corner of the screen Shows the current system time date The number of print head is in a right bott...

Страница 12: ...n of photo4 to open screen as photo5 In photo5 besides Disable there are two levels protection options Low High Disable means no limit of authority every people can edit and operate the printer Low the frist level protection at activation of the restrained function without password the Edit mode will be locked High the second level protection at activation of the admin function without password ju...

Страница 13: ...art when file shows in download zone it means download successful 2 1 3 InkLook click the button Inklook it shows information as follow Current ink The dot numbers which consist of the current printing content Residual Frames Shows can print How many times of current printing content with one liter ink 2 1 4 Date Time click the button Date Time to open screen as photo7 Photo 7 Adjust Date Time by ...

Страница 14: ...omatically at regular intervals Perform Idle jet when using solvent base inks non porous ink It can prevent from illegible printing result caused by dry ink of printhead if the printer keeps not running for a long time The Idle Jet interval and Idle Jet lines are depended on ink types temperature humidity and the speed of air flow Under normal situation the suggested Idle Jet interval is 10 second...

Страница 15: ... 5 Interval the interval of time between each of the contents millisecond 2 2 6 BNC Shaft encoder activates this button when using encoder Encoder could prevents from irregular printing result which caused by inconstant speed of production line 2 2 7 Bold Increase ink volume for printing content 2 2 8 FilelLink For read database 2 3 Print click of the button print when it turns red means start pri...

Страница 16: ... Date Time serial number shift group BMP generation etc Pic 15 1 Image file If you want to print with a picture please click Image File firstly Then choose an image file which is saved in the printer from the dialog box Then click OK Pic 16 Note Image file can only be single color BMP file ...

Страница 17: ...ode according to your need Bar Code height The quantity of dots consists of the height of the bar code Bar code width The quantity of dots consists of the width of the bar code Left and right margin quantity of the dots between bar code and the left or right edge if there is data in the bottom the margin should be large enough or the data can not be displayed completely Up and down margin quantity...

Страница 18: ... date property dialog box Pic 21 then choose Font change the character type and size in the font dialog box finally come back to Date dialog box click OK for certain Pic 21 Date time format Many different forms Date Time offset Date Time offset is available date as your requirement such as period of validity 1 period of validity 2 4 Serial No If you want to generate a Serial No click choose serial...

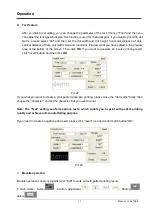
Страница 19: ...he preview area at the bottom of the dialog box click OK and back to Serial No interface click Font and then select the font of shift group Start time set start time for the shift group Add shift group Set the shift group name Delete shift group Delete wrong shift group name or cancel this shift group 6 Text Pic 25 If you need to generate a text please click icon then a dialogue box of property wi...

Страница 20: ...click OK If you want to generate an inverse printing result click invert button and then click OK Pic 27 If you what you want to create a print performance like printing please close the dot matrix firstly then choose the character and set the character that you want to print Note The Text setting can form various texts which enable you to print with perfect printing quality and achieve anti count...

Страница 21: ...ation adjustment choose the text that you want to print and move the text to the approximately location then click location adjustment click to adjust the location of the text click to change the extent of the movement 3 Property Choose the text you want to print firstly and then click to change the property of the text Pic 30 2 Delete Choose the text you want to print firstly and then click to de...

Страница 22: ... Choose the text you want to print firstly and then click to 90 degree counterclockwise rotate the text Pic 33 Note Module operation can work together with Edit to create perfect printing quality and superior anti counterfeiting performance ...

Страница 23: ...et a good result however the result will goes bad in a very short time especially the top of character Injector or filter was blocked Purge or replace the blocked parts Some parts of ink system was loose ink hose ink cartridge injector etc Tighten or replace the blocked parts No dot can be split out Printhead cap is not open or did not purge printhead gap Open printhead cap purge printhead gap and...

Страница 24: ...fferent types of consumable The irregular maintenance makes ink dryness The electro circuit is damaged by connecting the data wire in POWER ON status Break wire or loose wire caused by pulling Printer is not grounded and the power supply is not good Replace the printhead system When installed with encoder the printing result shows nonuniform in length The encoder selection function is not startup ...

Страница 25: ... shall ensure inks can leak out in the top position when you found some bubbles please continue to squeeze until no bubble can be found If it is installed for down printing put the blotting paper in the bottom Squeeze ink cartridge slowly for inks leaking c when squeeze the ink cartridge please keep blotting paper staying around for 3 seconds for leaking inks After that clean up the inks leave on ...

Страница 26: ...nnected ink supply hose before use next time squeeze the ink cartridge to drain out the airs and cleaners until no bubble can be found clean up by blotting paper testing by blank paper 3 It will spend long time in transportation of the damaged machine so please do the maintenance as above Note it s very important to follow the operation instruction as above otherwise the printhead will be damaged ...

Отзывы: