Bag K
Bag K
Bag K
Bag K
Bag K
Battery Mount
Battery Mount
Battery Mount
Battery Mount
Battery Mount
-Parts for
Bag J
3224 Qty 1
Battery Tray
5263 Qty 4
4-40 x 3/8 FH Screw
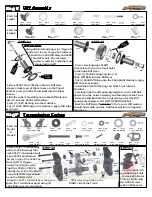
STEP #1
- Slide the 2004 Strap Mount thru the small loop on the
3009 Battery Strap.
- On the marked spots, drill the (4) holes in the 3224
Battery Tray so they align with the holes in the chassis.
- Mount the Tray to the Chassis using 5263 Screws thru
the Chassis and into the 2004 Strap Mount.
- Peel apart both 3009 Battery Straps. Insert one Strap
end thru the Buckle and re-attach to itself. Then slide
the end of the other Strap thru the Buckle, pull tight to
the Battery and attach to the velcro.
NOTE: Battery packs come in a variety of widths, it may be necessary
to alter the Tray by cutting away the left side of the tray and/or re-
aligning the holes it mounts in.
1:1
5263
2004
3224
5263
Servo and Linkage Installation
Servo and Linkage Installation
Servo and Linkage Installation
Servo and Linkage Installation
Servo and Linkage Installation
-Parts for
Steps
#1
5242 Qty 1
Large Servo Saver
8130 Qty2
Small Ball Cup
5281 Qty1
4-40 Stud
1:1
5253 Qty 4
4-40 x 3/8 BH Screw
1:1
5263 Qty 5
4-40 x 3/8 FH Screw
8122 Qty 2
Ball Stud
5240 Qty2
Servo Mount
3209 Qty1
Antenna Mount
Bag I
Bag I
Bag I
Bag I
Bag I
Bag J
Bag J
Bag J
Bag J
Bag J
2004 Qty 2
Strap Mount
3009 Qty 1
Strap Buckle
3009 Qty 2
Battery Strap
3009
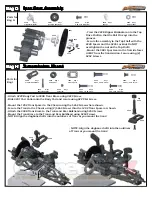
STEP #1
- Attach 5240 Servo Mounts to your steering servo in the position shown
using 5253 Screws.
- Thread 8120 Ball Stud into the upper-most center hole in the 5242 Servo
Saver.
- Attach both 8130 Ball Cups to one another using the 5281 Stud until the
Ball Cups bottom out on one another. Snap a Ball Cup onto the Ball Stud on
the Servo Saver.
- Determine which of the Spline Inserts are correct for your servo by pressing
it over the drive on the servo. Align the servo so it has equal throw in both
directions.
- Press the Servo Saver onto the Spline Insert so that the Servo Saver is perpen-
dicular to the servo, attach using the screw that came with your servo.
3234 Qty2
Spacer
3234
8122
5205
5253
5240
8130
5281
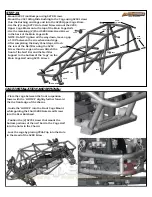
STEP #2
- Mount the servos to the chassis using 5263 Screws as shown.
- Thread 8122 Ball Stud with the 3234 Spacer into the top of the Steering
Slide.
- Snap the Ball Cup onto the Ball Stud threaded into the Steering Slide.
- Attach 3209 Antenna Mount in either of the two holes shown below.
NOTE: Steering movement should be bind free except for the restriction of
the servo transmission.
3209
5263
5263
8122
3234
Содержание Outlaw 0720
Страница 1: ......


