Installation
Publication date: October. 15, 2019
Revision 1.2
18
2.3.2.3 Install a Single/Two FOS-3114 Switches in a Rack Using 19-
inch Rack-mount Bracket
Besides the mounting methods we previously mentioned, to install one or two sets of FOS-3114 in a
single rack space; alternatively, you can use the 19-inch rack-mount bracket supplied with the
switch. Also follow the procedures listed below for step-by-step instructions to install your
switch/switches in this rack space:
Step 1.
On the switch that will be mounted on the left side of the rack space, do the following:
1.1.
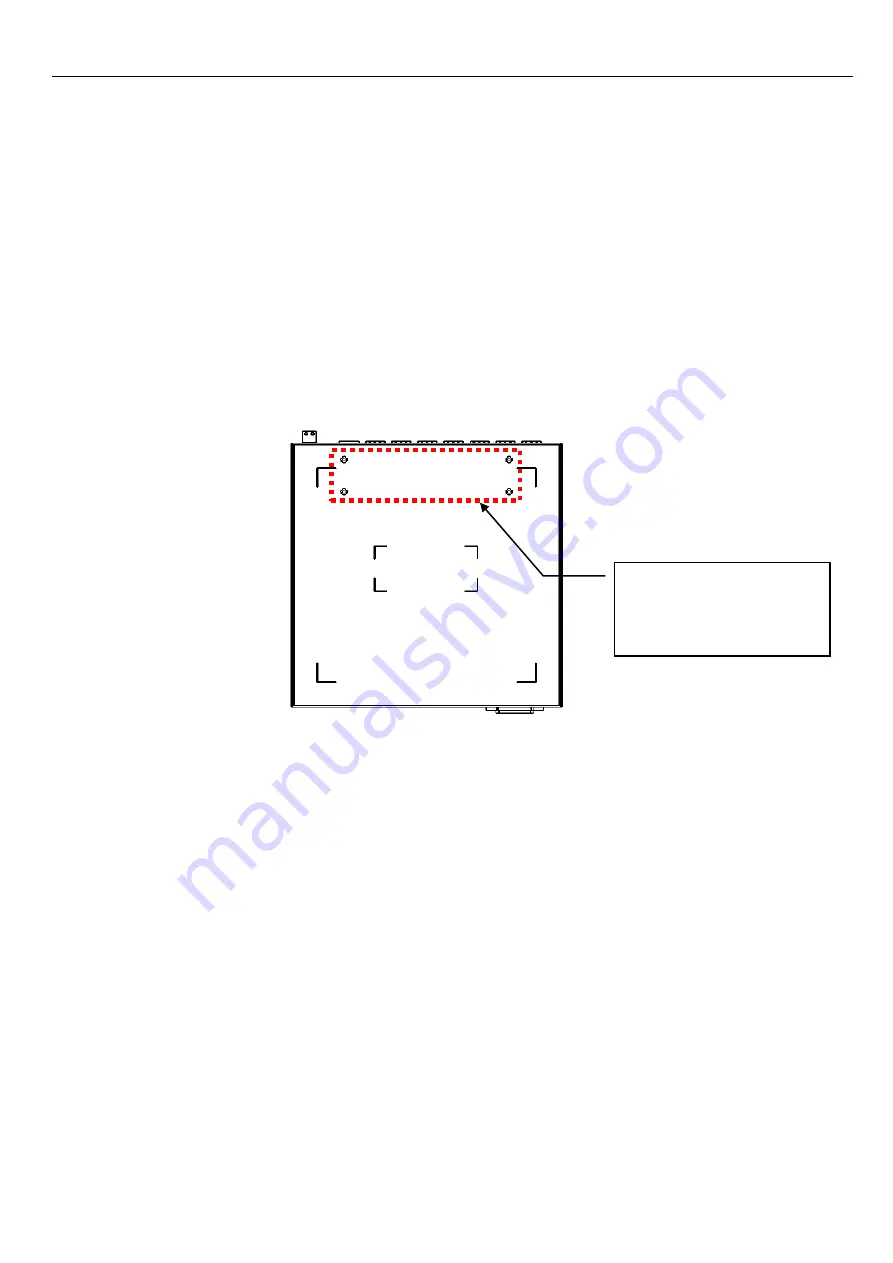
Four bracket mounting holes for 19-inch rack-mount bracket are located at the bottom
of each switch. (See Figure 2-5). Align these holes of this switch with the mounting
holes on the most left side of the bracket you purchase.
1.2.
Insert the screws provided in the 19-inch rack-mount bracket through this bracket and
into the bracket mounting holes at the bottom of the switch. (See Figure 2-6)
1.3.
Tighten the screws with the screwdriver to secure this bracket.
Step 2.
On the other switch that will be mounted on the right side of the rack space, do the
following:
2.1.
Also align four bracket mounting holes located at the bottom of this switch with the
mounting holes on the most right side of the bracket you purchase.
2.2.
Insert the screws provided in
the 19-inch rack-mount bracket through this bracket and
into these bracket mounting holes of the switch. (See Figure 2-6)
2.3.
Tighten the screws with the screwdriver to secure this bracket.
Figure 2-5. Bracket mounting holes located at the bottom of the switch
4 x bracket mounting
holes of the switch for
19-inch rack-mount
bracket
Содержание FOS-3114 Series
Страница 1: ...FOS 3114 Series 14 port L2 Managed Gigabit Fiber Switch User s Guide Version 1 2...
Страница 30: ......


