background image

Calibration

35

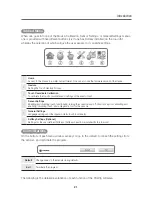
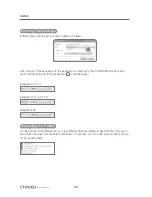
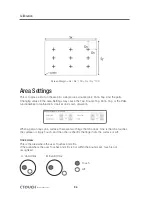
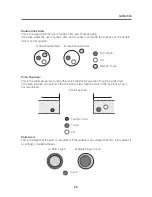
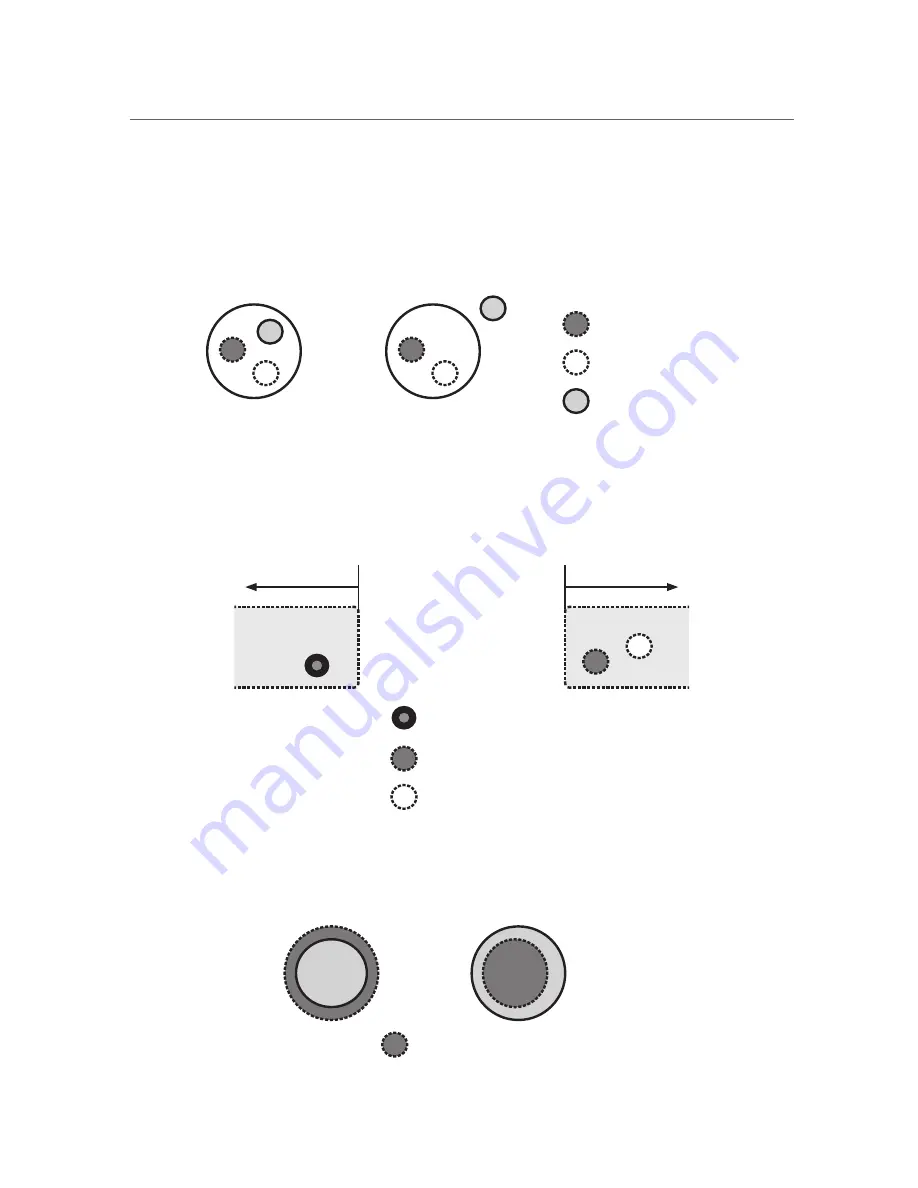
Double Click Area:

This is the area where the user Touches, Lifts, and Touches again.
If the area where the user Touches, Lifts, and Touches is not within the bounds set, the double 
click is not recognized.

First Touch

Lift

Second Touch

A. Valid Double Click

B. Invalid Double Click

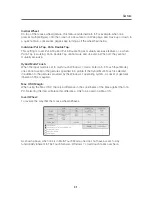
Put & Tap Area:

This is the minimum percent area within which the Put & Tap action should be performed.
If the area in which one performs the Put & Tap is less than the limits of the box, Put & Tap is 
not recognized.

Touch

Lift

Touch & Hold

Put & Tap Area

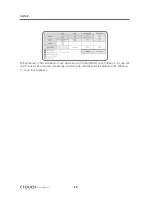
Palm Area:

This is the area that the palm is recognized. If the surface is any smaller than this, it recognizes it 
as a finger or multiple fingers.

Touch

A. Palm Touch

B. Single Finger Touch

Содержание IEB

Страница 1: ...equipment This User s Manual includes detailed usage instructions for your product Please read this manual thoroughly Figures and illustrations in this User Manual are provided for reference only and...

Страница 2: ...e slots and openings with a cloth or other materials Do not block the slots and openings by placing this apparatus on a bed sofa rug or other similar surface Do not place this apparatus in a confined...

Страница 3: ...articular if there are any unusual sounds or smells coming from it unplug it immediately and contact an authorized dealer or service center Be sure to pull the power plug out of the outlet if the prod...

Страница 4: ...l 9 Basic Functions 10 Turning on off your IEB 10 Using the touch sensor 10 Adjusting a volume level 11 Mute function 11 Selecting a input mode 11 Picture Control 12 Adjusting picture mode 12 Setting...

Страница 5: ...r 38 Shortcut Keys 38 Sensor Diagnostics 39 General Settings 41 Language 41 Tray Icon 41 Touch Input Mode 43 Positioning of the Monitor 44 Softkey Optional 45 Softkey Settings 46 Troubleshooting 48 De...

Страница 6: ...in your product box IEB Interactive Electronic Board AC Power Code Remote Control with Battery USB Cable HDMI Cable Audio Cable A B C F E D C E A User s Manual 1 5mm Hex Key Driver Activation Code Th...

Страница 7: ...splays a menu 3 VOL Adjust the volume In the menu screen adjust menu settings 4 CH Select a menu item 5 Standby Toggles between normal and standby modes 6 Power LED Blue In power on mode Red In standb...

Страница 8: ...ter to this jack 5 Component Connect a component video device to this jack 6 Audio Audio input for component video and S Video 7 Video Connect a video device to this jack 8 S Video Connect a S Video d...

Страница 9: ...reen menu items or change menu values 3 MENU Press to display the on screen menu 4 INPUT Press to display a menu of all available input sources 5 VOL Press to increase or decrease the volume 6 EXIT Pr...

Страница 10: ...nt panel to make the IEB go into standby mode 1 If the TV is in standby mode press the Power button on the remote control or IEB itself to turn the IEB on Power button 2 Press the Power button again o...

Страница 11: ...ton on the remote control to temporarily cut off the sound 2 When mute is on press the MUTE button again on the remote control to play the audio Selecting a input mode You can change the input mode 1...

Страница 12: ...50 Tint 0 Sharpness 10 Advanced Video 4 Press the button to make appropriate adjustments 5 Press the EXIT button to return to IEB viewing or press the MENU button to return to the previous menu Pictur...

Страница 13: ...se Reduction Auto Adaptive Contrast On 4 Press the button to select menu items 5 Press the EXIT button to return to IEB viewing or press the MENU button to return to the previous menu Advanced Video i...

Страница 14: ...ble 50 Balance 50 Surround Off AVC Off Digital Output PCM 4 Press the EXIT button to return to IEB viewing or press the MENU button to return to the previous menu Sound Mode items Sound Mode Select a...

Страница 15: ...gs Restore Default 4 Press the EXIT button to return to IEB viewing or press the MENU button to return to the previous menu Setup items Time Press the OK button and then press the button to adjust a s...

Страница 16: ...Position 34 Clock 50 Phase 5 Auto 6 Press the EXIT button to return to IEB viewing or press the MENU button to return to the previous menu PC Settings items H Position and V Position If the screen is...

Страница 17: ...17 Notes...

Страница 18: ...18 Smart innovation Touch Sensor...

Страница 19: ...tes for Running T3kCfg Prerequisites for Running T3kCfg The following is the window that comes up when one launches the T3kCfg exe program The left side is where buttons for setting the mouse calibrat...

Страница 20: ...Introduction 20 Smart innovation The following is the user interface for Ubuntu a Linux distribution by Canonical The following is some of the features of the T3kCfg program...

Страница 21: ...tings of the area to touch 4 Sensor Settings Enabling and disabling touch functionality turning the sound on and off shortcut keys for calibrating and enabling disabling touch and a diagnostic tool fo...

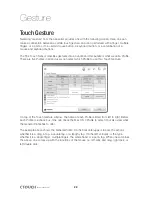
Страница 22: ...d users can select which Profile to use thru Touch Gesture On top of the Touch Gesture window the name of each Profile is listed from left to right Before each Profile is a check box One can check the...

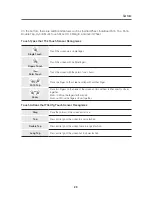
Страница 23: ...he palm of one s hand Put Tap Place one finger on the screen and tap with another finger Zoom Place two fingers on the plane of the screen and move them farther apart or closer together Zoom in Move t...

Страница 24: ...des simple and basic touch functionality Good for single touch functionality but also supports some gestures inherent in T3k Touch Sensors Windows 7 Profile The profile best suited for the Microsoft W...

Страница 25: ...p type There are limited actions that one can select from each Profile The following is the detailed editable actions present for the Single Drag Tap and Double Tap type Type Actions Explanation Singl...

Страница 26: ...ctions Explanation Disabled User Defined User defined keys Function key Function keys from F1 to F24 Left Drag Press the left mouse key and drag Right Drag Press the right mouse key and drag Middle Dr...

Страница 27: ...y and right arrow key Move forward on Windows Explorer or Internet Explorer Back Press the Alt key and the left arrow key Move backward on Windows Explorer or Internet Explorer Task Switching Switch f...

Страница 28: ...detailed editable actions for the Zoom type Actions Explanation Disabled User Defined User defined keys Function Key Any function keys from F1 to F24 Wheel Mouse wheel Ctrl Wheel Pressing of the Ctrl...

Страница 29: ...elow are ways to configure these two items Editing a User Defined key is as follows Choose the Ctrl Alt Shift Win buttons and type in the character that one wants to select a combination of The key is...

Страница 30: ...rom the Ctrl Alt Shift Win keys and press the function key on the keyboard is the Clear key Example Ctrl F1 Example Ctrl Alt F3 Example F20 Expanding the Profiles On the bottom of the Mouse menu is fo...

Страница 31: ...Touch When the input mode is set to multi touch Windows 7 mode refer to 5 3 Touch Input Mode one cannot use all of the gestures specified in a profile If the Hybrid Multi Touch is selected in addition...

Страница 32: ...innovation Shown above is the same Multi Touch Mode but with Hybrid Multi Touch turned on As one can see the user can drag tap double tap and long tap with the palm in addition to the Windows 7 s mult...

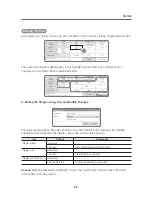
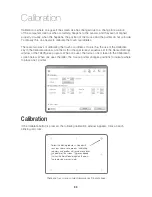
Страница 33: ...the special key sequence set in the Sensor Settings window of the T3kCfg exe program When one uses the former one is taken to the Calibration screen below When one uses the latter the mouse pointer c...

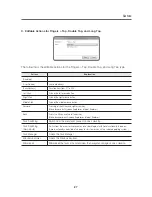
Страница 34: ...Palm functionalities to malfunction Use it at one s own discretion When a person taps on a surface there are two things that she does One is that she touches the surface or simply Touch and the other...

Страница 35: ...le Click B Invalid Double Click Put Tap Area This is the minimum percent area within which the Put Tap action should be performed If the area in which one performs the Put Tap is less than the limits...

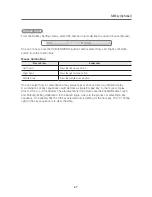
Страница 36: ...ouse Wheel This is the sensitivity setting for the wheel If it is on the positive side as the pointer goes down the page goes down with it If on the negative side the page goes down as the pointer goe...

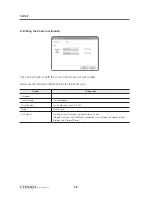
Страница 37: ...en disabled the device does not respond to touch One would need a mouse keyboard to interact when disabled When one presses the Disable button the following pop up appears Press the Timer Button to di...

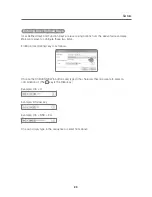
Страница 38: ...s and the Number of Key Presses on the right to calibrate the device Press the Scroll Lock Num Lock Caps Lock or the Escape key once to exit out of the Calibration screen In the above figure the Calib...

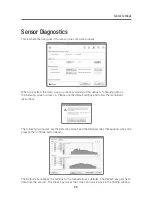
Страница 39: ...screen comes up Please use the default settings and follow the technician s instructions The following two figures are the Detection Graph and the Sideview tabs that appears when one presses the Conti...

Страница 40: ...novation Open the Sideview screen of the Sensor Diagnostics window by clicking on the Sideview tab One will be provided with a snapshot of the Sideview One can press the Snapshot button on the lower l...

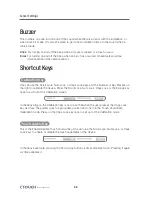
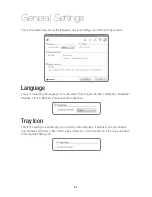
Страница 41: ...ng the language One can select from English Korean Traditional Simplified Chinese French Spanish Portuguese and Japanese Tray Icon This is the setting to use the tray icon to store profile mappings If...

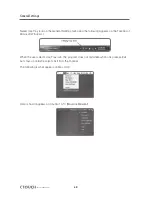
Страница 42: ...following appears on the Taskbar of Microsoft Windows 7 When the user selects Use Tray Icon the program does not terminate when one presses Exit but stays on until she selects Exit from the Taskbar Th...

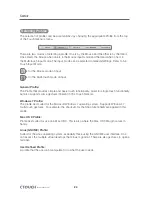
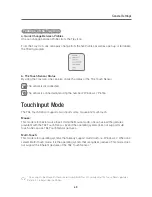
Страница 43: ...or supports two input modes mouse and multi touch Mouse This mode is for basic mouse input Using the Mouse mode one can use all the gestures prevalent with the T3k Touch Sensor Even if the operating s...

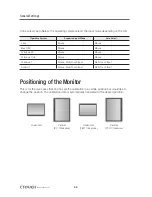
Страница 44: ...ouse Windows Vista Mouse Mouse Windows 7 Mouse Multi Touch Input Multi Touch Input Android Mouse Multi Touch Input Multi Touch Input Positioning of the Monitor This is for the rare cases that one has...

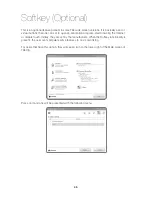
Страница 45: ...tion program start browsing the Internet or disable touch Initially they are set by the manufacturer When the Softkey functionality is present the user can manipulate some features to one s own liking...

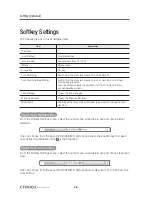
Страница 46: ...ista or above operating system Task Manager Opens the task manager Windows Explorer Opens the Windows Explorer Minimize All Minimize all the tasks at hand and view the background image on one s deskto...

Страница 47: ...se button Middle Down Press the middle mouse button One can select from a combination of key sequences or choose from two different states A combination of key sequences could be from a simple Escape...

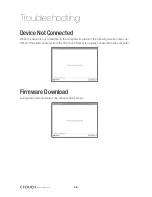
Страница 48: ...d When the device is not connected to the computer in question the following screen comes up Check if the USB connector from the T3k Touch Sensor is properly connected to the computer Firmware Downloa...

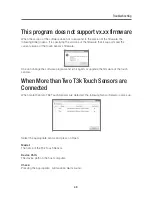
Страница 49: ...of the touch sensor s firmware One can change the software program and run it again or upgrade the firmware of the touch sensors When More than Two T3k Touch Sensors are Connected When more than two...

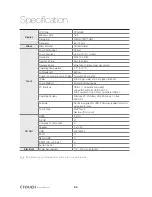
Страница 50: ...0 mA per meter at 5 V at highest intensity Touch Method Pointer including fingers PC Interface USB 1 1 compatible full speed using VID 0x2200 and PID 0x3100 HID compliant Plug Play compatible USB2 0 O...

Страница 51: ...51 Notes...

Страница 52: ...Smart innovation www ctouch eu...

Отзывы: