background image


Page 6 of 15 


System Installation 


Open box and check components.  
 
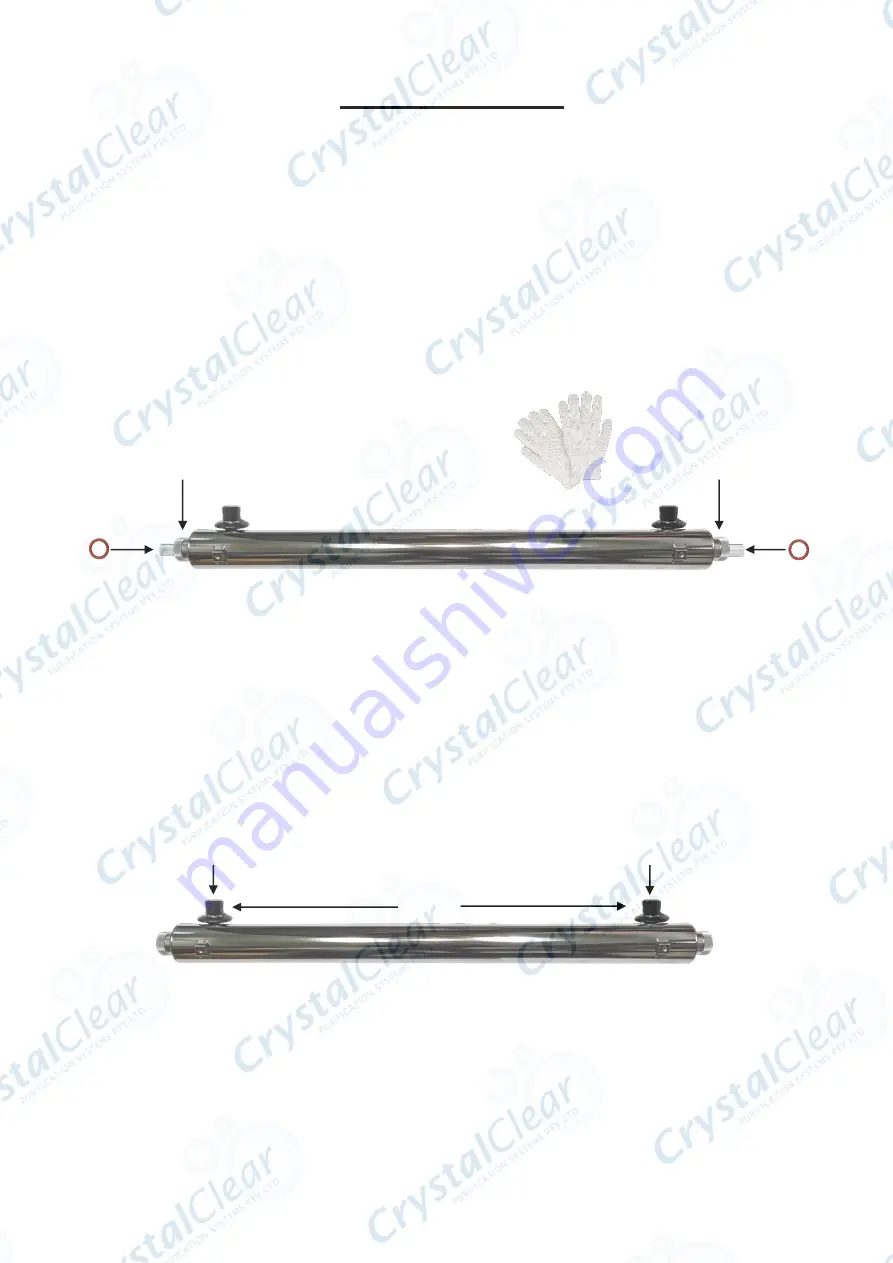
Unscrew side screws and remove front panel.  Mount back panel with UV vessel to wall or 
stable surface ensuring there is enough room to insert/replace quartz sleeve and lamp. 
 
Unscrew end nuts. Wearing gloves, clean quartz sleeve with methylated spirits and a clean 
cloth (if needed).  Slide quartz sleeve into chamber, ensuring sleeve is evenly distributed on 
both ends. Slide on o-rings then secure sleeve with nuts. DO NOT OVERTIGHTEN as this 
could damage the sleeve and/or o-ring. 


Make sure water supply is turned off. 
 
Connect fittings (fittings dependent on customer’s requirements – not included with system) 
to inlet and outlet ports of the unit. Connect fittings into water line or onto a water filter 
system.    


Open water supply to the unit and open faucet. Once water is pouring out of the faucet, turn 
faucet off to allow pressure to build up in system. CHECK FOR LEAKS! 
 
Turn water supply off and drain unit. 

Unscrew 

Unscrew 

Fitting 

Discard 

Fitting 

Содержание 12 GPM

Страница 1: ...ET STERILISER WITH HOUR COUNTER INSTALLATION MAINTENANCE BOOKLET Crystal Clear Purification Systems Pty Ltd 81 Torrens Road BROMPTON SA 5007 Australia t 08 8340 4344 e cc crystalclearaustralia com w w...

Страница 2: ...to avoid possible electric shocks DO NOT attempt to repair the system yourself Contact an authorized service facility for service 5 DO NOT operate the system if it has a damaged cord or plug if it is...

Страница 3: ...t does not reduce sediments which effects the efficiency of the UV lamp Water Quality Parameters Water quality is extremely important for the performance of your UV system The following levels are rec...

Страница 4: ...Page 4 of 15 Components Checklist Stainless Steel Vessel Quartz Sleeve 39W Lamp O Ring x2 Ballast pre installed in case...

Страница 5: ...al with the lamp connector on top This is to prevent water damage from occurring on the lamp pins and connector The ballast should be mounted horizontally either above or beside the chamber to prevent...

Страница 6: ...distributed on both ends Slide on o rings then secure sleeve with nuts DO NOT OVERTIGHTEN as this could damage the sleeve and or o ring Make sure water supply is turned off Connect fittings fittings...

Страница 7: ...n the lamp Place the cover over the end of the UV unit Connect the unit to a power source turn water supply on and switch on the power CHECK FOR LEAKS The light on the ballast should come on and turn...

Страница 8: ...Page 8 of 15...

Страница 9: ...Page 9 of 15 Wiring Diagram...

Страница 10: ...s and disconnect inlet and outlet elbows from chamber Tip the unit and drain as much water as possible into a bucket Remove end cover from chamber disconnect wire 4 pin plug from lamp and carefully re...

Страница 11: ...el to water supply but do not turn power on Open water supply and faucet and allow unit to flush until water no longer suds System Limitations AquaPro UV systems are designed to operate continuously a...

Страница 12: ...est source water for turbidity may need better pre filtration HEATED PRODUCT WATER Infrequent use of water o Run water until it returns to ambient temperature CLOUDY WATER Air in lines o Run water unt...

Страница 13: ...our 24 hours of delivery A copy of the original invoice must be presented for any Warranty claim as proof of purchase The faulty item must be returned to Crystal Clear if such a request is made This l...

Страница 14: ...Replaced Filters changed Yes Replace next service Next Service Due ____ ____ ____ 3rd Service ____ ____ ____ Serviced By ________________________ Lamp changed Yes No Quartz sleeve condition OK Cleaned...

Страница 15: ...Page 15 of 15 Notes...

Отзывы:

Похожие инструкции для 12 GPM