2.4
Operation
2.4.1
Installing and Operating the 1200-05
1.) Install the 1200-05 in the equipment rack.
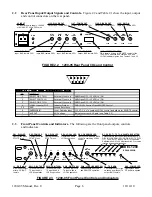
2.) Connect to signals on the CONTROL connector, J105, as desired (Figure 2.2).
3.) Connect 100-240 ±10% VAC, 47 - 63 Hz to AC IN on the back panel (Figure 2.2).
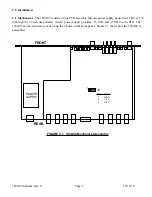
4.) Be sure the DC (power) LED, DS6, is on (Figure 2.3).
5.) Set SW4 for REMOTE or LOCAL operation (Figure 2.3).
6.) Choose the desired TX path(s) either remotely (J105, Figure 2.2) or locally using the front-panel
switches (SW1 - SW3, Figure 2.3) and check for proper signal(s) at TX IF MON (J2, Figure 2.3)
or TX IF OUT (J104, Figure 2.2) and that the appropriate LED(s) (DS1 - DS3, Figure 2.3) is lit.
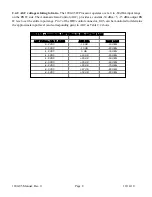
7.) Adjust attenuator pots (R1, R2, R3, T1, T2, T3) as needed. Clockwise rotation provides
increased output level (full clockwise = 0 dB atten, full counterclockwise = 30 dB atten).
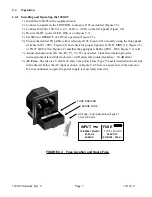
8.) AC Fuse - The fuse is a 5 mm X 20 mm, 2 amp slow blow (Type T) and is inserted in the far slot
in the drawer below the AC input as shown in Figure 2.4. There is a spare fuse in the near slot.
If a fuse continues to open, the power supply is most likely defective.
AC Fuse - 2 amp slow blow (Type T),
5 mm X 20 mm
FUSE DRAWER
SPARE FUSE
~
INPUT
100-240± 10%VAC
47-63 Hz
2A MAX
FUSE
TYPE T 2A GDC
250 VOLT
FOR 100 - 240 V~
~
FIGURE 2.4 Fuse Location and Spare Fuse
1200-05 Manual, Rev. 0
Page 7
10/14/10

