background image

8

CD Operation

CD Player

Programmed CD Playback

1

Make sure the power is on.

2

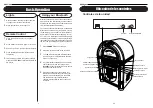
Press CD / BT BUTTON to select the CD 
function.  The CD display (- -) will flash, then 
show (0 0) .

3

Press OPEN / CLOSE BUTTON to open CD 
TRAY.

4

Insert CD in tray with the label side of CD facing
up.

5

Press the OPEN / CLOSE BUTTON again to 
close the CD TRAY.

6

Press PLAY / PAUSE BUTTON to begin playing
the CD.

7

To stop playing, press the STOP BUTTON.

8

To skip to a different track, press the BACK SKIP
or the FORWARD SKIP button.

9

By pressing and holding either the BACK SKIP
or FORWARD SKIP BUTTON, you can rewind
or fast forward through each individual tack. 
The track will fast forward or rewind as long as
you are holding the button. Once you release 
the button, regular playback resumes.

10

During playback, you can use the repeat 
function to repeat a single song or the whole 
CD.

11

While the song you want to repeat is playing, 
press the REPEAT button once. You will see the
REPEAT INDICATOR on the jukebox start to 
flash. The song will start over once it is finished.

12

Press the REPEAT button the second time to 
repeat the whole CD. The REPEAT INDICATOR
will stay on without flashing.

13

Pressing the REPEAT button a the third time 
will disable the repeat function.

This CD player is programmable which allows you
to program it to play only selected tracks. To
program, follow the steps below.

1

Insert disc and close CD TRAY. Do not press 
play yet.

2

Press the PROGRAM button. The PROGRAM
INCICATOR on the jukebox will start to flash.

3

Use the BACK SKIP or FORWARD SKIP 
BUTTON to select a track you want to program.

4

Once you have selected a track, press the 
program button again. This stores the track into
memory.

5

Use the BACK SKIP or FORWARD SKIP 
BUTTON to select the next track you want to 
program. Once selected, press the program 
button again.

6

Repeat step number 5 until you have 
programmed all desired tracks.

7

Press PLAY / PAUSE BUTTON  to begin playing
the selected tracks. The program light will stop
flashing and the selected tracks will begin 
playing. They will play in the order that they 
were programmed.

8

Using the BACK SKIP or FORWARD SKIP 
BUTTON will only skip through the programmed
tracks.

9

To clear programmed tracks, press the stop 
button twice until the program light goes out.

10

Programmed tracks will also be erased from 
memory when the CD TRAY is opened or when
the power is turned off.

ENGLISH

27

Inicio

Ubicación de los controles............ 4,5

Desembalaje.................................. 6

Fuente de alimentación................. 6

Funcionamiento básico

Luces ............................................. 7

Control remoto............................... 7

Uso del Bluetooth.......................... 7

Funcionamiento del CD

Reproductor de CD........................ 8

Reproducción programada del CD. 8

Conexión de equipo opcional

Parlantes externos......................... 9

General

Guía de solución de problemas..... 10

Garantía.......................................... 11

Gracias por adquirir la unidad Crosley iJuke Bluetooth
(CR1703A). Lea atentamente este manual antes de
usar esta unidad y consérvelo para consultarlo en
el futuro.

Acerca de este manual

Bienvenido

Índice

Las instrucciones de este manual describen las
funciones de los controles del CR1703A.

Este paquete incluye:

iJuke Bluetooth
Manual
Un adaptador de CA
Control remoto

ESPA OL

Содержание CR1703A

Страница 1: ...ta expira comuníquese directamente con Crosley Radio para participar en el programa de protección de un año Programa de garantía de 1 año de Crosley LLAME SIN CARGO AL 1 800 926 7801 Deberá comunicarse con nuestras oficinas de lunes a viernes de 8 a m a 5 p m Hora del Este para obtener un número de autorización de devolución Return Authorization RA Recibirá instrucciones para enviar la unidad a su...

Страница 2: ... is left unattended and unused for long periods of time unplug it from the wall outlet and disconnect the antenna or cable system This will prevent damage to the product due to lightning and power line surges 14 Power Lines An outside antenna system should not be located in the vicinity of overhead power lines or other electric light or power circuits or where it can fall into such power lines or ...

Страница 3: ...ersons CAUTION TO REDUCE THE RISK OF ELECTRIC SHOCK DO NOT REMOVE COVER OR BACK NO USER SERVICEABLE PARTS INSIDE REFER SERVICING TO QUALIFIED SERVICE PERSONNEL WARNING TO PREVENT FIRE OR SHOCK HAZARD DO NOT EXPOSE THIS APPLIANCE TO RAIN OR MOISTURE DO NOT REMOVE COVER PILOT LAMPS SOLDERED IN PLACE NO USER SERVICEABLE PARTS INSIDE REFER SERVICING TO QUALIFIED SERVICE PERSONNEL ENGLISH 33 Parlantes ...

Страница 4: ...o y cierre la BANDEJA DE CD No presione reproducir aún 2 Presione el botón de PROGRAMACIÓN El INDICADOR DE PROGRAMACIÓN del jukebox empezará a parpadear 3 Utilice el BOTÓN DE SALTO HACIA DELANTE o el BOTÓN DE SALTO HACIA ATRÁS para seleccionar la pista que desea programar 4 Una vez que haya seleccionado una pista presione el botón de programación otra vez Esto hará que la pista se guarde en la mem...

Страница 5: ...dispositivo sean compatibles para poder reproducirlos en la Jukebox Una vez que haya confirmado estos pasos el usuario puede conectar el dispositivo a la Jukebox 1 Presione el botón de ENCENDIDO para encender la unidad 2 Presione el botón de funciones al modo BT 3 El indicador LED parpadeará para indicar que está buscando un dispositivo cercano con Bluetooth activado para conectarse 4 En su dispos...

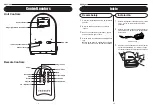
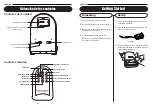
Страница 6: ...un tomacorriente de pared adecuado 2 Enchufe el extremo pequeño del adaptador en el conector de CC ubicado en la parte posterior de la unidad 3 Quite la cubierta de baterías del control remoto e instale 2 baterías AAA no incluidas Tenga en cuenta la orientación correcta de las baterías Adaptador de CA ESPA OL Unit Controls 5 Control Locators Remote Controls Power Back Skip Stop Repeat Program CD B...

Страница 7: ...the unit 3 Remove battery cover from remote control and install 2 AAA batteries not included Note the correct battery orientation A C Adapter ENGLISH Controles de la unidad 29 Ubicación de los controles Controles remotos Encendido Salto hacia atrás Detención Repetición Programación CD Bluetooth Reproducción pausa Apertura cierre Silencio Salto hacia adelante Incremento de volumen Reducción de volu...

Страница 8: ...s a smart phone and the Jukebox enabling the user to play and control tracks direct from their Bluetooth enabled device The user must ensure that they have a compatible Bluetooth enabled device with media playing capabilities such as an Android Smartphone or Apple iPhone with Bluetooth capability The user must also ensure that they have loaded compatible audio files on to the device in order to pl...

Страница 9: ... PROGRAM INCICATOR on the jukebox will start to flash 3 Use the BACK SKIP or FORWARD SKIP BUTTON to select a track you want to program 4 Once you have selected a track press the program button again This stores the track into memory 5 Use the BACK SKIP or FORWARD SKIP BUTTON to select the next track you want to program Once selected press the program button again 6 Repeat step number 5 until you h...

Страница 10: ...e encuentran en el manual del usuario librado con el aparato RIESGOS DE CHOQUE ELÉCTRICO NO ABRIR ATENCIÓN ATENCIÓN PARA REDUCIR LOS RIESGOS DE CHOQUE ELÉCTRICO NO QUITE LA TAPA Ó LA PARTE DE ATRÁS EL INTERIOR NO CUENTA CON NINGÚN COMPONENTE A REPARAR POR EL USUARIO CONFÍE SU APARATO SOLAMENTE AL PERSONAL DE SERVICIO CALIFICADO ATENCIÓN PARA RÉDUCIR LOS RIESGOS DE CHOQUE ELÉCTRICO NO EXPONGA ESTE ...

Страница 11: ...íneas de transmisión No hay que colocar un sistema de antena exterior en la proximidad de líneas de transmisión eléctrica u otros circuitos de voltaje ó de luces dónde el sistema de antena corra el riesgo de caer sobre tales líneas Al momento de hacer la instalación de un sistema de antena exterior hay que poner mucha atención en no venir en contacto con estas líneas lo que puede resultar en riesg...

Страница 12: ...iod has expired please contact Crosley Radio directly to participate in the one year protection program Crosley 1 Year Warranty Program CALL TOLL FREE 1 800 926 7801 You will need to contact our offices M F 8am 5pm EST to obtain an RA Return Authorization Number You will be instructed to send the unit at your cost to our offices in its original packaging or reasonable substitute to prevent damage ...

Страница 13: ...de de retour au détail est expirée veuillez communiquer directement avec Crosley Radio pour participer au programme de protection d un an Programme de garantie d un 1 an de Crosley APPELEZ SANS FRAIS 1 800 926 7801 Vous aurez besoin de contacter nos bureaux du lundi au vendredi de 8 h à 17 h HNE pour obtenir un numéro AR autorisation de retour Vous serez chargé d envoyer l appareil à vos frais à n...

Страница 14: ...brancher du secteur et aussi débranchez l antenne ou le système du câble Ceci évitera des dommages au produit dus à la foudre ou aux surcharges d alimentation 14 Lignes de transmission Il ne faut pas situer un système d antenne extérieure dans le voisinage des lignes de transmission électriques ou d autres circuits de tension ou de lumière ou là où le système d antenne risque de tomber sur de tell...

Страница 15: ...oc électrique aux personnes AVERTISSEMENT POUR RÉDUIRE LES RISQUES DE CHOC ÉLECTRIQUE N ENLEVEZ PAS LE COUVERCLE OU LE DOS L INTÉRIEUR NE CONTIENT AUCUN COMPOSANT À RÉPARER PAR L UTILISATEUR CONFIEZ VOTRE APPAREIL SEULEMENT AU PERSONNEL DE SERVICE QUALIFIÉ AVERTISSEMENT POUR RÉDUIRE LES RISQUES DE CHOC ÉLECTRIQUE N EXPOSEZ PAS CET APPAREIL À LA PLUIE NI À L HUMIDITÉ N ENLEVEZ PAS LE COUVERCLE LES ...

Страница 16: ...ppuyez sur le bouton PROGRAMMER Le voyant de programmation commencera à clignoter sur le jukebox 3 Appuyez sur le bouton SUIVANT ou PRÉCÉDENT pour sélectionner une piste que vous voulez programmer 4 Lorsque vous avez sélectionné une piste appuyez de nouveau sur le bouton de programmation La piste sera enregistrée dans la mémoire 5 Appuyez sur le bouton SUIVANT ou PRÉCÉDENT pour sélectionner une au...

Страница 17: ...e charger des fichiers audio compatibles sur son appareil afin de pouvoir les lire sur le jukebox Une fois ces deux points confirmés l utilisateur est prêt à connecter son appareil au jukebox 1 Appuyez sur le bouton ALIMENTATION pour allumer l appareil 2 Appuyez sur le bouton de fonction pour activer le mode BT 3 Le voyant DEL clignotera pour indiquer qu il recherche un appareil Bluetooth à proxim...

Страница 18: ...ropriée 2 Branchez la petite extrémité de l adaptateur dans la prise CC située à l arrière de l appareil 3 Retirez le couvercle des piles de la télécommande et installez 2 piles AAA non incluses Prenez note de la bonne orientation des piles Adaptateur CA FRANÇAIS Commandes de l appareil 17 Emplacement des commandes Télécommandes Alimentation Précédent Arrêter Répéter Programmer CD Bluetooth Lectur...

Отзывы:

Похожие инструкции для CR1703A