


20
ENGLISH
Mat Size
The
Mat Size
button is a quick way to set the mat size that you will be using with
the Cricut Cake machine. Load the mat and then press the button to change
to 12" by 12" or 12" by 24". The default mat size can also be changed on the
Settings
screen.
Xtra Buttons
The
Xtra1
and
Xtra2
buttons are placeholders for future functions for the Cricut
Cake™ machine. See all the Cricut Cake updates at
www.cricutcake.com
.
Sizing
Characters in the Cricut cutting system are measured from the lowest possible point
to the highest possible point. In font sets, and some shape sets, the character shown
in red is the Key Height Character. This is usually the tallest character in any one set. All
other characters will be sized in proportion to the Key Height Character, unless
Real
Dial Size
is selected. In shape sets, some images are also cut in proportion to other
shapes. See the cartridge handbook to get the details on specific cuts.
Real Dial Size
If
Real Dial Size
is selected, all characters will be sized according to the selected dial
size, rather than cutting proportionate to the Key Height Character or the base shape.
TIP:
Only one dial size can be selected for each cut, and that dial size will be applied
to all characters on the display (even in the
Mix ’n Match
mode). For example, you
cannot select an
A
at 1.5" (3.81 cm) and then immediately select a
B
at 2" (5.08 cm)
in the same cut. We recommend you check the size appearing in the display prior to
pressing the
CUT
button.
Cutting on Lightweight or Heavyweight Materials
Your Cricut Cake machine can cut a variety of materials. For an optimal cut, you may
need to adjust the speed of the cut, and/or the cut pressure as discussed in the follow-
ing sections.
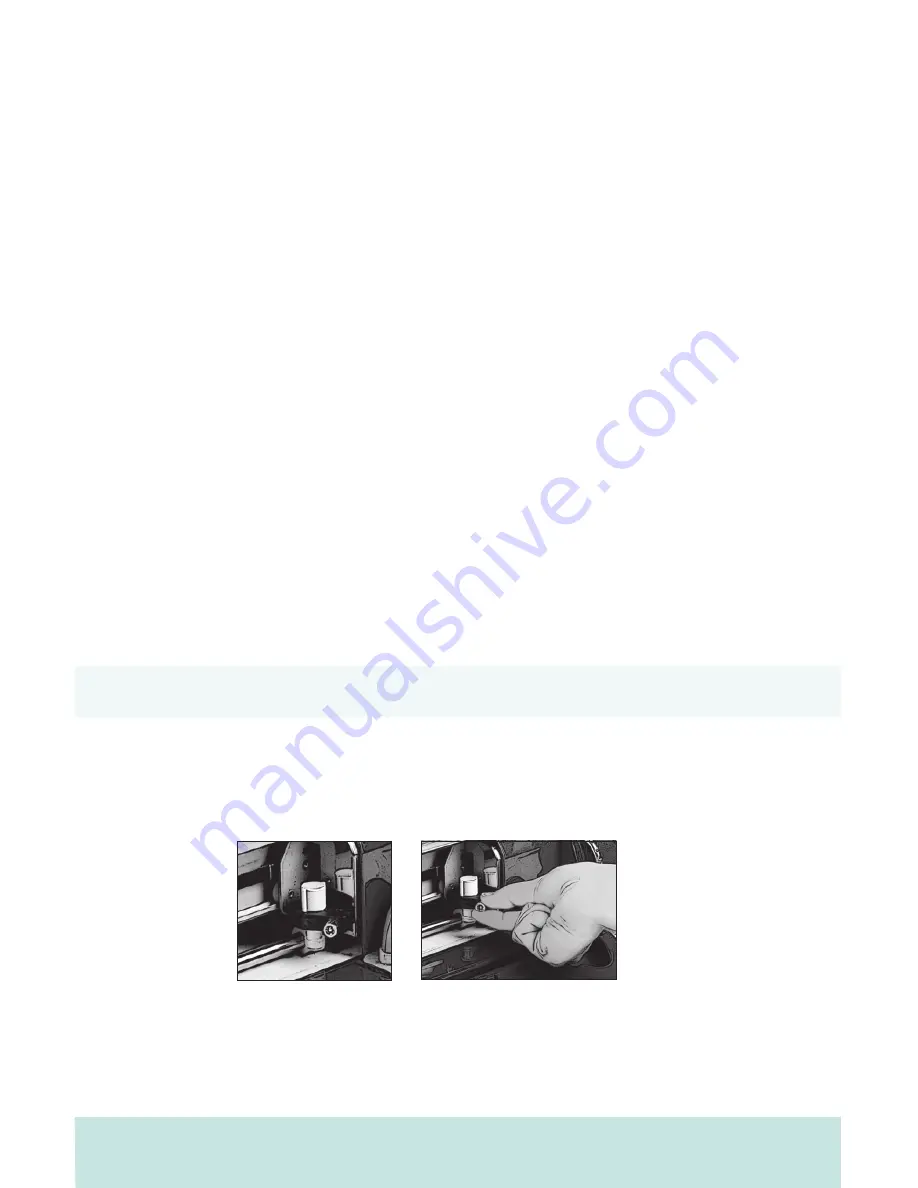
WARNING! Always unplug your Cricut Cake machine before removing the
cutting blade assembly!
To remove the cutting blade assembly (Figure 1), locate the screw and turn it coun-
terclockwise until it loosens enough that you can swing the screw to the right (Figure
2). Be careful not to loosen the screw too much, or it will fall out. Remove the cutting
blade assembly from the machine.
Figure 1
Figure 2
TIP:
If the Cricut Cake produces poor cutting results, always clean it first before trying
other options.
Содержание Cake Personal Electronic Cutter
Страница 1: ......


