Creality Ender 3 Pro Assembly Instructions V1.0
26
www.rb42.blog
9.2
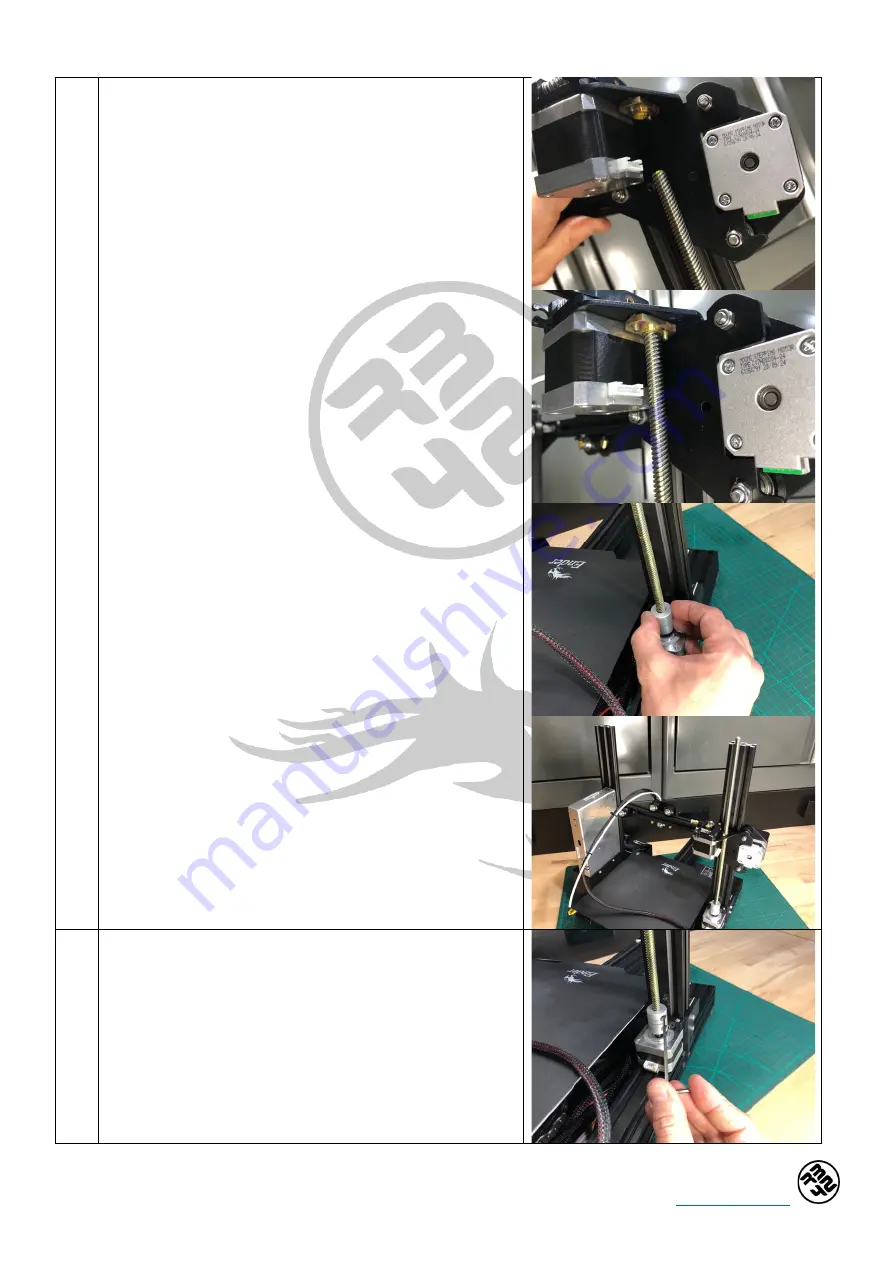
With the X-axis gantry sitting over the Z-axis uprights, thread
the (17) Z-axis lead screw (from step 4) through the nut
(goldish coloured) on the gantry backing plate, turn the (17)
Z-axis lead screw by hand enough for the X-axis gantry to be
lowered down towards the print bed and clear from the top
of the Z-axis vertical uprights. Lower the gantry down by
approx. 50-100mm, however you can lower it as much as
you feel like.
9.3
After the X-axis gantry has been positioned onto the vertical
uprights and the (17) Z-axis lead screw has been manually
threaded and lowered slightly, with an M2.5 hex key (Allen
key) proceed to fully tighten the grub screws in the coupler
on the (08) Z-axis motor assembly (from step 4).


