English
6
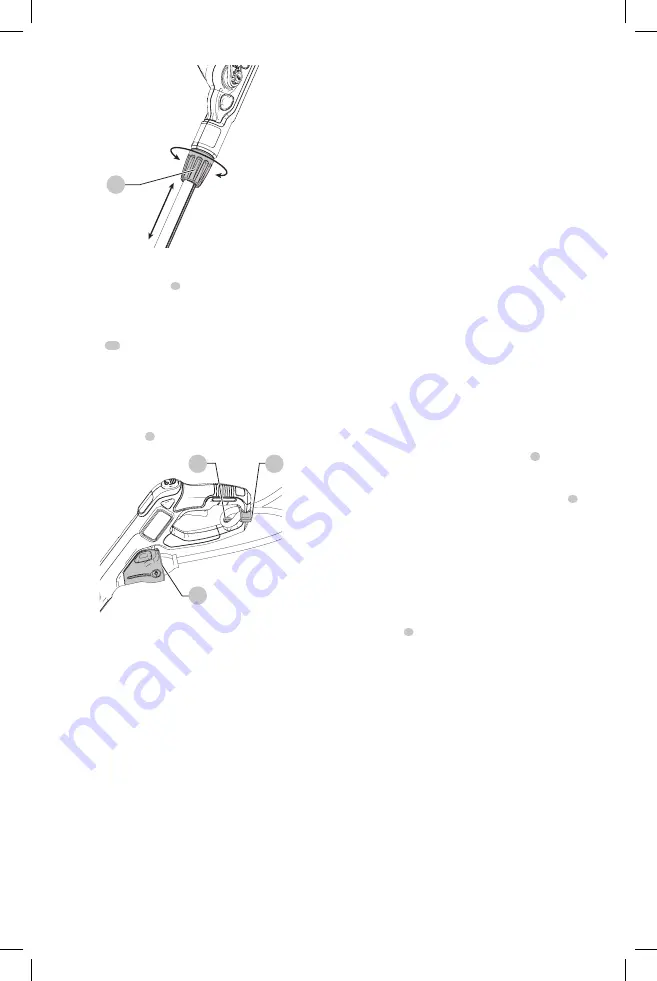
Fig. G
6
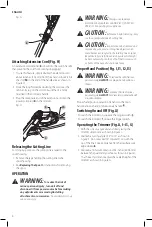
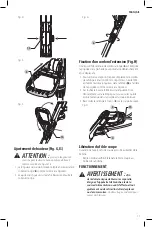
Attaching Extension Cord (Fig. H)
An extension cord retainer
3
is built into the switch handle
that prevents the cord from coming unplugged.
1. To use this feature, simply double the extension cord
about 8 inches (203 mm) from the end, and insert it into
the slot
15
in the end of the handle area as shown in
Figure H.
2. Hook the loop formed by doubling the cord over the
tab. Gently tug on the cord to insure that it is firmly
retained in the trimmer’s handle.
3. Plug the receptacle end of the extension cord into the
power cord plug
4
in the trimmer.
Fig. H
3
15
4
Releasing the Cutting Line
For shipping purposes, the cutting line is taped to the
spool housing.
1. Remove the tape holding the cutting line to the
spool housing.
2. See
Replacing the Spool
for instructions for removing
the spool.
OPERATION
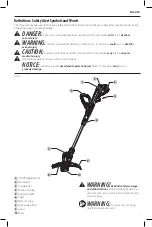
WARNING:
To reduce the risk of
serious personal injury, turn unit off and
disconnect it from power source before making
any adjustments or removing/installing
attachments or accessories.
An accidental start-up
can cause injury.
WARNING:
Always use proper eye
protection that conforms to ANSI Z87.1 (CAN/CSA
Z94.3) while operating this appliance.
CAUTION:
Before you begin trimming, only
use the appropriate type of cutting line.
CAUTION:
Inspect area to be trimmed and
remove any wire, cord, or string-like objects which
could become entangled in the rotating line or spool.
Be particularly careful to avoid any wire which might
be bent outwardly into the path of the trimmer, such
as barbs at the base of a chain link fence.
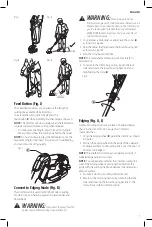
Proper Hand Position (Fig. I, I1, I2, I3)
WARNING:
To reduce the risk of serious
personal injury,
ALWAYS
use proper hand position as
shown.
WARNING:
To reduce the risk of serious
personal injury,
ALWAYS
hold securely in anticipation of
a sudden reaction.
Proper hand position requires one hand on the main
handle and one hand on the auxiliary handle
5
.
Switching On and Off (Fig. A)
To switch the trimmer on, squeeze the trigger switch
1
.
To switch the trimmer off, release the trigger switch.
Operating the Trimmer (Fig. A, I–I3, G)
1. With the unit on, angle unit and slowly swing the
trimmer side to side as shown in Figure I.
2. Maintain a cutting angle of 5° to 10° as shown in
Figure I1. Do not exceed 10° (Figure I2). Cut with the
tip of the line. To keep distance from hard surfaces use
edge wheel
8
.
3. Maintain a minimum distance of 24 inches (609.6 mm)
between the guard and your feet as shown in Figure I.
To acheive this distance adjust the overall height of the
trimmer as shown in Figure G.
Содержание CMESTE920
Страница 36: ......
Страница 37: ......
Страница 38: ...Craftsman 701 East Joppa Road Towson MD 21286 Part No N557609 CMESTE920 SEPT 2017 Copyright 2017 Craftsman ...


