18
MAINTENANCE & SERVICE
Shave Plate and Skid Shoes
The shave plate and skid shoes on the bottom of the snow thrower are subject to
wear. These should be checked periodically and replaced when necessary.
To replace skid shoes:
1.
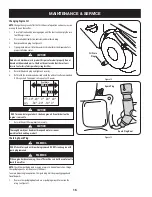
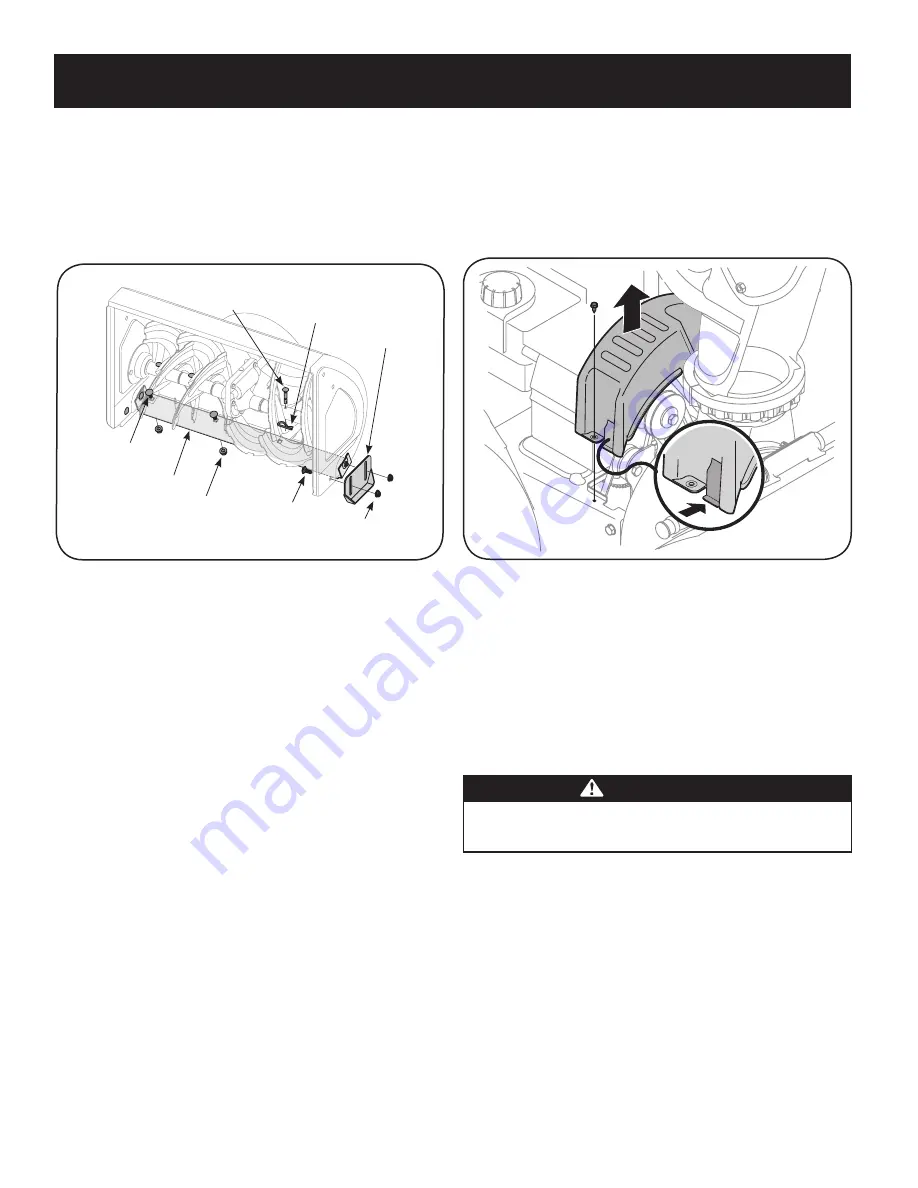
Remove two carriage bolts and nuts securing each skid shoe to the auger
housing. See Figure 17.
Shear Pin
Cotter Pin
Skid Shoe
Lock Nut
Carriage Bolt
Lock Nut
Carriage Bolt
Shave Plate
Figure 17
2.
Reassemble new skid shoes with hardware removed in Step 1. Make sure the
skid shoes are adjusted to be level.
To remove shave plate:
1.
Run the engine out of fuel. Do not attempt to pour fuel from the engine.
2.
Lift and tilt the unit forward to position the auger housing on its front face.
3.
Remove both skid shoes and carriage bolts and lock nuts which attach shave
plate to the snow thrower housing. See Figure 17.
4.
Reassemble new shave plate, making sure heads of the carriage bolts are to
the inside of the housing. Reinstall skid shoes. Tighten securely.
Adjusting Auger Cable
Refer to page 10 of the Assembly section for instructions on adjusting the auger
control cable.
Check Belts
Follow instructions below to check condition of the belts every 50 hours of
operation.
1.
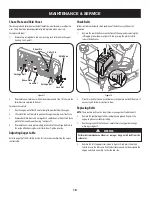
Remove the plastic belt cover on the front of the engine by removing the
self-tapping screw shown in Figure 18 and pressing the plastic tabs to
release the belt cover.
Plastic Tab
Figure 18
2.
Visually inspect for frayed, cracked, or excessively worn out belts. Replace, if
necessary, and follow instructions below.
Replacing Belts
NOTE:
There are two belts on this snow thrower: an auger belt and drive belt.
1.
Remove the spark plug wire from spark plug and ground it against the
engine to prevent accidental starting.
2.
Run the engine until the fuel tank is empty to prevent gasoline leakage
when replacing belts.
WARNING
Perform belt maintenance outdoors as some gas may possibly leak from the
carburetor.
3.
Remove the self-tapping screw shown in Figure 18, and press the plastic
tabs to release the belt cover. Pull the belt cover up and out from around the
engine and chute assembly. Set it aside and save.

