


REMOTE OPERATION
~
50
~
Function
Description
Title
Select to display the channel title in the live view.
Event
Select to display the event symbol in the live view.
Full Sequence Duration /
Quad Sequence Duration
Set the time-out in seconds (3 / 5 / 10 / 15) after which the channel display will be switched
by one channel (Full Sequence Duration) or by four channels (Quad Sequence Duration).
Server Time
Set the DVR time remotely.
Date Format
Choose the date display format appropriate to your location (Y-M-D, M-D-Y and D-M-Y).
Click “
” to upgrade the firmware version, multilingual OSD and boot display of your DVR (Update Server).
C
,
.5
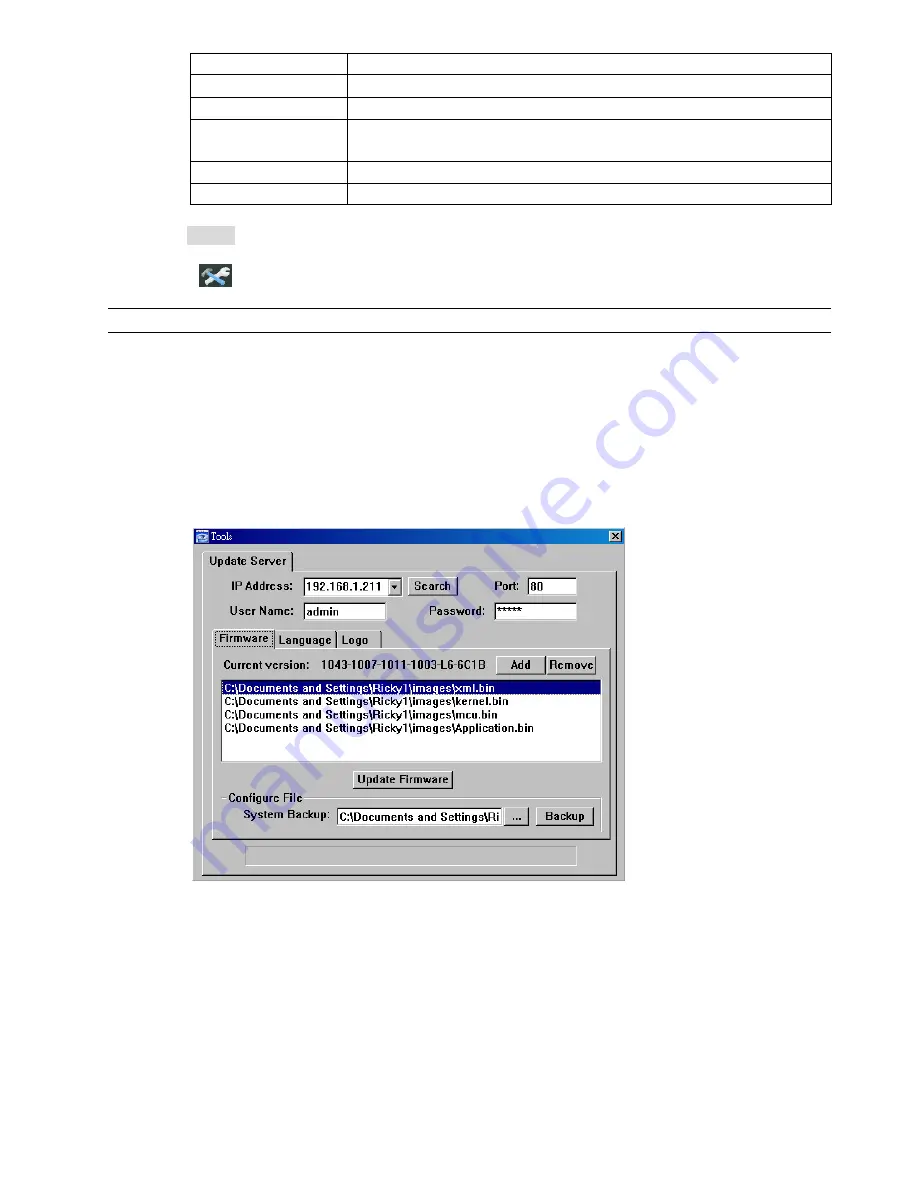
Update Server
3 update options are available for this function: Firmware, Language and Logo.
Before performing any update, finish the following settings first:
1) Choose the IP address of the DVR whose firmware needs to be updated from the drop-down list, or
click “Search” to find.
2) Key in the user name, password and port number used to access your DVR remotely.
3) Select the update option (Firmware / Language / Logo) you want. For details, please see the
description below.
Firmware
To upgrade your DVR firmware remotely, click “Firmware” tab, and follow the steps below:
a). In the “Firmware” section, you will see the current firmware version. To upgrade the firmware
version of your DVR, click “Add” to locate and select the firmware file. The file will be shown in the
firmware list.
b). If you want to backup your system before upgrading the firmware version of your DVR, select
“System Backup” in the “Configure File” section, click “
…
” to specify the location for saving system
backup, and click “Backup” to start the backup process.
c). To start upgrading the DVR firmware, choose the file from the firmware list, and click “Update
Firmware” to start the upgrade process.
Содержание 262Z
Страница 7: ...OVERVIEW 3...
Страница 28: ...ADVANCED MENU 24...
Страница 37: ...ADVANCED MENU 33...