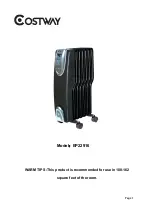
Costway EP22916 Скачать руководство пользователя страница 7

Page 7


2.  Set all the power switch to OFF position, and plug the Power Cord into a standard 120-volt 

AC electrical outlet. 

3.  Press  the  Power  Switch  Button  (”5”  in  Parts  description)  first,  and  then  press  the  Power 

Button

once, and the LCD will turn on. 

4.  To set the required function, proceed as follows: 


Power setting:   

Press the “

  ” button in succession until the power setting icon on the LCD flashes. 

Use 

  and 

  button to set your desired power setting. 

This unit has 3 power settings, low (600 Watts), medium (900 Watts), high(1500 Watts). 


Temperature setting:


Press  the “

  ” button in succession until the temperature  setting icon on the LCD flashes. 

Use 

  and 

  button to set your desired room temperature. 

The temperature setting has a range from 5°C to 35°C 

By pushing once the 

  or 

  button, the temperature will increase or decrease of 1

°

C. 

Keep the button pressed to move through the temperature quickly. 


Timer setting:   

Press the “

” button in succession until the timer setting icon on LCD flashes. 

Use 

  and 

  button to set your desired time. 

The timer setting has a range from 0 to 18 hours. 

By pushing once the 

  or 

  button, the timer will increase or decrease of 1 hour. 

Keep the button pressed to move through the time quickly. The timer pilot light will illuminate 

when the timer is activated. 

To cancel the timer setting, push the 

  and 

  button until the LCD appears 

00

, the timer 

pilot light will be fade out. 

To turn off, press the Power Switch Button to Off. 

WARNING: Always unplug the product from the electrical outlet when it will be left 

unattended or when it is not in use. 


SPECIFICATIONS

__________________      ___ 

.           


Model Number 

EP22916 

Power Supply 

120 volts AC, 60Hz 

Power Consumption 

600W (low heat setting) 

900W (medium heat setting) 

1500W (high heat setting) 


Содержание EP22916

Страница 1: ...Page 1 Model EP22916 WARM TIPS This product is recommended for use in 108 162 square feet of the room...

Страница 2: ...re use to make sure that they are not damaged 6 Before unplugging the power cord be sure to turn off the power When touching the unit be sure your hands are dry to prevent from receiving an electric s...

Страница 3: ...ater 19 Use this heater only as described in this manual Any other uses not recommended by the manufacturer may cause fire electric shock or personal injury and may void the warranty 20 Always plug he...

Страница 4: ...esent in the box If anything is missing or broken contact our Customer Service at 1 866 206 0888 PACKAGING INCLUDES Caster brackets X2 U bolt with right angle bend X2 Butterfly bolts X4 PARTS DESCRIPT...

Страница 5: ...ght castor mounting plate in the end 1 Unscrew nut and washer and nut Fig B 1 2 Attached casters with two metal plates with washer and nut Fig B 2 3 Place the bowlegged metal plate and wheel assembly...

Страница 6: ...Do not operate the product until fully assembled do not operate without the casters attached 1 Before using the heater make sure that it is on a flat and stable surface Damage may occur if it is place...

Страница 7: ...on the temperature will increase or decrease of 1 C Keep the button pressed to move through the temperature quickly Timer setting Press the button in succession until the timer setting icon on LCD fla...

Страница 8: ...tly wipe off the dirt from the surface of the unit only 3 Do not attempt to open the heater to clean it Doing so will damage the unit and void the warranty NOTE THE FINS ARE PERMANENTLY SEALED AND DO...

Страница 9: ...ht is on but no heat is emitting from the unit Room temperature has warmed up to thermostat setting To increase the room temperature adjust thermostat control knob to a higher setting by turning clock...

Страница 10: ...HOLDER 1 4 SCREW 3 19 CORD CLAMP 1 5 FRONT COVER 2 20 SCREW 2 6 LCD COVER 1 21 THERMAL LINK 1 7 CONTROL PANEL 1 22 HEATING TUBE 1 8 SCREW 1 23 PRESSURIZED WASHER 1 9 SCREW COVER 1 24 WING NUT 4 10 KEY...

Отзывы: