System Installation
MA2000-Lite Installation and Connections
MA2000 Installation and Configuration Guide
43
4.4.1
Mounting MA2000-Lite
In order to mount MA2000-Lite on the wall, the cover is first removed, the tray and all installed
elements are secured to the wall and the top cover assembled again.
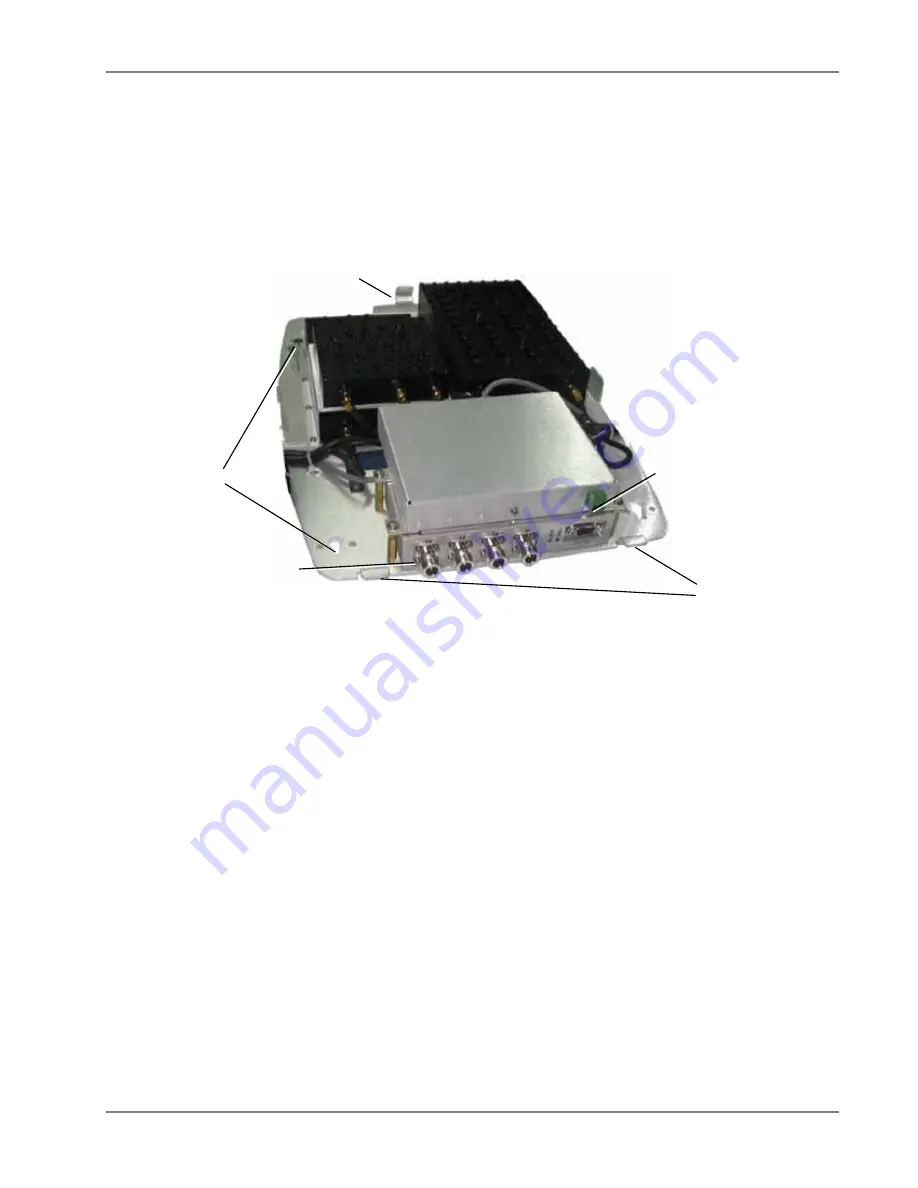
1. Remove the top cover by pulling it towards the rear bracket and lifting it over the front
brackets. The tray and all its assembled components are displayed. The installed filters vary
depending on the RU models in the installation.
Figure
4-14. MA2000-Lite Prepared for Mounting
2. Depending on the tools you use:
•
Either measure the distance between the four wall mount holes and drill the required
holes in the wall and insert the screws, or
•
Hold the tray up against the wall and simply drill the screws in the holes.
3. Mount each MA2000 RU on the wall, on the corresponding side of the MA2000-Lite unit.
4. Reassemble the MA2000-Lite cover by fitting it over the
front tabs
and pressing down gently
at the rear.
Power connection
Rear tab
Mounting holes
(2x on each side)
Front tabs
Antenna
connections


