background image

8

3

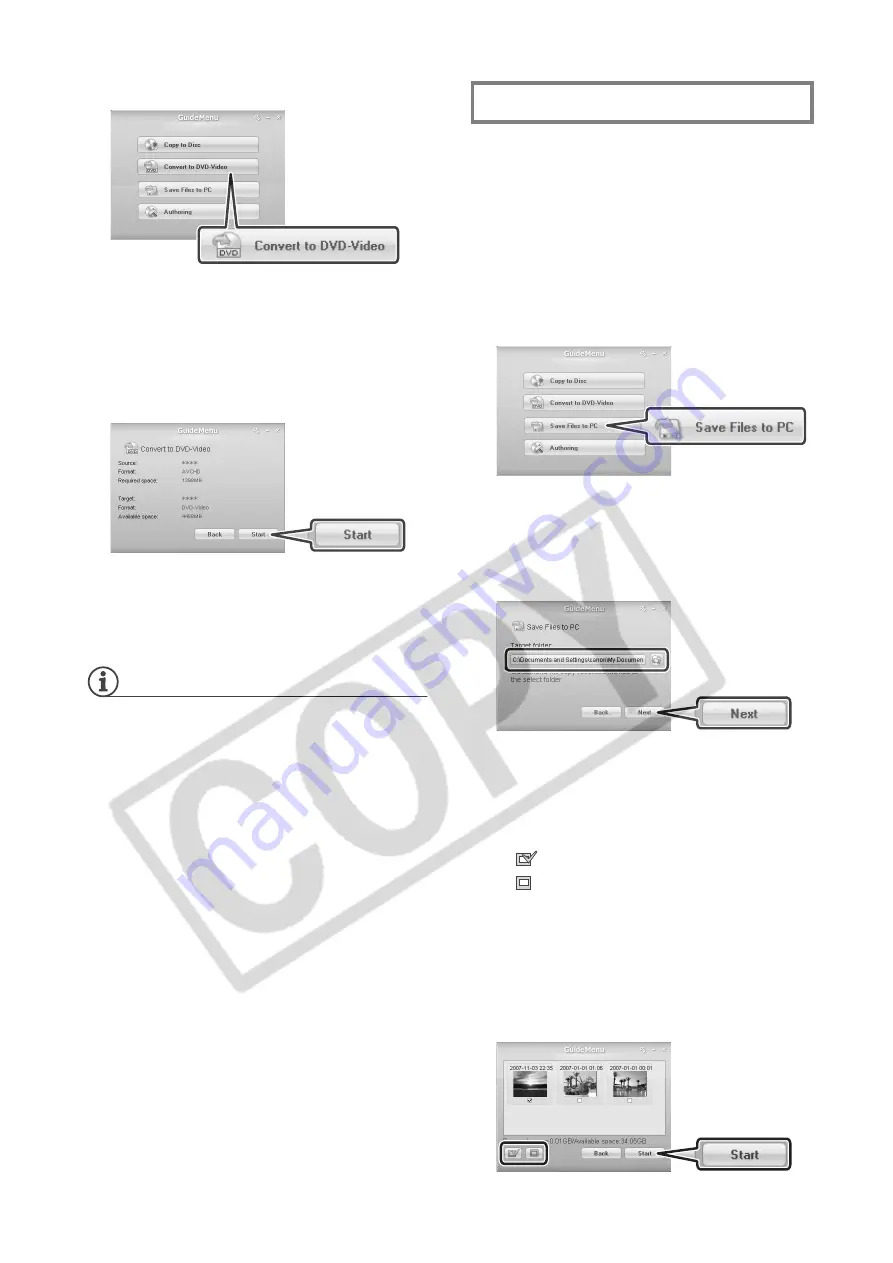
Click [Convert to DVD-Video].

4

Select the computer’s DVD drive 
as the target device and click 
[Next].

5

Verify that the information is 
correct and click [Start].

6

When the disc conversion and 
copy is completed successfully, 
click [OK].

NOTES

• Depending on the length of the 

recordings on the source disc, the 
conversion process may take some 
time.

• When recordings are converted into 

DVD-VIDEO specifications, several 
scenes will be merged into one scene.

• When a disc recorded in VR mode 

(standard definition) is converted to 
DVD-VIDEO specifications, all the 
scenes will have the same aspect ratio 
(16:9 or 4:3) as the first scene on the 
disc.

Transfer the movies you recorded from 
a disc to the computer’s hard disk and 
save them as backup files.

1

Camcorder: Insert the disc 
containing the scenes you want to 
backup.

Insert a finalized disc.

2

Click [Save Files to PC].

3

Select the folder where you want 
to save the files and click [Next].

Select a folder on the computer’s 
built-in hard disk.

4

Select the scenes you want to 
save and click [Start].

• You can also click on the following 

buttons.

: Select all scenes at once.
: Remove the checkmarks from 

all selected scenes at once.

• If there are less than 3 GB of 

available hard disk space, the 
backup operation will not start. 

• It may take some time to display 

all the scenes’ thumbnails.

Backing Up your Video Recordings

Содержание Application Disc Ver.1

Страница 1: ...Version 1 PUB DIM 823...

Страница 2: ...vieFactory SE Video Editing and DVD Authoring 9 Touch up your videos by cutting deleting and moving scenes Add music titles and transition effects Create your own personalized DVD menus Start the prog...

Страница 3: ...size 12 cm DVD R DVD RW at least 10 GB Operating System Windows XP SP2 Windows Vista CPU Intel Core 2 Duo 1 86 GHz Intel Pentium D 3 2 GHz RAM 1 GB 2 GB Available Hard Disk Space Installation only At...

Страница 4: ...ation from the drop down menu and click OK 3 Click Next 4 Read the license agreement and click Next Select I accept the terms of the license agreement to continue 5 Enter the user information and clic...

Страница 5: ...ctivation code 2 Click Create a New Account to create a new Ulead member account If you have already registered as a Ulead member continue directly to step 4 3 Enter the user information and click Sub...

Страница 6: ...your files on the hard disk To play back movies WinDVD SE or edit movies DVD MovieFactory SE you can also insert a finalized disc directly into the computer s DVD drive without having to connect the...

Страница 7: ...that the information is correct and click Start 6 When the disc copy is completed successfully click OK IMPORTANT High definition discs created or copied using Corel software can be played back only...

Страница 8: ...same aspect ratio 16 9 or 4 3 as the first scene on the disc Transfer the movies you recorded from a disc to the computer s hard disk and save them as backup files 1 Camcorder Insert the disc containi...

Страница 9: ...ing software to touch up your videos cut delete and move scenes to add music titles and transition effects and to create your own DVDs with personalized menus For further details refer to the help fil...

Страница 10: ...rrect playback of AVCHD discs created using the supplied software cannot be guaranteed for all AVCHD compatible devices Discs created with DVD MovieFactory SE Can be played back using WinDVD SE or the...

Страница 11: ...edure below to solve the compatibility problem 1 Connect the camcorder to the computer This step is not necessary if you want to play back or edit video directly from a finalized disc in the computer...

Страница 12: ...dows et Windows Vista sont des marques d pos es ou des marques enregistr es de Microsoft Corporation aux Etats Unis d Am rique et ou dans d autres pays AVCHD et le logo AVCHD sont des marques de comme...

Страница 13: ...PUB DIM 823...

Отзывы: