7
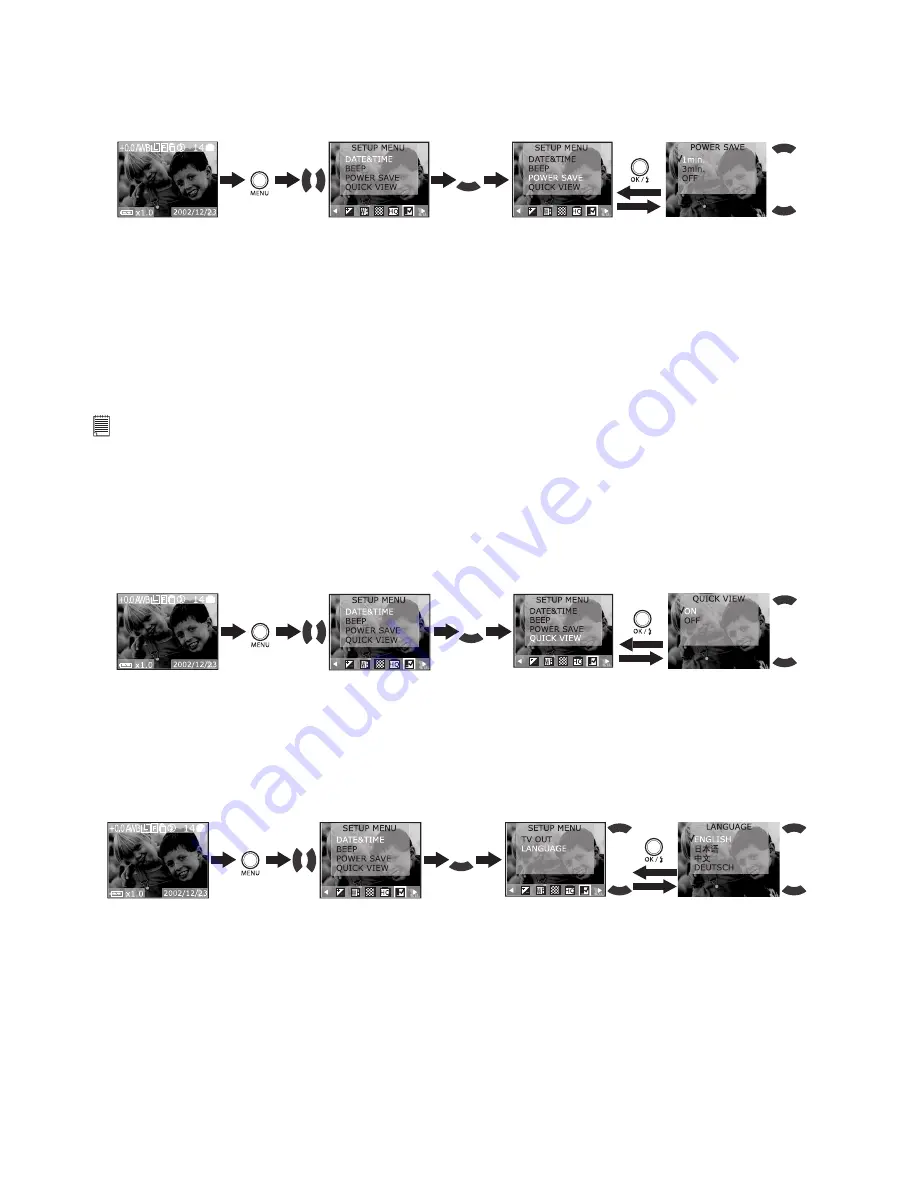
• Power Save Setting
Your camera is designed to turn off the LCD screen and the camera automatically after a period of inactivity
to save battery life. You can change Power Save Setting by the following steps.
1. Turn the camera on.
2. Press Menu button, and then use the Right or Left button to select “SETUP MENU”.
Press
Press
Press
3. After the above operation, press the Menu button to exit.
The function for each setting is:
Off:
This camera will not perform the power save function.
One minute:
This camera will automatically turn off the LCD screen after one minute of inactivity (the
operation LED will flash). Press any button will reactivate the LCD screen.
Three minutes: This camera will automatically turn off the LCD screen after three minutes of inactivity (the
operation LED will flash). Press any button will reactivate the LCD screen.
After the above one minute/three minutes power saving, if there is no more operation in another one
minute, the camera will automatically power off. You need to press the Power button if you want to turn on
the camera again.
NOTE:
• Power save setting is available in all camera modes.
• Auto power off is automatically disabled while the AC adaptor is connected to the camera or the camera is connected
to PC.
• Setting Quick View
This setting enables you to view the picture immediately on the LCD screen right after it is taken. You can
perform Quick View Setting in any camera mode.
1. Turn on the camera.
2. Press Menu button, and then use the Right or Left button to select “SETUP MENU”.
Press
Press
Press
3. After the above operation, press the Menu button to exit.
• Setting the Display Language
Under this setting, you can select the language you prefer for the LCD screen. You may change the
language setting in any camera mode.
1. Turn on the camera.
2. Press Menu button and use the Right button to select “SETUP MENU”.
Press
Press
Press
3. After the above operation, press the Menu button to exit.


