background image

Bar Code Print Direction

You can set the Bar Code Print Direction to:

Unidirectional

Causes the printer to print in only one direction,
either from left to right or from right to left, for
each of the two passes of bar code printing on a
line.

Bidirectional (Default)

Causes the printer to print as the printhead moves
in both directions. (This setting causes faster
throughput but may affect print quality. Verify that
the print quality is acceptable before running a
print job.)

To change or check the bar code print direction, follow these steps:

1.

Press

MENU

.

2.

Press

SCROLL/MICRO

or

SCROLL/MICRO

until the printer displays

CONFIGURATION MENU
Printer Setup

3.

Press

ENTER

.

4.

Press

SCROLL/MICRO

or

SCROLL/MICRO

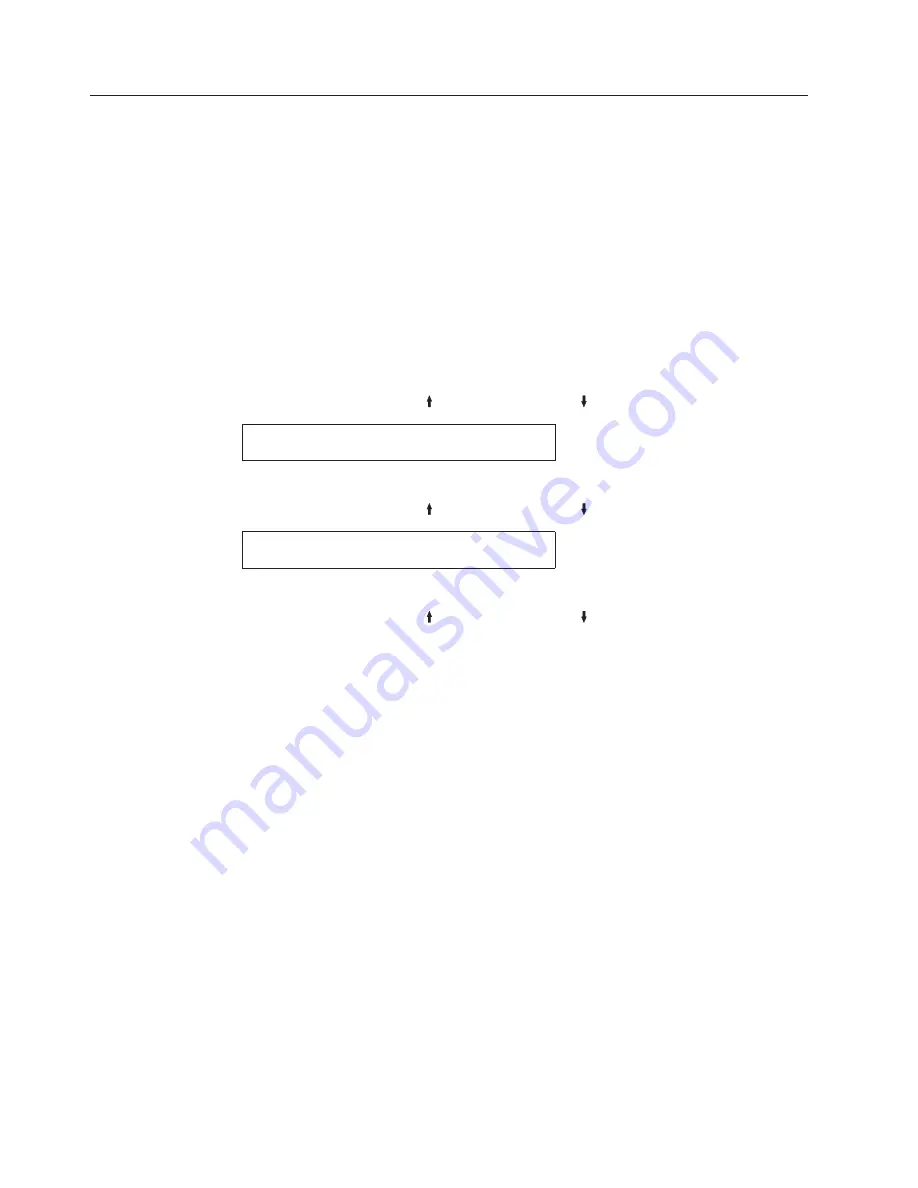
until the printer displays

Printer Setup
Bar Code Print Direction

5.

Press

ENTER

to display the current value.

6.

Press

SCROLL/MICRO

or

SCROLL/MICRO

until the desired value for bar

code print direction is displayed.

7.

Press

ENTER

.

An asterisk (*) will be displayed in front of the selected value.

8.

Press

START

or

RETURN

to exit the Menu. See “Exiting the Configuration

Menu” on page 39.

110

User’s Guide

Содержание 4247 X03

Страница 1: ...Compuprint 4247 Serial Matrix Printers Compuprint 4247 Model X03 Printer User s Guide MAN10296 00 00...

Страница 2: ...er 2011 This edition applies to the Compuprint 4247 X03 printer and to all subsequent releases and modifications until otherwise indicated in new edition Internet Visit our home page http www compupri...

Страница 3: ...26 Chapter 2 Understanding the operator panel 27 Status indicators 27 READY 27 PROCESSING 28 ATTENTION 28 Display panel 28 Audible alarm 29 Custom Set In Use Indicator 29 Function Keys 29 MENU 30 SCRO...

Страница 4: ...e 101 Front Forms Backup 102 Rear Forms Backup 103 Continuous Forms Linking 104 Form Feed Mode 105 Controlling tear off operations 106 Using automatic eject to control forms eject 106 Using automatic...

Страница 5: ...Problem list index 156 Forms problems 159 Print quality and ribbon problems 160 Configuration problems 162 Miscellaneous problems 162 Clearing forms jams 163 Appendix A Printer specifications 165 Gen...

Страница 6: ...vi User s Guide...

Страница 7: ...0 Closing the left sprocket cover 17 21 Inserting the paper on the right sprocket pins 18 22 Matching the left sprocket for the first printing position 18 23 Adjusting the right sprocket 19 24 Closing...

Страница 8: ...viii User s Guide...

Страница 9: ...Languages 125 17 Forms buckle twist jam or tractor holes tear 156 18 Forms do not feed past printhead 156 19 Forms do not stack correctly 156 20 Characters off registration 157 21 Unreadable characte...

Страница 10: ...x User s Guide...

Страница 11: ...tion hazard level The word Caution indicates the presence of a hazard that has the potential of causing moderate or minor personal injury Most CAUTION notices are numbered 2 1 2 2 and so forth where t...

Страница 12: ...urtains and chemicals away from the printer providing adequate ventilation and cooling limiting unattended operation and having trained personnel available and assigned to the printer Approved power c...

Страница 13: ...d unplug the printer power cord before connecting or disconnecting a communication port a teleport or other attachment connector Servicing during an electrical storm DANGER 1 13 Do not connect or disc...

Страница 14: ...xiv User s Guide...

Страница 15: ...r printer attachment v Chapter 6 IPDS Configuration describes how to check and change IPDS configuration parameters for your 4247 printer v Chapter 7 ASCII Configuration describes the procedures for c...

Страница 16: ...printer problems Always start your problem determination procedure with this chapter v Appendix A Printer specifications contains general printer information and planning requirements It also contains...

Страница 17: ...g forms in the Front Push Tractors 16 Printing your first documents 19 Installing the optional second tractor 20 Removing the optional second tractor 24 Attaching the 4247 Printer to your computer 25...

Страница 18: ...Printer parts Figure 1 Printer Parts Front and Rear View 2 User s Guide...

Страница 19: ...n not pictured here v Printer Stand Provides adequate printer support and especially helpful when using the Dual Push forms path 2 After opening the shipping container have another person help you rem...

Страница 20: ...t not exceed the length of the interface cable The location must be sturdy horizontal and stable v Your printer must not be exposed to direct sunlight extreme heat cold dust or humidity see Appendix A...

Страница 21: ...se Hz 100 230 Vac 90 264 Vac 3 8 1 6 A Single phase 50 60 Hz Installing the Controller Board The 4247 printer arrived with the Controller Board that you ordered You must install the Controller Board r...

Страница 22: ...th the printer mechanism board Unpredictable printer behavior will result Perform the following steps to install the Controller Board 1 Ensure that the printer is powered off Installing the Controller...

Страница 23: ...ctly seated in the printer when the Controller Board metal plate is aligned with the back profile of the slot 6 Attach the Controller Board with the two captured screws using the screwdriver that came...

Страница 24: ...rlay 3 Align the bottom of the overlay and align both sides Ensure that the placement you choose for the overlay will allow free movement of the operator panel keys 4 After being satisfied with the pl...

Страница 25: ...ribbon guide snap arm ribbon advance knob and the ribbon mounting pins To avoid damage to the ribbon do not turn the winding knob in the wrong direction 2 Turn the ribbon advance knob in the direction...

Страница 26: ...e of the top cover 4 Slide the print head to the center of the printer 5 Align the cartridge pins with the locking grooves on the left and right cartridge supports Figure 10 Opening the top cover C7Q0...

Страница 27: ...k in the ribbon 8 Position the snap arm with the small lever up onto the ribbon lift assembly Push the snap arm down onto the ribbon lift assembly until it snaps into place HC0I0030 Figure 12 Print he...

Страница 28: ...ibbon cartridge correctly ensure that a The left and right ribbon mounting pins are securely snapped into the cartridge supports b There are no twists or folds in the ribbon c The ribbon is not catchi...

Страница 29: ...into a convenient outlet 4 Turn the printer on press the power switch in the I position ON Attention If for any reason the Controller Board was not correctly installed in the printer the printer will...

Страница 30: ...er does not show the correct display sequence go to the status code section of Using status code and problem listings on page 151 Follow the instructions for the status code shown on the display panel...

Страница 31: ...k will be displayed in front of the selected value 6 Press RETURN to return to the Configuration Menu 7 Press START The printer displays Press ENTER to Save Press START to Not Save 8 Choose between on...

Страница 32: ...rn the printer on 2 Open the Push tractors cover turning it upwards and lay it on the top of the printer 3 Unlock the tractors by moving the sprocket levers to the up position Slide the left tractor t...

Страница 33: ...vers 5 Hold the fanfold paper in front of the sprockets and insert the paper perforation on the left sprocket pins and close the left sprocket cover HC0I0019 Figure 19 Opening the left and right sproc...

Страница 34: ...t Note Aligning the left hand edge of the paper past the 22nd spacer on the printer cabinet will cause the paper to be misaligned with the Paper Load Sensor resulting in a 001 End of Forms error HC0I0...

Страница 35: ...iliarize you with the operator panel keys and the configuration menu you can set The Quick Reference printout allows you to check print quality and printer operations v Each key is listed with a corre...

Страница 36: ...Save this printout for future reference You can create a printout of the printer configuration by following these steps 1 Press SCROLL MICRO or SCROLL MICRO until the printer displays OPERATOR PRINT...

Страница 37: ...n both sides of the second tractor with the pins on the first tractor Push the second tractor on the pins until it is fully engaged C7QU2023 Figure 26 Second tractor C7Q02024 Figure 27 Aligning the se...

Страница 38: ...e electrical cable connector provided on the tractor 5 Rotate the tractor gear protection cover downwards to free the gear C0Q02025 Figure 28 Connecting the second tractor C7Q02026 Figure 29 Rotating...

Страница 39: ...the second tractor is installed rotate the second tractor out and insert paper between the two tractors See Loading forms in the Front Push Tractors on page 16 for paper loading procedures C7Q02027 F...

Страница 40: ...ither side to disengage the tractor Then pull the tractor off CAUTION 2 53 If the second tractor unit is not installed make sure the gear protector cover is closed Do not touch inside the printer or i...

Страница 41: ...eleport or other attachment connector Insert the host computer cable s into the back of the printer as shown below Controller Board with parallel interface and ASCII IPDS Ethernet 10 100 LAN interface...

Страница 42: ...Software driver selection See Appendix C Printer driver support on page 175 for information about selecting printer drivers 26 User s Guide...

Страница 43: ...24 character display panel 14 printer function keys and an audible alarm Figure 34 illustrates the operator panel and keys for the printer Status indicators The following status indicators appear on...

Страница 44: ...data that cannot be printed immediately If not lighted there is no data to process and no data in the print buffer ATTENTION If blinking the printer requires operator intervention for example to add...

Страница 45: ...letter ID When the custom set identified by this ID is selected from the operator panel these configuration values are used by the printer NOT READY X The current custom set in use is displayed in pa...

Страница 46: ...The configuration menu can be locked to prevent an unauthorized user from changing parameter values When the configuration menu is locked pressing the MENU key only allows recall of Custom Set Values...

Страница 47: ...he display to show the next configuration category parameter or value Pressing SCROLL MICRO when the Test Menu is displayed changes the second line of the display to show the previous test name Pressi...

Страница 48: ...forms path If continuous forms are currently in the printer and the top of the form is beyond the print area press PARK PATH The forms will be ejected for tearoff and the printer will display 091 FANF...

Страница 49: ...ns v Automatically loads forms After the forms are loaded under the sensor and onto the tractors at the bottom of the forms device press LOAD EJECT to automatically load the forms to the top of form p...

Страница 50: ...he previous print position and makes the printer ready Refer to Continuous Forms Eject Mode on page 109 for more information on changing Continuous Forms Eject mode v Ejects forms for viewing If a For...

Страница 51: ...EADY message to appear in the operator panel display v Exit the Configuration Menu and make the printer ready If a partial reset is required it is performed to put configuration changes into effect be...

Страница 52: ...rint data and buffers This function is valid only when the printer is not ready CANCEL PRINT is also active in Operator Print Tests If CANCEL PRINT is pressed while in the tests the printer stops any...

Страница 53: ...Attachment v IPDS Configuration v ASCII Configuration v Printer Setup v Printer Adjustments v Power On Reset v Display Language v Vital Product Data v Quiet Print v Hex Print v Quit From Menu You can...

Страница 54: ...is displayed Press ENTER to select this new value When you change the values and do not save them in a custom set the printer retains the values until one of the following occurs v You power off O the...

Страница 55: ...the printer will exit the menu and become ready 3 To store your changes in a custom set press ENTER 4 The printer will go to the Value level of the Configuration Storage Category in the menu and disp...

Страница 56: ...ter will exit the menu and become not ready See Configuration categories for the parameters you can change and the manufacturing values Locking the Printer Configuration Menu The configuration menu ca...

Страница 57: ...e Attachment Category Refer to Chapter 5 Attachment options on page 55 for detailed information on setting these parameters Table 2 Attachment Category Parameters Values Default Attachment Hot Port Sw...

Страница 58: ...ry Parameters that can be overridden by the computer are noted with a dagger Refer to Chapter 7 ASCII Configuration for detailed information on setting these parameters Table 4 ASCII Configuration Par...

Страница 59: ...L or 2381 Disabled Enabled Disabled Printer Compatibility 5 Form Feed Suppression When emulation mode is set to 4247 4202 III XL or 2381 Disabled Enabled Disabled Printer Compatibility 6 Init Enabled...

Страница 60: ...Feed XT When emulation mode is set to Epson FX Disabled Enabled Disabled Serial Interface Interface Type RS 232C RS 232C Serial Interface Input Buffer Size 256 2K 12K 32K 64K 128K 32K Serial Interface...

Страница 61: ...can be overridden by the computer are noted with a dagger Refer to Chapter 8 Printer setup for detailed information on setting these parameters Table 5 Printer Setup Parameters Values Default Paper S...

Страница 62: ...0 Front Left Margin Alignment 0 to 60 0 Front Paper Load Position 30 to 360 0 Rear AFTA when optional second tractor is installed 5 to 3 Fixed 1 to 8 0 Rear Tear Position when optional second tractor...

Страница 63: ...sts the parameters available for the Vital Product Data Category Refer to Chapter 12 Vital Product Data for detailed information on setting these parameters Table 9 Vital Product Data Category Paramet...

Страница 64: ...rs Table 11 Hex Print Category Parameters Values Default Hex Print No Yes No Quit From Menu Table 12 lists the parameters available for the Quit From Menu Category Refer to Chapter 15 Quit From Menu f...

Страница 65: ...eter values on page 37 Non custom set The non custom set contains parameter values that stay the same no matter which custom set you are using The following parameter values are saved in this part of...

Страница 66: ...plays CONFIGURATION MENU Configuration Storage 3 Press ENTER 4 Press SCROLL MICRO or SCROLL MICRO until the printer displays Configuration Storage Save Current Values 5 Press ENTER to display the curr...

Страница 67: ...printer displays CONFIGURATION MENU Configuration Storage 3 Press ENTER 4 Press SCROLL MICRO or SCROLL MICRO until the printer displays Configuration Storage Recall Custom Set Values 5 Press ENTER to...

Страница 68: ...Paper Source The Power On Paper Source allows you to select which paper source is to be used when the printer is turned on The Last Used value means that the paper source used before the printer was p...

Страница 69: ...r on custom set The Recall Factory Defaults function does not affect the values saved in custom sets Note When factory defaults are recalled a partial reset is automatically performed when exiting fro...

Страница 70: ...he only change from factory defaults is a non custom set parameter value a value that stays the same no matter which custom set you are using only the first custom set will be identified as In Use The...

Страница 71: ...your order for the printer To change or check the attachment selection follow these steps 1 Press MENU 2 Press SCROLL MICRO or SCROLL MICRO down until the printer displays CONFIGURATION MENU Attachme...

Страница 72: ...56 User s Guide...

Страница 73: ...position to exceed the maximum physical page width If this occurs the printer automatically changes the maximum print position to the highest valid value for the new CPI setting See Maximum Print Posi...

Страница 74: ...or RETURN to exit the Menu See Exiting the Configuration Menu on page 39 Maximum Print Position MPP The maximum print position MPP equals the number of characters the printer prints on a line The defa...

Страница 75: ...on Menu on page 39 Maximum Page Length MPL You can set the maximum page length MPL for the printer from 1 660 lines for 6 LPI and 1 880 lines for 8 LPI The default value is 66 lines MPL equals the num...

Страница 76: ...Processing Quality Default v DP Text Quality v Near Letter Quality NLQ Notes 1 This parameter can be overridden by the computer 2 Only Near Letter Quality is valid when either OCR A or OCR B is select...

Страница 77: ...man 274 Belgian Old 275 Brazilian 277 Danish Norwegian 278 Finnish Swedish 280 Italian 281 Japanese English 282 Portuguese 284 Spanish Spanish Speaking 285 English UK 290 Japanese Katakana 297 French...

Страница 78: ...selectable options for CPI and print quality become fixed at 10 CPI and Near Letter Quality respectively To change or check the print language value follow these steps 1 Press MENU 2 Press SCROLL MICR...

Страница 79: ...Menu on page 39 Media Size Priority This parameter is available only if the IPDS feature is installed and the IPDS data stream is selected It affects the use of the XOH Set Media Size SMS order This...

Страница 80: ...et the Bar Code Mode to any of the following values High Default High Contrast Bar Codes Low Low Contrast Bar Codes Computer Selected Contrast as specified by the IPDS data stream Note The printer per...

Страница 81: ...ge to this parameter value into effect when you exit the Configuration Menu with START or RETURN Buffered data will be lost To change or check the graphics mode follow these steps 1 Press MENU 2 Press...

Страница 82: ...or SCROLL MICRO until the printer displays CONFIGURATION MENU IPDS Configuration 3 Press ENTER 4 Press SCROLL MICRO or SCROLL MICRO until the printer displays IPDS Configuration Alarm Control 5 Press...

Страница 83: ...onnection Type 92 LAN Interface 93 IP Address Assignment 93 IP Address 93 Subnet Mask 94 Default Gateway 95 Host Name 95 Workgroup Name 96 SMTP Service 97 Mail Server Address 97 E Mail Address Receive...

Страница 84: ...nch LPI You can set the lines per inch LPI for the printer to either of the following values v 6 Default v 8 Note This parameter can be overridden by the computer To change or check the LPI follow the...

Страница 85: ...the MPP larger than the paper width can result in lost data because of printing on the platen and may damage the platen and the printhead 2 This parameter can be overridden by the computer To change...

Страница 86: ...LPI 6 and page length 254 mm 10 in then MPL 6 x 10 MPL 60 Note This parameter can be overridden by the computer To change or check the MPL follow these steps 1 Press MENU 2 Press SCROLL MICRO or SCROL...

Страница 87: ...of the selected value 8 Press START or RETURN to exit the Menu See Exiting the Configuration Menu on page 39 Emulation Mode You can set Emulation Mode to the following values v 4247 Default v 2381 Per...

Страница 88: ...e Page When emulation is set to Epson FX Code Page When emulation is set to 4247 4202 III XL 2381 Personal Printer Language 0 N A USA 1 N A France 2 N A Germany 3 N A U K 4 N A Denmark I 5 N A Sweden...

Страница 89: ...Latin 6 ISO 8859 6 N A 1098 Farsi PC N A 1116 Estonia PC N A 1117 Latvia PC N A 1118 Lithuania PC N A 1250 Central Europe Latin 2 N A 1251 Cyrillic Windows euro Notes 1 The printer performs a partial...

Страница 90: ...CR B When emulation mode is set to Epson FX you can set the printer to any of the following values v DP Quality Default v Courier v Gothic v OCR A v OCR B Notes 1 This parameter can be overridden by t...

Страница 91: ...ace 5 Press ENTER to display the current value 6 Press SCROLL MICRO or SCROLL MICRO until the desired value for NLQ Typeface is displayed 7 Press ENTER An asterisk will be displayed in front of the se...

Страница 92: ...he printer displays CONFIGURATION MENU ASCII Configuration 3 Press ENTER 4 Press SCROLL MICRO or SCROLL MICRO until the printer displays ASCII Configuration Printer Compatibility 5 Press ENTER 6 Press...

Страница 93: ...alue 8 Press SCROLL MICRO or SCROLL MICRO until the desired value for Automatic Carriage Return on Line Feed is displayed 9 Press ENTER An asterisk will be displayed in front of the selected value 10...

Страница 94: ...detect the Init signal and perform a partial reset when active or to ignore the signal You can set this value to Disabled Init signal detection disabled No action occurs when Init is activated Enabled...

Страница 95: ...SCROLL MICRO until the printer displays CONFIGURATION MENU ASCII Configuration 3 Press ENTER 4 Press SCROLL MICRO or SCROLL MICRO until the printer displays ASCII Configuration Printer Compatibility...

Страница 96: ...0 Press START or RETURN to exit the Menu See Exiting the Configuration Menu on page 39 Printer Compatibility 9 20 CPI This parameter is displayed when emulation mode is set to 4247 4202 III XL or 2381...

Страница 97: ...Note Pressing Set Top of Form and some unit check conditions sound the alarm even if the alarm is disabled To change or check the alarm control follow these steps 1 Press MENU 2 Press SCROLL MICRO or...

Страница 98: ...panel Commands sent from the host cannot override the paper source selected at the operator panel To change or check the Paper Source 1 Press MENU 2 Press SCROLL MICRO or SCROLL MICRO until the print...

Страница 99: ...r Inch setting 1 Press MENU 2 Press SCROLL MICRO or SCROLL MICRO until the printer displays CONFIGURATION MENU ASCII Configuration 3 Press ENTER 4 Press SCROLL MICRO or SCROLL MICRO until the printer...

Страница 100: ...Inch setting 1 Press MENU 2 Press SCROLL MICRO or SCROLL MICRO until the printer displays CONFIGURATION MENU ASCII Configuration 3 Press ENTER 4 Press SCROLL MICRO or SCROLL MICRO until the printer d...

Страница 101: ...ximum Page Length setting 1 Press MENU 2 Press SCROLL MICRO or SCROLL MICRO until the printer displays CONFIGURATION MENU ASCII Configuration 3 Press ENTER 4 Press SCROLL MICRO or SCROLL MICRO until t...

Страница 102: ...or SCROLL MICRO until the printer displays Parallel Interface Interface Type 7 Press ENTER to display the current value 8 Press SCROLL MICRO or SCROLL MICRO until the desired value for Interface Type...

Страница 103: ...t In Signal to Disabled The Select In Signal is ignored and treated as always on Enabled Default The printer checks the Select In Signal from the host To change or check the Select In Signal 1 Press M...

Страница 104: ...Press SCROLL MICRO or SCROLL MICRO until the printer displays ASCII Configuration Parallel Interface 5 Press ENTER 6 Press SCROLL MICRO or SCROLL MICRO until the printer displays Parallel Interface A...

Страница 105: ...v 256 v 2K v 12K v 32K Default v 64K v 128K To change or check the Input Buffer Size 1 Press MENU 2 Press SCROLL MICRO or SCROLL MICRO until the printer displays CONFIGURATION MENU ASCII Configuratio...

Страница 106: ...he current value 7 Press SCROLL MICRO or SCROLL MICRO until the desired value for Data Bits is displayed 8 Press ENTER An asterisk will be displayed in front of the selected value 9 Press START or RET...

Страница 107: ...v Space To change or check the Parity setting 1 Press MENU 2 Press SCROLL MICRO or SCROLL MICRO until the printer displays CONFIGURATION MENU ASCII Configuration 3 Press ENTER 4 Press SCROLL MICRO or...

Страница 108: ...alue for Pacing Protocol is displayed 8 Press ENTER An asterisk will be displayed in front of the selected value 9 Press START or RETURN to exit the Menu See Exiting the Configuration Menu on page 39...

Страница 109: ...ion 3 Press ENTER 4 Press SCROLL MICRO or SCROLL MICRO until the printer displays ASCII Configuration LAN Interface 5 Press ENTER and the printer displays LAN Interface IP Address Assignment 6 Press E...

Страница 110: ...ration Menu on page 39 Subnet Mask You can set the Subnet Mask Example 255 255 254 000 Default These values set the Subnet Mask number This number is represented by a decimal notation The decimal valu...

Страница 111: ...until the printer displays ASCII Configuration LAN Interface 5 Press ENTER and the printer displays LAN Interface Default Gateway 6 Press ENTER to display the current value 7 Press SCROLL MICRO or SC...

Страница 112: ...me You can set the Workgroup Name to v 14 Chars max v Workgroup Default The Workgroup Name allows the printer to be associated with another group of printers To change or check the Workgroup Name 1 Pr...

Страница 113: ...ess SCROLL MICRO or SCROLL MICRO until the printer displays ASCII Configuration LAN Interface 5 Press ENTER and the printer displays LAN Interface SMTP Service 6 Press ENTER to display the current val...

Страница 114: ...e Configuration Menu on page 39 E Mail Address Receiver You can set the E Mail Address Receiver to v 48 Chars max v Null String Default This function allows you to enter the e mail address up to 48 ch...

Страница 115: ...vice function choice is Enabled To change or check the E Mail Address Sender 1 Press MENU 2 Press SCROLL MICRO or SCROLL MICRO until the printer displays CONFIGURATION MENU ASCII Configuration 3 Press...

Страница 116: ...100 User s Guide...

Страница 117: ...the following values Front Default The front paper path is assigned according to the forms tractors installed on the printer The front paper path settings apply to the paper loaded with the tractor a...

Страница 118: ...be used for the paper path You can define the front forms backup to either one of the following values Enabled Default Allows the printer to back up the front forms as needed Disabled Prevents the pr...

Страница 119: ...paper path You can define the rear forms backup to any one the following values Enabled Default Allows the printer to back up the rear forms as needed Disabled Prevents the printer from backing up re...

Страница 120: ...The Front Push and Rear Push continuous forms paths are to be linked together so they are treated by the printer as one continuous paper source To change or check the Continuous Forms Linking 1 Press...

Страница 121: ...ange the value to Active in the ready state To change or check the form feed mode 1 Press MENU 2 Press SCROLL MICRO or SCROLL MICRO until the printer displays CONFIGURATION MENU Printer Setup 3 Press...

Страница 122: ...which apply to both the front and rear continuous forms paths The paths cannot be controlled individually Using automatic restore to control restoring of forms After the forms have been ejected messa...

Страница 123: ...Eject This parameter is displayed for the Front Push or Rear Push forms path You can set the printer to perform an automatic eject without pressing LOAD EJECT when a print job is complete You can set...

Страница 124: ...30 seconds 40 seconds or 50 seconds To change or check the automatic restore follow these steps 1 Press MENU 2 Press SCROLL MICRO or SCROLL MICRO until the printer displays CONFIGURATION MENU Printer...

Страница 125: ...1 Press MENU 2 Press SCROLL MICRO or SCROLL MICRO until the printer displays CONFIGURATION MENU Printer Setup 3 Press ENTER 4 Press SCROLL MICRO or SCROLL MICRO until the printer displays Printer Setu...

Страница 126: ...efore running a print job To change or check the bar code print direction follow these steps 1 Press MENU 2 Press SCROLL MICRO or SCROLL MICRO until the printer displays CONFIGURATION MENU Printer Set...

Страница 127: ...running a print job To change or check the graphics print direction follow these steps 1 Press MENU 2 Press SCROLL MICRO or SCROLL MICRO until the printer displays CONFIGURATION MENU Printer Setup 3 P...

Страница 128: ...ting is recommended for thick multiple part forms To change or check the Perforation Safety value 1 Press MENU 2 Press SCROLL MICRO or SCROLL MICRO until the printer displays CONFIGURATION MENU Printe...

Страница 129: ...ot be disabled To change or check the Jam Sensors category 1 Press MENU 2 Press SCROLL MICRO or SCROLL MICRO until the printer displays CONFIGURATION MENU Printer Setup 3 Press ENTER 4 Press SCROLL MI...

Страница 130: ...114 User s Guide...

Страница 131: ...Paper Load Position parameters is set the printer automatically adjusts the corresponding Tear Position value to compensate for the change you made to the Load Position This automatic adjustment keep...

Страница 132: ...FIGURATION MENU Printer Adjustments 3 Press ENTER 4 Press SCROLL MICRO or SCROLL MICRO until the printer displays Printer Adjustments Front AFTA 5 Press ENTER to display the current value 6 Press SCRO...

Страница 133: ...gn 5 Press ENTER to display the current value 6 Press SCROLL MICRO or SCROLL MICRO until the desired value for Front Left Margin Align is displayed 7 Press ENTER An asterisk will be displayed in front...

Страница 134: ...nds to a gap of 0 25 mm 01 in from the forms Fixed 1 to 8 Selects a fixed printhead distance value from 1 to 8 in increments of 0 5 where each value equals approximately 0 05 mm 002 in Default 0 To ch...

Страница 135: ...ult is 0 units The total range of adjustment is 42 36 mm 1 66 in To change or check the Rear Left Margin Align 1 Press MENU 2 Press SCROLL MICRO or SCROLL MICRO until the printer displays CONFIGURATIO...

Страница 136: ...nu on page 39 Bidirectional Adjustment You can adjust dot registration and print quality for characters on your printer by running the bidirectional adjustment test pattern The test pattern consists o...

Страница 137: ...LL MICRO or SCROLL MICRO until the printer displays OPERATOR PRINT TESTS Printer Adjustments 3 Press ENTER 4 Press SCROLL MICRO or SCROLL MICRO until the printer displays Printer Adjustments Sensor Tu...

Страница 138: ...nts only follow these steps 1 Press SCROLL MICRO or SCROLL MICRO until the printer displays Printer Adjustments Quit from Menu 2 Press ENTER The printer displays Quit from Menu Restore Previous Values...

Страница 139: ...low these steps 1 Press MENU 2 Press SCROLL MICRO or SCROLL MICRO until the printer displays CONFIGURATION MENU Power On Reset 3 Press ENTER The printer displays Power On Reset Yes 4 Press ENTER The p...

Страница 140: ...124 User s Guide...

Страница 141: ...printer displays CONFIGURATION MENU Display Language 3 Press ENTER 4 Press SCROLL MICRO or SCROLL MICRO until the desired value for display language is displayed 5 Press ENTER An asterisk will be dis...

Страница 142: ...126 User s Guide...

Страница 143: ...rinter is located on the Information Label on the back of printer and next to the power on switch To check or change the serial number for the printer follow these steps 1 Press MENU 2 Press SCROLL MI...

Страница 144: ...MICRO or SCROLL MICRO until the printer displays Vital Product Data Device Specific Info 5 Press ENTER The printer displays the current value for device specific information A cursor X appears under...

Страница 145: ...throughput by one half The default is No Disabled To enable or disable the Quiet Print mode 1 Press the MENU key 2 Press SCROLL MICRO or SCROLL MICRO to select the Quiet Print CONFIGURATION MENU Quiet...

Страница 146: ...130 User s Guide...

Страница 147: ...al format The default is No Disabled To enable or disable the Hex Print function 1 Press the MENU key 2 Press SCROLL MICRO or SCROLL MICRO to select Hex Print CONFIGURATION MENU Hex Print 3 Press the...

Страница 148: ...132 User s Guide...

Страница 149: ...w these steps 1 If CONFIGURATION MENU is not on the first line of the display press RETURN until it appears 2 Press SCROLL MICRO or SCROLL MICRO until the printer displays CONFIGURATION MENU Quit from...

Страница 150: ...134 User s Guide...

Страница 151: ...good solution The printer can be set up to automatically switch paper sources and keep printing Notes 1 The 4247 Printer can print on various sizes dimensions and weights of forms We recommend that yo...

Страница 152: ...h these applications If the 4247 is being shared by more than one user data stream controlled switching will probably work best since the timing of operator panel controlled switching with the arrival...

Страница 153: ...ear bar After having torn the forms the path switching procedure is the same regardless of the setting of Automatic Eject The rest of the steps follow a Press LOAD EJECT The printer will restore the f...

Страница 154: ...s are loaded on the pins of the other tractor the printer will automatically switch to that tractor when the current tractor reaches end of forms The 001 END OF FORMS message will only be displayed on...

Страница 155: ...n of 72 or a maximum page length of 66 the printer will adjust the values This is done to ensure correct formatting of all offline customer tests A form that is at least 210 mm x 297 mm 8 27 x 11 70 i...

Страница 156: ...tor goes on and printing begins 4 When the Quick Reference test is complete the READY indicator goes off 5 Press CANCEL PRINT to make the printer ready or RETURN to make the printer not ready see Gene...

Страница 157: ...The READY indicator goes on and printing begins The printout shows the current configuration The configuration printout is complete when the READY indicator goes off 5 Press CANCEL PRINT to make the...

Страница 158: ...n and printing begins The firmware printout is complete when the READY indicator goes off 5 Press CANCEL PRINT to make the printer ready or RETURN to make the printer not ready see General test instru...

Страница 159: ...esired value for Printer Adjustments is displayed 6 Press ENTER and change the values you wish to change 7 Press START to run a print test for acceptable quality and alignment If the quality is not ac...

Страница 160: ...144 User s Guide...

Страница 161: ...ust meet the following specifications Paper Criteria Characteristics Continuous Forms Front Push Rear Push Dimensions Width 76 2 to 431 8 mm 3 to 17 in Length 76 2 to 609 6 mm 3 to 24 in Single Part W...

Страница 162: ...n v Modifies how the PARK key works for forms in the Front Push and Rear Push forms paths You cannot back up the forms to park them Break the forms at a perforation before they enter the printer Press...

Страница 163: ...inter For satisfactory stacking results the distance from the printer stand to the floor should be 736 to 762 mm 29 to 30 in and the distance between the shelf and the floor should be 381 mm 15 in We...

Страница 164: ...different types of fanfold paper simultaneously with the printer Controller Board There are three Controller Board options 1 Allows a host connection to parallel serial and USB 2 0 interfaces 2 Allows...

Страница 165: ...steps 1 Open the printer top cover 2 Slide the printhead to the center of the printer 3 Slide the ribbon guide out of the printhead 4 Free the shifter holder by pushing the tab towards the rear and pu...

Страница 166: ...t and pieces of paper Remove the ribbon cartridge to prevent the ribbon from going into the vacuum cleaner Vacuum any dust from around the printhead and in the printer cavity Attention Do not allow an...

Страница 167: ...r service Using status code and problem listings When a problem with the printer occurs the printer displays a status code and message The message on the display identifies the problem and gives a rec...

Страница 168: ...Close the top cover 5 Press LOAD EJECT to load forms 6 Press START to restart the print job If the message displays again perform the actions under Forms buckle twist jam or tractor holes tear on page...

Страница 169: ...rm The message remains in the display 2 Clear the jammed or torn form If paper is difficult to remove from the printhead area note the setting on the AFTA wheel rotate the AFTA wheel to a higher numbe...

Страница 170: ...247 Printer to your computer on page 25 089 RIBBON JAM CHECK RIBBON 1 Turn off the printer 2 Remove the ribbon cartridge 3 Turn the ribbon advance knob to be sure that the ribbon is advancing correctl...

Страница 171: ...PATH key and 091 FANFOLD PARK message requires that any fanfold forms above the tear bar be torn off before confirming the Park operation with a second press of PARK PATH Failure to tear off forms may...

Страница 172: ...index Printer has no power on page 158 Throughput of printer at half speed on page 158 1 Forms problems index Table 17 Forms buckle twist jam or tractor holes tear Problem Page Right tractor adjusted...

Страница 173: ...issing dots or irregular characters Problem Page Ribbon worn 161 Ribbon twisted or folded 161 AFTA setting needs to be changed 161 Table 23 Ribbon smudging forms Problem Page Ribbon twisted or folded...

Страница 174: ...27 Printer doesn t print or prints wrong characters Problem Page Printer doesn t print or prints wrong characters 162 4 Miscellaneous problems index Table 28 Printer has no power Problem Page Power c...

Страница 175: ...reach the bottom of the box this problem can occur more often 6 The ribbon is twisted or folded Solution Check the ribbon for folds or twists 7 The forms contain excessive moisture Solution Store the...

Страница 176: ...ge operator assistance may be needed 5 Forms are too dry Solution Condition the forms for 24 hours or more at the manufacturer recommended temperature and humidity settings Problem Characters are off...

Страница 177: ...ibbon advance knob If the ribbon advance knob does not turn replace the ribbon 2 The Automatic Forms Thickness Adjustment AFTA setting for the paper source you are using needs to be increased Paper mu...

Страница 178: ...r prints wrong characters 1 Nothing is printed or the wrong characters print Solution v Ensure the printer cable is attached to the host v Check the configuration menu parameter values for your printe...

Страница 179: ...bly if it is present a Open the forms guide b Remove the ribbon cartridge See Removing the ribbon cartridge on page 149 c Grip the bail assembly as shown in the following illustration Rotate it toward...

Страница 180: ...c Rotate the paper bail assembly toward the back of the printer closing it as far as it will go d Reinstall the ribbon cartridge e Close the forms guide 9 Reload the forms Figure 42 Inserting the left...

Страница 181: ...printer avoid factors that can create a buildup of an electrostatic charge on the printer While not harmful an electrostatic discharge can cause discomfort to persons Such discharges also can cause pr...

Страница 182: ...inter Weight CAUTION The 4247 printer weighs 21 kg 46 lbs Two persons are required to lift it Power consumption Category 115 Vac 60 Hz 230 Vac 50 Hz Maximum Peak 220 Watts 210 Watts Operating Maximum...

Страница 183: ...ise emission levels with standard covers was v Standard covers v Front Push forms path v DP print quality v Without Quiet Mode All measurements are made in accordance with International Organization f...

Страница 184: ...iption SIGNAL GROUND 5 Always connected to the 0 Volts of the Power Supply TXD 3 Printer Printer Transmitted Data Signal an output from printer A MARK condition is held during IDLE communication state...

Страница 185: ...iness offices Attention Damage to the printer can occur if you power on the printer immediately after the printer has been moved from an environment that does not meet the following operating requirem...

Страница 186: ...Use the following tables to plan your site power requirements The tables list the voltage inputs grounding plugs and receptacles necessary for your new printer All voltages are single phase Nominal Op...

Страница 187: ...ficiently low impedance to limit the voltage to ground and to facilitate the operation of circuit protective devices in the circuit For example the ground path must not exceed 1 ohm for 120 volt 20 am...

Страница 188: ...172 User s Guide...

Страница 189: ...10 Lines Per Inch 6 8 6 Maximum Print Position 001 to 272 136 Maximum Page Length 001 to 880 066 Perforation Skipping 000 to 879 000 Emulation Mode 4247 2381 Personal Printer 4247 4202 Proprinter III...

Страница 190: ...ect Disabled Enabled Disabled Automatic Restore Disabled Data Timer nn Seconds Disabled nn 10 20 30 40 50 Continuous Forms Eject Mode Immediate Eject Delayed Eject Immediate Eject Bar Code Print Direc...

Страница 191: ...objects To help you get started in attaching your printer to IBM System i systems Printer Profile source files for creating Workstation Customization Objects WSCST for Host Print Transform can be down...

Страница 192: ...176 User s Guide...

Страница 193: ...40 exiting the configuration menu 39 checking parameter values 38 clearance operating and service 166 coax attachment selecting 55 Condensed Print parallel parameter 79 configuration categories confi...

Страница 194: ...set top of form 35 start 35 stop 35 test 36 L language print IPDS Configuration 61 language print parallel attachment 72 LINE FEED function key 33 line feeds parallel 76 Lines Per Inch LPI IPDS Confi...

Страница 195: ...2 rear forms backup 103 printhead parking 112 printing your first document 19 Processing status indicator 28 push pull forms specifications 145 Q quality print IPDS Configuration 60 Quick Reference pr...

Страница 196: ...ustments 142 printer configuration 141 printer demonstration 140 quick reference 140 V very important vital data 127 vital product data device specific information 128 serial number 127 Vital Product...

Страница 197: ...Compuprint advises the customers not to use products for which the compliance to this safety rules are not warranted Finally seek your dealer or contact a Compuprint office and be sure that are provi...

Страница 198: ...ital apparatus complies with Canadian ICES 003 Cet appareil num rique de la classe A est conform la norme NMB 003 du Canada Statement for CISPR 22 Edition 2 Compliance Attention This is a Class A prod...

Страница 199: ......

Страница 200: ...MAN10296 00 00 Printed in Italy MAN10296 00 00...

Отзывы: