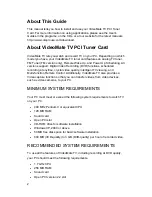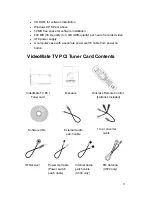
background image


7

Hardware Installation 

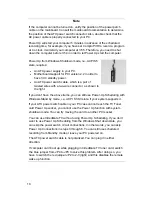
Warning 

Unplug your PC’s main power cord before installing VideoMate TV.


Failure to do so may cause damage to your VideoMate TV tuner card and 
void your warranty. 

1.  Shut down your computer and 

unplug main power cord.


2.  Remove the computer case cover. 

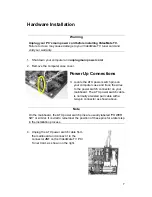
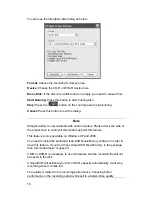
Power Up Connections


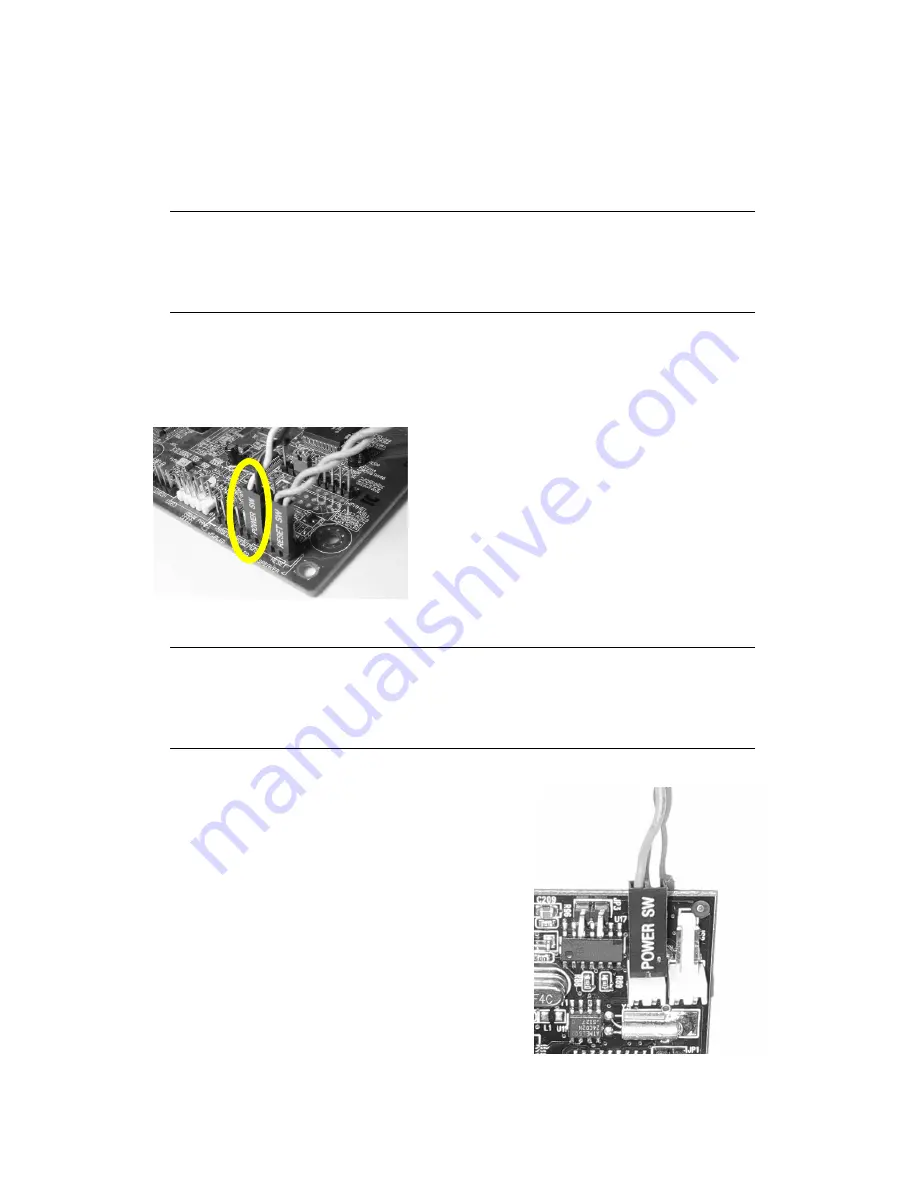
3.  Locate the ATX power switch pins on 

your computer case and trace the wires 
to the power switch connector on your 
mainboard. The ATX power switch cable 
is normally a twisted pair cable with a 
two-pin connector as shown above. 

Note 

On the mainboard, the ATX power switch pins are usually labeled “POWER 
SW” or similar. It is vital to remember the position of these pins for a later step 
in the installation process. 

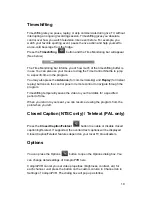
4.  Unplug the ATX power switch cable from 

the mainboard and connect it to the 
connector 

JS1

 on the VideoMate TV PCI 

Tuner Card, as shown on the right. 


Содержание Videomate TV X series

Страница 1: ...Videomate TV X series PCI TV Tuner Card Start Up Guide Compro Technology Inc www comprousa com...

Страница 2: ...pective owners COMPRO makes no warranties with respect to this documentation and disclaims any implied warranties of merchantability quality or fitness for any particular purpose The information in th...

Страница 3: ...uner Card 2 VideoMate TV PCI Tuner Card Contents 3 Remote Control Key Definition and Use 4 VideoMate TV PCI Tuner Card Connectors 6 Hardware Installation 6 Software Installation 11 Remote Wake Up 12 C...

Страница 4: ...al video quality intelligent TV viewing and Multi function Remote Control Additionally VideoMate TV also provides a Video capture function so that you can transfer videos from video devices such as vi...

Страница 5: ...ower supply A computer case with a separate power switch cable from power on button VideoMate TV PCI Tuner Card Contents VideoMate TV PCI Tuner card FM Antenna X500 only External Audio patch cable IR...

Страница 6: ...4 Remote Control Key Definition and Use Please refer to the buttons and their corresponding function listed on the opposite page...

Страница 7: ...pter 21 EPG US only Open on line help Main manual 22 Open setup dialog box Open properties setup dialog box Open properties setup dialog box 23 Up arrow or select Mono Stereo SAP Up arrow Up arrow 24...

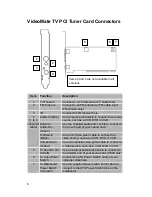
Страница 8: ...S Video In Black Use an S Video patch cable to connect to a video source such as a VCR DVD or VCD 4 1 to 4 converter cable Composite In Yellow Use a Composite video patch cable to connect to a video...

Страница 9: ...ns on your computer case and trace the wires to the power switch connector on your mainboard The ATX power switch cable is normally a twisted pair cable with a two pin connector as shown above Note On...

Страница 10: ...Scheduling is not a required for using VideoMate TV If you don t want to use Power Up Scheduling from the Windows Shut down state you can skip the power switch circuit connections in other words you...

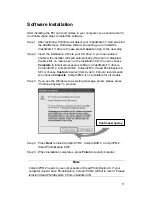
Страница 11: ...the audio source to be CD In in the System Device in Settings of ComproPVR Installation 10 Verify that the power cord to your PC case is unplugged 11 Insert VideoMate TV in an open PCI slot Compro rec...

Страница 12: ...own to the right If you don t have the above items you can still use Power Up Scheduling with Windows Stand by mode i e ACPI S1 S3 state if your system supports it If your ATX power switch cable in yo...

Страница 13: ...lation CD You can choose Complete to install all necessary software VideoMate TV drivers ComproPVR 2 ComproDVD 2 ComproFM 2 Ulead PhotoExplore 8 SE or choose Custom to select item by item Compro recom...

Страница 14: ...n also shut down the computer by remote control as well No more mouse clicks on the screen This feature converts your PC into a convenient home entertainment video appliance Using Remote Wake Up After...

Страница 15: ...Press OK to immediately shutdown the computer When watching TV i e ComproPVR is running Just press the SLEEP button on the lower right corner on the remote keypad repeatedly you will see the text on t...

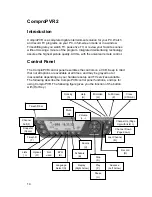
Страница 16: ...s on a VCR Keep in mind that not all options are available at all times and may be grayed out or inaccessible depending on your hardware setup and TV services available The following describe the Comp...

Страница 17: ...he PVR TV button on the remote or double click the ComproPVR icon on the desktop you will be able to watch TV Same as operating a normal TV set Watch TV programs on your PC in full screen mode or in a...

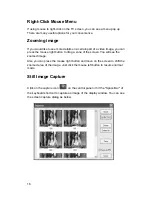
Страница 18: ...ress the mouse right button to drag a zone of the screen You will see the zoomed image Also you can press the mouse right button and move on the screen to shift the zoomed area of the image Just click...

Страница 19: ...ike This is useful to skip recording the commercials 3 Press the Stop button to stop recording 4 When you stop recording ComproPVR prompts you to name the file containing the recorded video Enter the...

Страница 20: ...ide of the product box to confirm if this model supports this feature This feature is only available on Windows XP and 2000 You need to install the bundled Ulead DVD MovieFactory software in order to...

Страница 21: ...nd Replay for instant replay buttons on the control panel or remote control to navigate through the program Timeshifting temporarily saves the video to your hard disk for a specified period of time Wh...

Страница 22: ...e This manual only provides basic information for the ComproPVR 2 For more information on using applications please see the User s Guides in the programs on the CDs or at our website for the latest ma...

Страница 23: ...anual in the installation CD Control Panel The following describe the ComproDVD control panel functions and tips for using ComproDVD The following figure gives you the function of the button with Hot...

Страница 24: ...check the help file of ComproFM or the manual in the installation CD Control Panel The following describe the ComproFM control panel functions and tips for using ComproFM The following figure gives y...

Страница 25: ...tatus of the drivers with Device Manager You should see the following four drivers in the Sound video and game controllers section of Windows Device Manager Compro VideoMate X series Audio Capture Com...

Страница 26: ...ce shares an IRQ with the TV tuner card remove other PCI cards from your PC and insert TV card on the third or fourth slot from AGP only if available Then uninstall and reinstall the TV card driver Th...

Страница 27: ...hardware installation section for more information Second make sure you see a green LED light on the VideoMate TV tuner card If you don t see the green light your motherboard does not support the sta...

Страница 28: ...n reason for this problem usually is the result of an IRQ conflict Please see Driver Installation above to solve it Video OK No Audio If you can view the TV picture but get no audio you should check t...

Страница 29: ...to CD In If so please select the audio source to CD In Check the recording volume levels in the ComproPVR Recording tab in the Settings dialog How to recorded file from VCR Please plug VCR Composite v...

Страница 30: ...loose Please unplug it and plug it again You should also check the batteries of the remote control Do not use rechargeable batteries Verify that the IR icon ComproRemote is in the system tray on the l...

Страница 31: ...SABLE CPU to PCI write buffer DISABLE PCI Latency Timer a higher value 64 can help image quality TV is not clear TV signal could be reduced by the branching Please make sure the cable signal is good T...

Страница 32: ...of the requested information as possible Please write the details in order to determine the problem And also provide the product serial number 19 digits numbers on the PCI card Please use the form fr...

Отзывы: