4
'"
$
&
.,
)
%
0
'2
'"
$
&
.,
)
%
0
'2
5.1 Add Photos
In the “Browse for Images” window, select the storage directory and the target folder for
storage, and then the photos will be shown on the “Browse for Images” window. Select the
desired photo, and a blue box will be shown around the photo. In addition, the selected photo
will be displayed on the “Preview” window; select
button to add the
photo to the “New Collection Panel” window.
Note
(1) Before adding photos, the “Photos on Device” window displays items for selection. When
no selection is made, the added photo will be automatically cut into the size fitting for digital
photo frame’s screen. When selecting the option of “Whole Photo”, the added photo will be
completely displayed in all images, and the unoccupied place will be in black.
(2) Press “CTRL” button, and left click the mouse to choose more than one photos.
5.2 Crop Photos
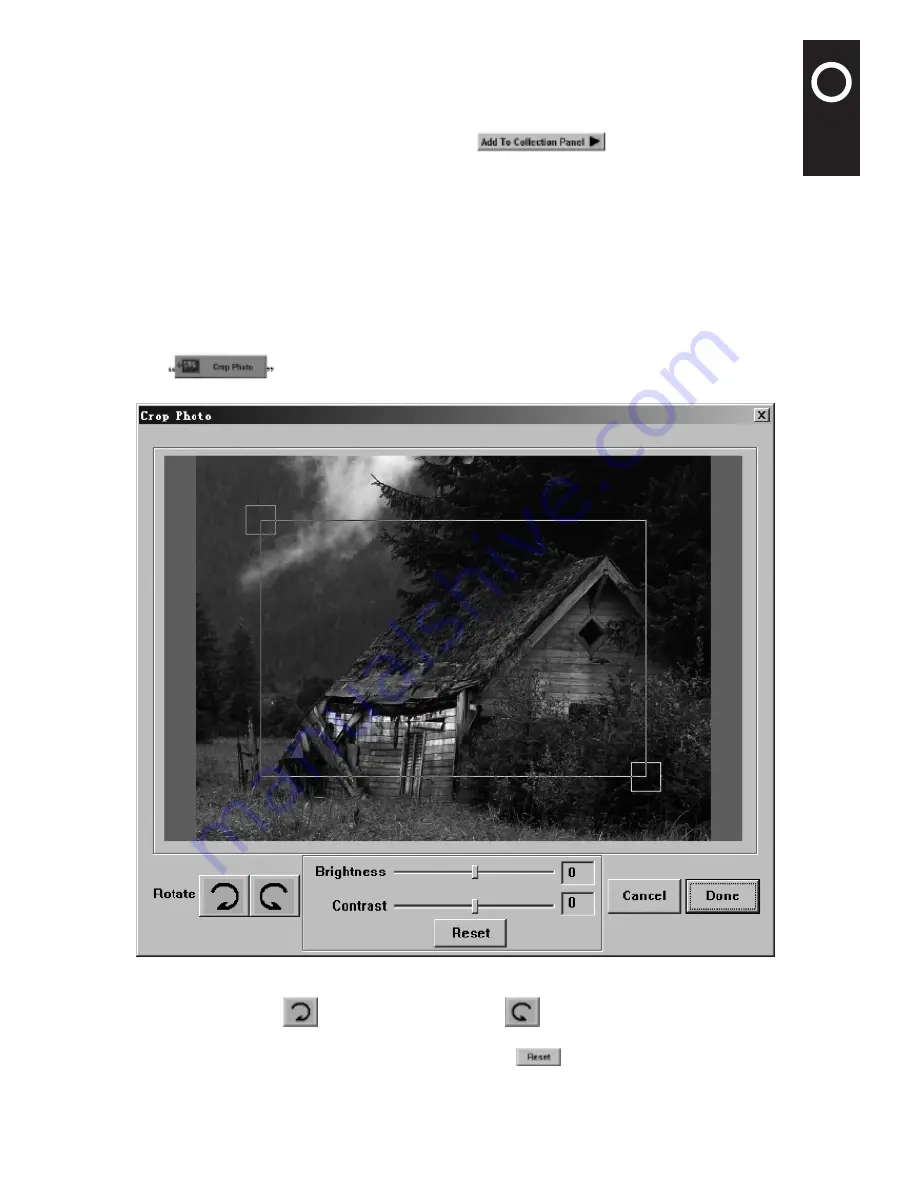
Click
button to open the “Crop Photo” window (Figure 2) where you can crop
the selected photos.
Figure 2
• Click the clockwise
button and anticlockwise
button to rotate the photos;
• Drag the brightness sliding block to adjust the photo’s brightness, drag the contrast
sliding block to adjust the photo’s contrast, and click
button to resume the original
brightness and contrast of the photos.
• In the Photo Viewer, the rectangle selection box will be shown in the “Crop Photo” window.


