background image

24 

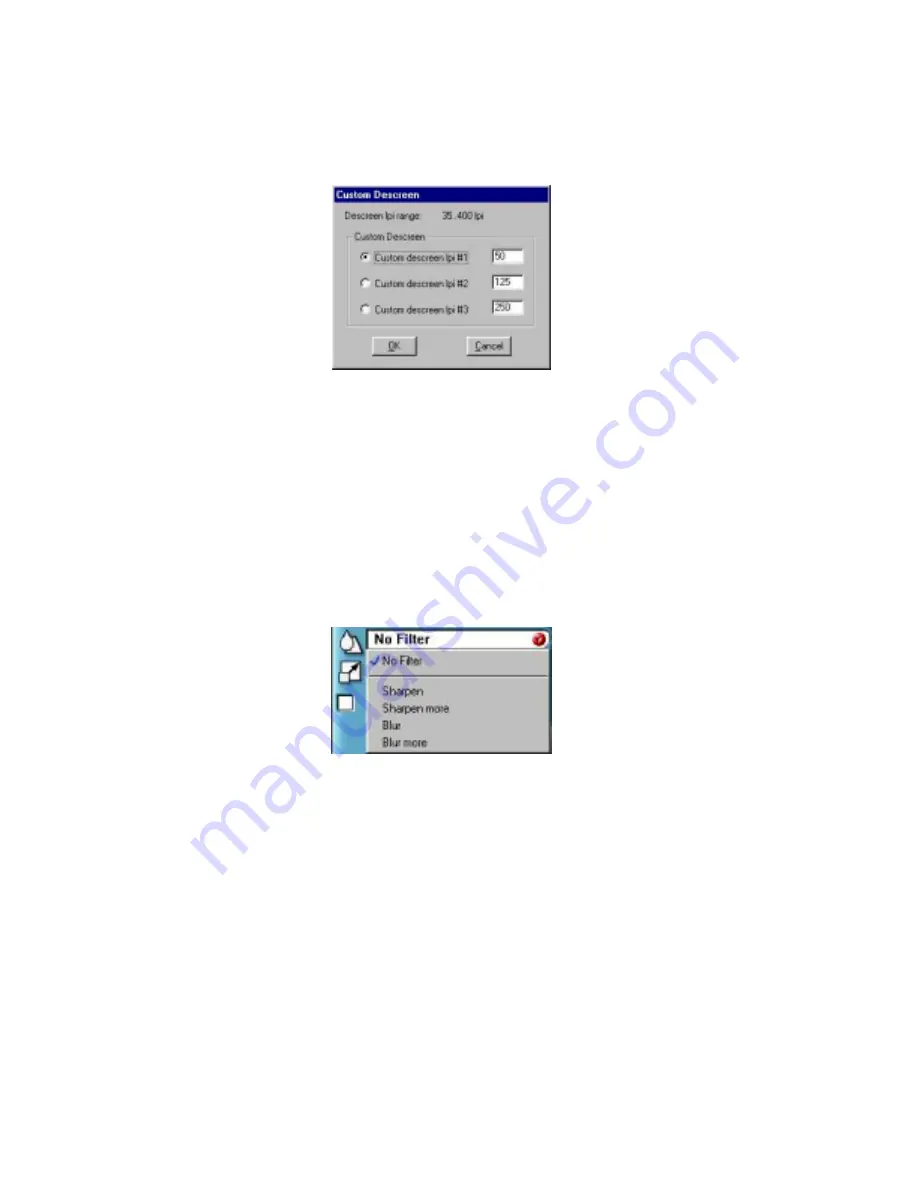
enter custom settings that range from 35 to 400 lines per inch. To 
define the custom descreen settings: 


1. 

Choose the 

Custom…

 option from the Descreen drop down 

menu. The Custom Descreen window opens.  


2. 

Enter the desired lines per inch setting (between 35 and 400 lpi) 
in the Custom descreen lpi #1 text box. 

3. 

Repeat step 2 to define the Custom descreen #2 and Custom 
descreen #3 settings. 

4. 

Click OK. The settings you defined appear on the Descreen 
setting drop down menu, under the Custom heading. 


Changing the Filter Setting 

Image filters are used to soften or sharpen edges and boundaries of 
an image.  


VistaScan provides the following filter options: 
 

Содержание S4 100

Страница 1: ...COMPAQ S4 100 Scanner OWNER S GUIDE P N 83100199 0000...

Страница 2: ...NT IN NO EVENT SHALL COMPAQ BE LIABLE FOR ANY DIRECT CONSEQUENTIAL INCIDENTAL SPECIAL PUNITIVE OR OTHER DAMAGES WHATSOEVER INCLUDING WITHOUT LIMITATION DAMAGES FOR LOSS OF BUSINESS PROFITS BUSINESS IN...

Страница 3: ...Adapter 6 CHAPTER 2 SCANNING BASICS 7 Open the VistaScan software application 7 Setting VistaScan Preferences 7 General 8 Scan Destination 9 Scanner Information 11 VistaScan Beginner Window Features 1...

Страница 4: ...ne Manual 57 Accessing the Presto PageManager Online Manual 57 Troubleshooting 58 General Problems and Solutions 58 Windows 98 98SE 2000 ME Problems and Solutions 58 Contacting Technical Support 63 Ma...

Страница 5: ...ful software included with your scanner you can create an archive of scanned images e mail or fax images to friends or clients Get ready to unleash your creativity with the Compaq scanner Unpacking th...

Страница 6: ...hics below identify the key scanner components Scanner Elements Scanner Back Panel Document Cover The plastic cover that protects the object glass Object Glass The glass surface on which documents or...

Страница 7: ...e minimum system requirements necessary to operate the Compaq scanner PC Requirements An IBM compatible PC with Pentium processor or higher Microsoft Windows 98 98SE 2000 ME USB interface connector At...

Страница 8: ...ned on this disk after inserting it into the CD ROM click on the Start bar select Run A dialog box appears Type d setup in the dialog box If your CD ROM is designated with another letter substitute th...

Страница 9: ...lly configures peripherals If your computer has a USB port you must make sure that this port is enabled in the system Checking Your Computer s Connectors To use your scanner you need to understand wha...

Страница 10: ...he USB cable that is provided Plug one end of this cable firmly into the USB port on the back of the computer For Compaq Scanner 2 Plug the other end of this cable into the port located on the back pa...

Страница 11: ...scanner icon in the Task bar using your right mouse button A pop up menu appears b Click on VistaScan to launch the software Or you can also a Click on the Start bar in the bottom left corner of the...

Страница 12: ...Color Matching Correction Color Matching allows you to fine tune the colors of scanned images so that they emulate the colors of your original source documents as closely as possible A profile is a li...

Страница 13: ...he checkmark and hides the ruler Clicking on the checkbox again turns the feature on displays a checkmark and shows the ruler Tips Help The Tips Help option determines whether tips are displayed when...

Страница 14: ...ile Name text box 4 Select the file format in which you want to save scanned images from the File Format drop down list Printer To specify which printer to use when printing scanned images 1 Click on...

Страница 15: ...ox opens Make any changes you want and then click OK to return to the Preference settings Application 1 Click on the Application icon 2 Enter the application name to which you want to send the scanned...

Страница 16: ...12...

Страница 17: ...ars when you launch VistaScan The features of the VistaScan Beginner window let you scan a wide variety of documents photos and graphics Just click a button Scanning an item via the Beginner window co...

Страница 18: ...w the item you are going to scan 1 Place the item you want to scan face down on the object glass under the inverted triangle that appears in the center of the rear ruler 2 Click the Preview button on...

Страница 19: ...ning the cursor inside the frame which changes the cursor shape to a four direction arrow and dragging the frame to another location in the Preview window Move tool Lets you move an image in the Previ...

Страница 20: ...ou want to scan color or black and white photos Printed Matter use this setting when you want to scan something that has been printed like a brochure magazine etc Text Lineart use this setting when yo...

Страница 21: ...e the VistaScan Beginner window until you are more familiar with VistaScan and the scanning process The Beginner window options are preset to provide a quick and easy way to scan images If you are an...

Страница 22: ...he following settings Flatbed Reflective Scans paper originals non transparencies e g photographs documents and brochures Three other setting options appear onscreen that are not available with this s...

Страница 23: ...ns black and white photos using 256 shades of gray ranging from white to black so you get smooth shade transitions in your scanned image B W Document Scans text documents black and white line art and...

Страница 24: ...easured in dots per inch DPI Resolution determines the amount of information the scanner will capture in a scanned image The higher the resolution the finer the image detail and the larger the file si...

Страница 25: ...0 385 20 NOTE Choosing the True Color RGB 42 bit setting captures more data than the 24 bit setting This means that the file sizes listed above will be larger if you scanned images using the True Colo...

Страница 26: ...olution 1 text box 3 Repeat step 2 to define the Custom resolution 2 and Custom resolution 3 settings 4 Click OK The settings you defined appear on the Resolution setting drop down menu under the Cust...

Страница 27: ...ommonly found in newspaper images Art print Specifies 175 lines per inch Smoothes the fine dot pattern found in high quality art prints Custom Opens the Custom Descreen window which allows you to spec...

Страница 28: ...nes per inch setting between 35 and 400 lpi in the Custom descreen lpi 1 text box 3 Repeat step 2 to define the Custom descreen 2 and Custom descreen 3 settings 4 Click OK The settings you defined app...

Страница 29: ...s option when you want to soften the edges more than the Blur filter does Changing the Scale Factor Scaling lets you automatically enlarge or reduce an image from its original size 100 as it is scanne...

Страница 30: ...utomatically changes the other field If the scale output size is unlocked you can set the width and height output dimensions individually 3 To change the unit of measure click on the down arrow next t...

Страница 31: ...Scan online help you must have a browser installed on the system 4 Click the Auto Adjustment check box The selected area is adjusted and the preview image refreshes displaying the results you can expe...

Страница 32: ...ication Using the Multiple Scan Mode You can select multiple portions of the image you scanned in Preview mode using the Multiple Frame tool The Multiple Frame tool allows you to create two or more se...

Страница 33: ...me 1 Click on the Job List button Thumbnails of the selected frames appear in the job list window 2 Click on the thumbnail of the frame you want to remove A red box appears around the selected thumbna...

Страница 34: ...ragging the slider in one of the bars to the left or the right Using the Brightness Bar This setting determines the overall intensity level gray level of an image Moving the slider on the scroll bar t...

Страница 35: ...rast setting is 100 the minimum setting is 100 Highlight Bar This setting defines the lightest whitest tones in the scanned image If you broaden the range that includes the highlight points the pixels...

Страница 36: ...is 0 Gamma Bar The Gamma bar alters the mid range gray tones in the scanned image All optical devices such as monitors and scanners have some variance in their light sensitivity characteristics To get...

Страница 37: ...ges Using this feature corrects the gray color values in an image You change the values by altering the shape of the curve that represents the brightness values of pixels Click Reset to cancel the cha...

Страница 38: ...value to default setting Rotating Inverting an Image You can rotate an image clockwise or counter clockwise and you can flip images 180 degrees vertically or horizontally The following lists the poss...

Страница 39: ...nal orientation Using VistaAccess VistaAccess is a utility that provides instant access to several VistaScan applications VistaAccess loads at startup and can be found in the system tray When VistaAcc...

Страница 40: ...ion from the VistaAccess menu The VistaShuttle Main window appears You would click on the Start bar and then click on the Programs option When the Programs pop up menu appears click the VistaShuttle o...

Страница 41: ...play the image handles Drag one of the image handles outward to enlarge the image or inward to reduce the image You can customize the E Card template frame that surrounds the scanned item the stamp gr...

Страница 42: ...button to open the application and attach your E Card to the message 15 Send your e mail message Using the Copy Utility The Copy utility is an application that lets you scan and automatically print co...

Страница 43: ...r Gray or B W The Single Photo option automatically crops unnecessary white space around the image no matter where the image is placed reducing memory storage space and speeding up the scanning Printo...

Страница 44: ...staAccess or by pushing Power Saving button on the front panel of your scanner Turning off the scanner lamp when you are not scanning prolongs the life of the lamp To turn the scanner lamp off Click i...

Страница 45: ...ing to launch the software applications through the onscreen interface Before you can use these time saving functions you need to configure the settings for each button Follow the appropriate set of i...

Страница 46: ...dow Each icon represents a separate scanner button function Clicking on the icon displays a window with variables NOTE You could click the check box Intelligent Image Process Engine in the Push button...

Страница 47: ...p down list click the Add button to the right of the scan Destination drop down list The Add Application window opens Enter the application name in the Application Name text box Enter the path and the...

Страница 48: ...an push button configuration settings These settings will be used whenever you press the Scan button on the front of the scanner Configuring the Copy Button Values 1 Click the Copy icon to open the wi...

Страница 49: ...ng on the arrow to the right of the Scan Area field and choosing the desired dimensions from the drop down menu 7 Click the OK button to save the Copy push button configuration settings These settings...

Страница 50: ...the arrow to the right of the Resolution field and choosing one of resolution presets from the drop down menu 5 Select a scanning intensity level brightness by clicking on the arrow to the right of t...

Страница 51: ...he desired resolution by clicking on the arrow to the right of the Resolution field and choosing one of resolution presets from the drop down menu 5 Select a scanning intensity level brightness by cli...

Страница 52: ...lect values for Document Type Resolution Brightness nor for Scan Area 4 Click the OK button to save the Custom OCR push button configuration settings The Custom setting is now configured to scan OCR a...

Страница 53: ...wner s Guide 49 2 A Scan Progress window appears showing you the status of the scanning task 3 When the scan is complete the image you scanned appears in the application you specified when you configu...

Страница 54: ......

Страница 55: ...Click on the Start bar in the bottom left corner of the screen b Click Programs c Select VistaScan d Click VistaScan 2 The VistaScan Beginner window appears Lift the scanner s document cover and place...

Страница 56: ...int instructions then proceed with the following steps 1 Click on the E mail icon to set the scanner settings to the best values for scanning an image to e mail NOTE You may need to adjust the destina...

Страница 57: ...he File menu A window appears choose VistaScan Select Acquire from the File menu The VistaScan Beginner window appears 7 Lift the document cover and place the form you want to scan face down in the ce...

Страница 58: ...le menu A window appears choose VistaScan Select Acquire from the File menu The VistaScan Beginner window appears 7 Lift the document cover and place the form you want to scan face down in the center...

Страница 59: ...PageType application icon PageType opens and automatically displays the scanned form 12 Fill in the form text desired using the PageType tools 13 Save the image when you have finished editing the form...

Страница 60: ......

Страница 61: ...y is an online manual Read the following information to find out how to access the manuals for each individual software application Accessing the Compaq VistaScan Online Manual If the VistaScan applic...

Страница 62: ...anged Please contact your dealer or Compaq Technical Support Problem The scanner test failed The scanner test utility is a PC based utility Solution Make sure the interface cable is properly connected...

Страница 63: ...nager should be Universal Serial Bus Controllers 4 Click the beside the Universal Serial Bus Controllers entry Two items display your chipset PCI to USB Open Host Controller and Root Hub If a yellow e...

Страница 64: ...e right mouse button A pop up menu appears 2 Click on Properties command using the left mouse button This brings up the Device Manager 3 In the Device Manager click the symbol beside the System Device...

Страница 65: ...reinstall VistaScan 5 Verify there is power to the scanner 6 Unplug the scanner cable from the back of the computer and then plug it back into the USB port 7 If the scanner does not show up and there...

Страница 66: ...cond section This number should be above 90 5 If not press and hold down the CTRL ALT keys and tap the Delete key once This brings up the Close Programs window 6 You need to end all tasks running exce...

Страница 67: ...del and serial number The version number of the scanner driver located on the front of the CD The computer model you are using The application software packages that you are using Error codes or messa...

Страница 68: ...fore you clean the glass make sure the scanner is turned off and the power cord is unplugged Clean the object glass and document cover with a soft damp cloth and a mild detergent or alcohol Warning Do...

Страница 69: ...Element Color CCD Optical Resolution Maximum Resolution 600 dpi x 1200 dpi 9600 dpi x 9600 dpi Color Density 42 bit color Internal Light Source Cold Cathode Lamp Optics Enclosed Optical System Interf...

Страница 70: ...e this product near water or in rainy moist environment Do not place the scanner on an uneven surface This may cause serious damage to the scanner The product should be operated using only the type of...

Страница 71: ...ny interference received including interference that may cause undesired operation For questions regarding your product contact Compaq Computer Corporation P O Box 692000 Mail Stop 530113 Houston Texa...

Страница 72: ...3 EEC issued by the Commission of the European Community Compliance with these directives implies conformity to the following European Norms in brackets are the equivalent international standards EN55...

Страница 73: ...9 Modifications The FCC requires the user to be notified that any changes or modifications made to this device that are not expressly approved by Compaq Computer Corporation may void the user s author...

Страница 74: ...70 Cables Connections to this device must be made with shielded cables with metallic RFI EMI connector hoods in order to maintain compliance with FCC Rules and Regulations...

Отзывы: