860479229
Instruction Sheet
www.commscope.com
Page 14 of 15
•
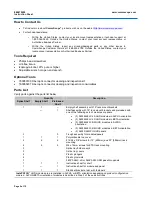
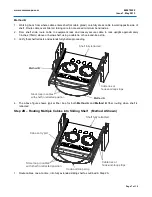
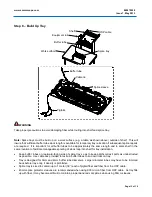
Install splice sleeves into lower position of holders by firmly pressing them down into retention features with 2
index fingers. One finger is sufficient for placing sleeves into the upper (stacked) position. Use orange stick
or similar device to remove sleeves for repairs. Press down on the holder to support it when removing a
splice sleeve.
•
Wind patchcord groups in opposite directions (clockwise & counter-clockwise) inside tray to keep lengths
exiting tray consistent for better dressing at termination. Use hook and loop ties to bundle and restrain
pigtails, as required.
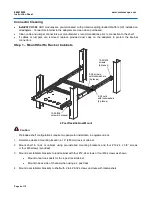
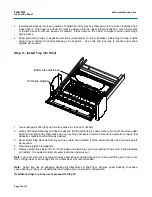
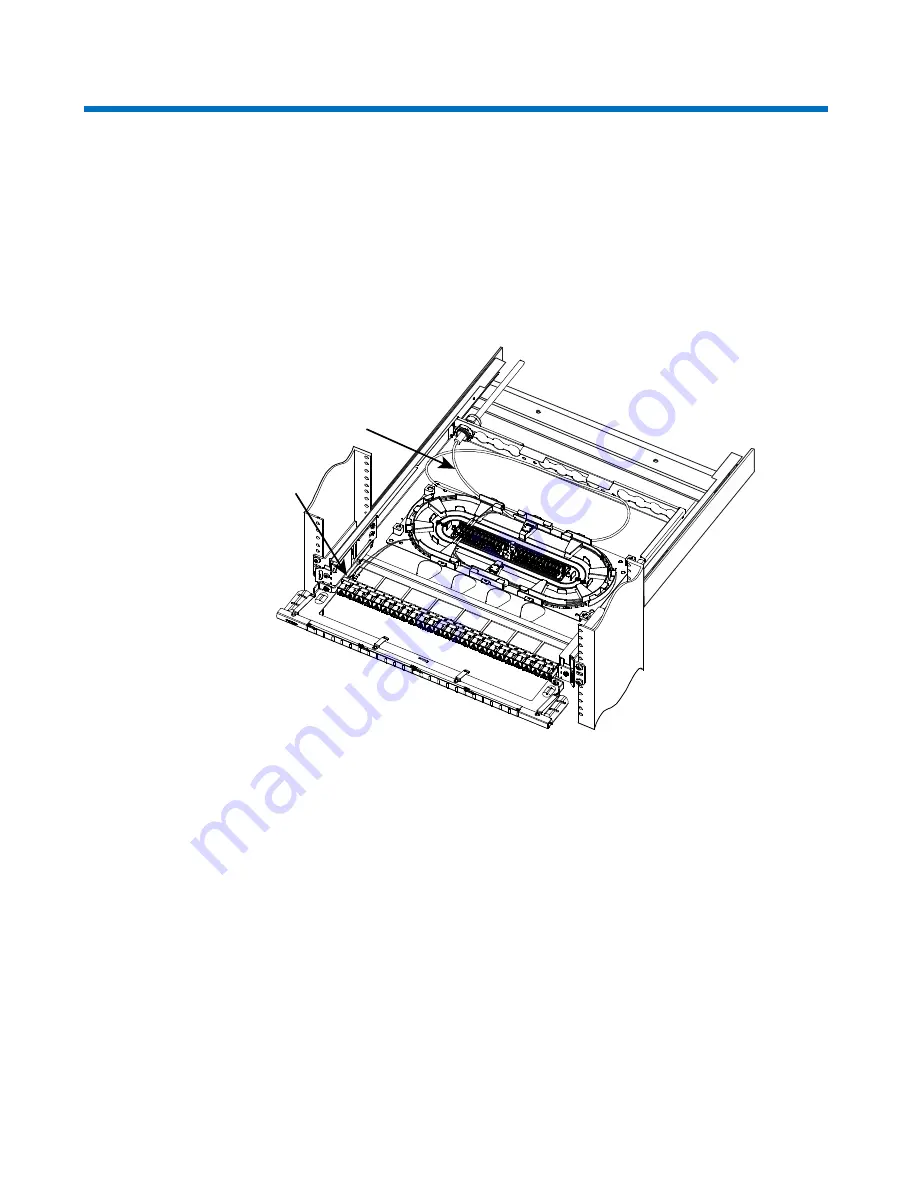
Step 9 – Install Tray into Shelf
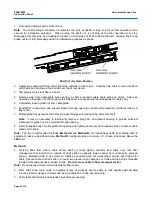
Buffer tube slack loop
Terminate pigtails
1. Use isopropyl alcohol (IPA) and lint-free wipes to clean floor of shelf.
2. Gently, lift and position tray and fiber as desired (UHD positioning is shown above) into shelf. Remove paper
backing from splice tray and press down on tray firmly at several locations around its perimeter to insure that
adhesive contacts shelf surface as desired.
3. Spool buffer tube slack behind tray and use cable ties to attach it at the external buffer tube tie-down points
as required.
4. Terminate pigtails into adapters.
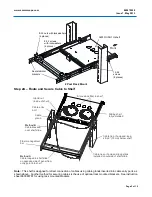
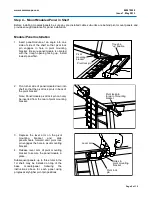
5. Remove protective plastic film from both sides and install top cover by pressing it down onto 6 snap features
on holders. It is easiest to start at center locations and work out.
Note
: Top cover removal is accomplished by depressing snap features one at a time and lifting up on the cover.
Use of finger nails or an orange stick (or similar device) is recommended.
Note:
Splice tray has an adhesive backing for attachment to shelf floor. Remove paper backing to expose.
Leave backing in place on all additional trays when used in a stacked configuration.
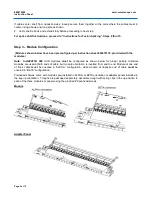
If additional trays are to be used, proceed to Step 10.


