User’s Manual
54
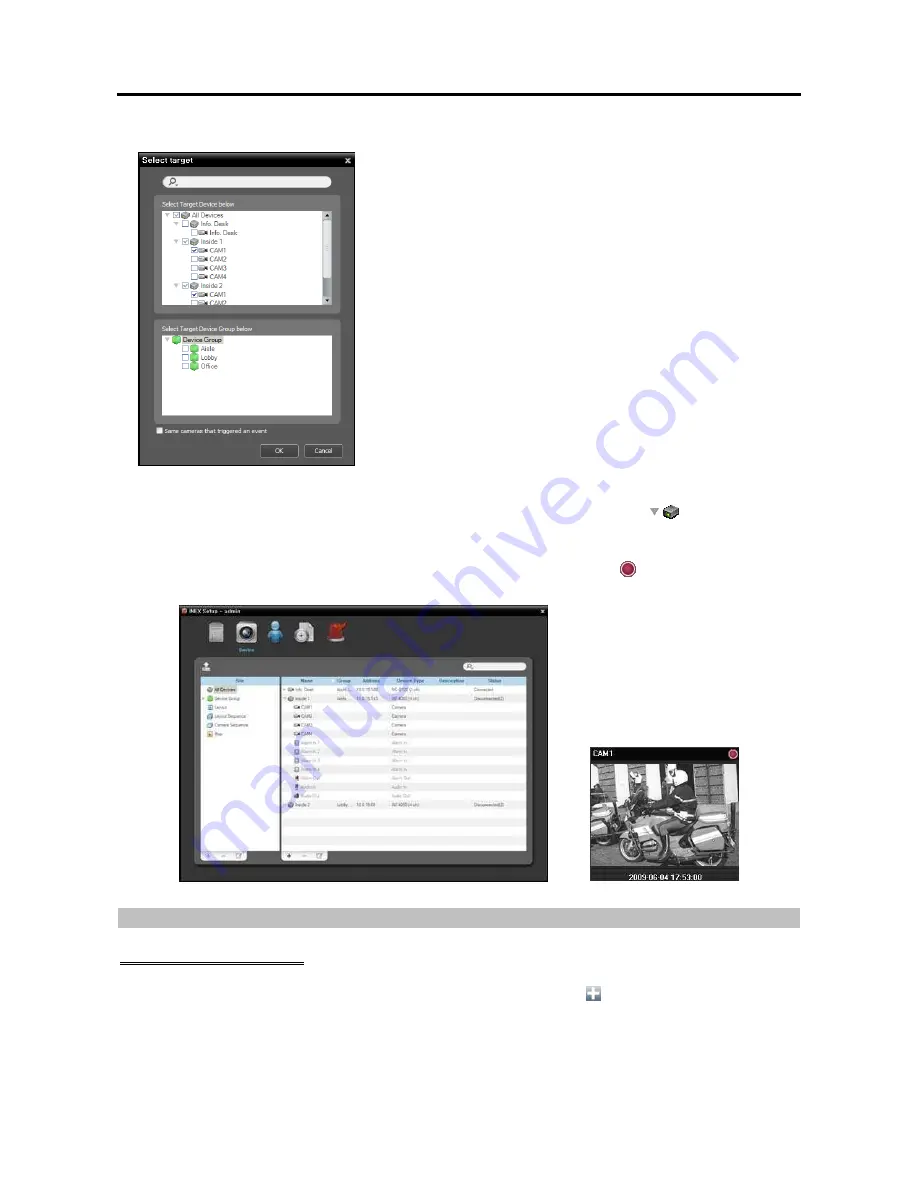
4. Select the cameras to record after double clicking the
Target
schedule window.
Select cameras from the device list or device groups from the device
group list from which to record video whenever any predefined event
is detected. Selecting the
Same cameras that triggered an event
option records video only from the camera where the predefined event
is detected (not supported for alarm-in events and audio detection
events). The
Same cameras that triggered an event
option is
not supported for Pre-Event recording.
5. You can check the recording status in the
Device
menu. Click
All Devices
in the
Site
panel and all
registered devices are displayed in the Site List panel. Click the arrow button (
) beside the device
name, and check the status (
Record
: During Time-Lapse recording or Event-Based recording,
Instant
Recording
: During Instant recording,
Idle
: Ready to record,
Not Use
: Camera disabled,
Video Loss:
On video loss). The Time-Lapse Recording or Event-Based Recording OSD (
) is displayed in the upper
right corner of the camera screen of the Live screen in the Client program.
Managing Schedule
Adding a New Schedule
Adding a new schedule with a different time range:
Clicking the
button in the upper left corner
of the
Time Coverage
schedule window allows you to add a new schedule with a different time range.
Содержание IPNVR016A
Страница 2: ......
Страница 4: ......
Страница 9: ...Network Video Recorder vi ...
Страница 10: ......
Страница 24: ...User s Manual 14 ...
Страница 42: ...User s Manual 32 ...
Страница 56: ...User s Manual 46 ...
Страница 98: ...User s Manual 88 ...
Страница 112: ...User s Manual l2 ...
Страница 136: ...User s Manual 126 ...
Страница 138: ...User s Manual 128 ...
Страница 139: ......


