background image

Code Blue


 259 Hedcor Street 

 Holland, MI 49423 USA 

 800.205.7186 

 www.codeblue.com

GU-156-I

page 11 of  26

CB 6 Series

Administrator Guide

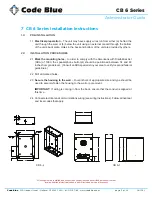
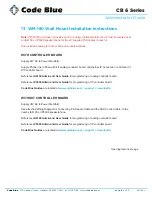
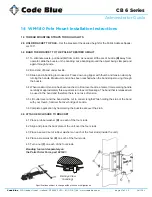
7  CB 6 Series Installation Instructions

1.0  

PRE-INSTALLATION 

1.1 

Electrical preparation

 – The unit may have supply wires run from either (a) behind the 

unit through the wall, or (b) below the unit using an external conduit through the bottom 

of the unit’s back plate. Holes in the back and bottom of the unit are provided by others.

2.0  

INSTALLATION PROCEDURES

2.1 

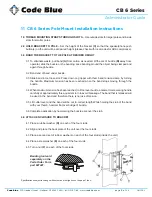
Mark the mounting holes

 – In order to comply with the Americans with Disabilities Act 

(ADA) of 1990, the speakerphone  button(s) should  be positioned  between  34 and 48 

inches from grade level.  (Consult an ADA specialist in your area to verify local and federal 

guidelines.)

2.2 Drill all marked holes.

2.3 

Secure the housing to the wall

 – Four anchors of appropriate size and type should be 

used to securely fasten the housing to the wall or pole mount.

IMPORTANT:

  If wiring is coming in from the back, ensure that the conduit is aligned at 

this time.

2.4  Connect electrical and communications wiring (see wiring instructions). Follow all national 

and local codes that apply.

All wiring must be installed and connected by experienced and certified personnel to meet

local and national electrical codes, and will include a service disconnect.

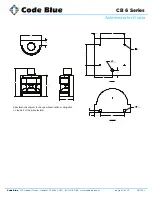
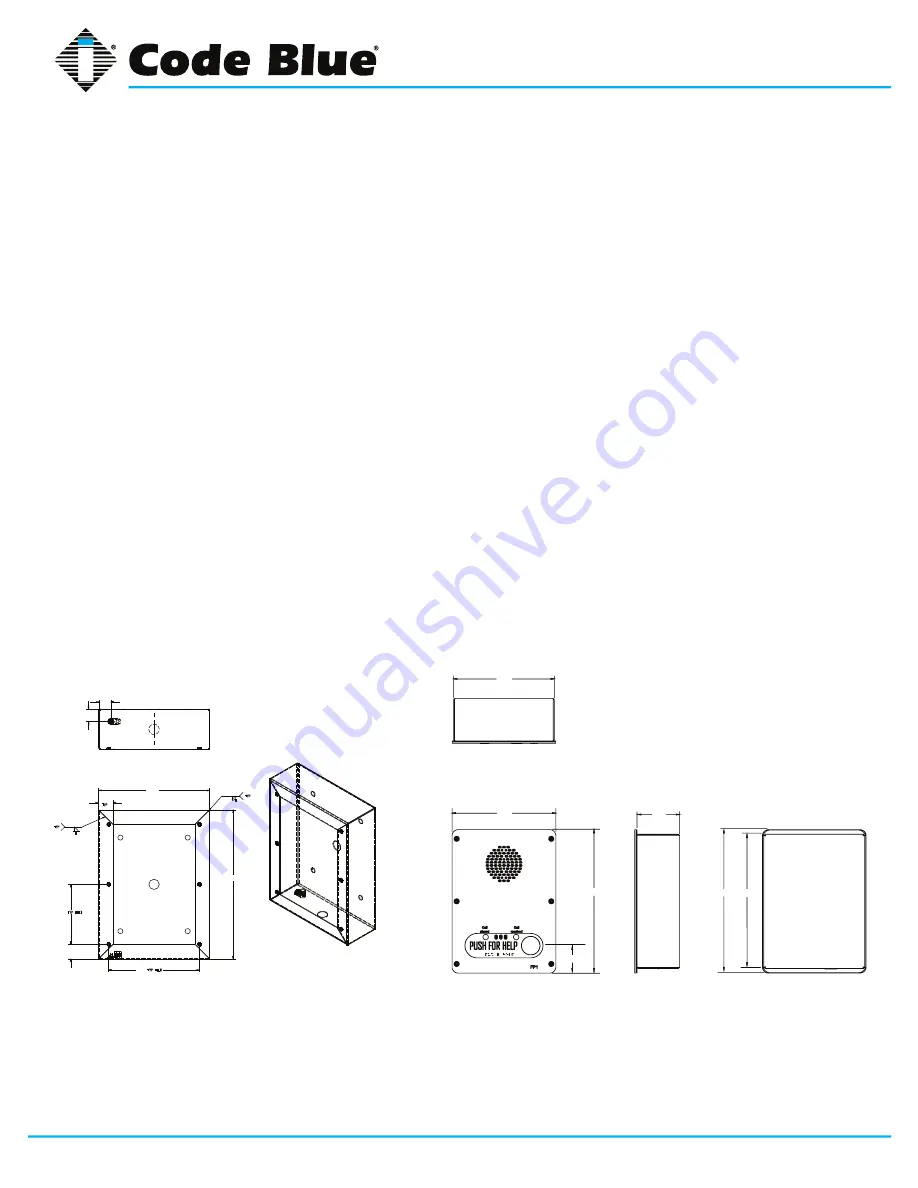
CB 6-f

8.50

11.75

8.25

3.50

11.75

11.00

2.25

CB 6-s

1.00

1.00

9.50

1.25

1/16

5.13

1.25

7.75

12.75

1/16

1.00

1.00

9.50

1.25

1/16

5.13

1.25

7.75

12.75

1/16

Содержание CB 6 Series

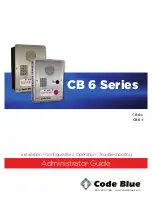
Страница 1: ...800 205 7186 www codeblue com Administrator Guide CB 6 Series CB 6 s CB 6 f Installation Configuration Operation Troubleshooting...

Страница 2: ...TO THIS GUIDE THE SOFTWARE OR OTHER INFORMATION CONTAINED HEREIN AND HEREBY EXPRESSLY DIS CLAIMS ANY IMPLIED WARRANTIES OF MERCHANTABILITY OR FITNESS FOR ANY PARTICU LAR PURPOSE WITH REGARD TO THIS G...

Страница 3: ...ments 8 6 Software Configuration 10 7 CB 6 Series Installation Instructions 11 8 CB 6 Series Remote Mount Beacon Strobe Installation 12 9 S 1000 S 1050 Installation Instructions 13 10 PoE Installation...

Страница 4: ...ed structures The exclusive analog InterAct and VoIP speakerphones are designed for maximum reliability vandal resistance auxiliary functions mass notification control and fault monitoring and reporti...

Страница 5: ...GU 156 I page 5 of 26 CB 6 Series Administrator Guide This guide contains all of the Code Blue CB 6 Series information for the CB 6 s and CB 6 f This guide contains a general overview of the Code Blue...

Страница 6: ...rphones require programming before operation Consult the User Guide or Admin istrator Guide enclosed with the unit or go to www codeblue com Support Downloads to read or download manuals 4 If you are...

Страница 7: ...eplate Screws 41544 6pk Manifold R B 5 way 40101 Analog Surge Suppressor 41471 IP Surge Suppressor 41421 CB 6 Series Additional Options Part Part Number Pole Mount kit 40027 Remote Mount Beacon Strobe...

Страница 8: ...Street Holland MI 49423 USA 800 205 7186 www codeblue com GU 156 I page 8 of 26 CB 6 Series Administrator Guide 5 Power Requirements The following power requirements include the 6 Series and also ALL...

Страница 9: ...Code Blue 259 Hedcor Street Holland MI 49423 USA 800 205 7186 www codeblue com GU 156 I page 9 of 26 CB 6 Series Administrator Guide...

Страница 10: ...ts effectively by re motely controlling emergency communication devices with an easy to use Graphical User Interface GUI You also will have the ability to open gates and AED access doors turn LED beac...

Страница 11: ...should be positioned between 34 and 48 inches from grade level Consult an ADA specialist in your area to verify local and federal guidelines 2 2 Drill all marked holes 2 3 Secure the housing to the w...

Страница 12: ...K fasten the strobe J to the round portion of the strobe bracket NOTE If the beacon strobe is mounted upside down a drain hole must be drilled into the lens to prevent it from filling with water 3 0 A...

Страница 13: ...THE UNIT OPERATION To activate the LEDs in the PRIMARY STEADYBURN MODE connect the BLACK and RED wires to 12 24 volts AC or DC When in PRIMARY STEADYBURN MODE to change the LEDs to SECONDARY FLASH MOD...

Страница 14: ...r disconnected for 20 seconds BEFORE reapplying When power is reapplied the unit will operate as programmed above NOTE If you do not leave power disconnected for 20 seconds before reapplying power the...

Страница 15: ...Code Blue 259 Hedcor Street Holland MI 49423 USA 800 205 7186 www codeblue com GU 156 I page 15 of 26 CB 6 Series Administrator Guide 10 PoE Installation Instructions PoE extractor...

Страница 16: ...ning the handle Maximum tension has been reached when the band stops moving through the buckle 3 4 When maximum tension has been reached roll tool over buckle at same time reversing handle carefully a...

Страница 17: ...d Wiring Product wiring diagram shown reasonably represents current offering and is intended to assist in component identification and service Earlier product production may have different components...

Страница 18: ...ard or Ethernet IP Connection to LAN port if IP Controller board Reference IA4100 Admin and User Guide for programming of analog controller board Reference IP5000 Admin and User Guide for programming...

Страница 19: ...wiring diagram shown reasonably represents current offering and is intended to assist in component identification and service Earlier product production may have different components and wiring connec...

Страница 20: ...I page 20 of 26 CB 6 Series Administrator Guide 15 00 3 50 15 12 20 10 10 40 Specifications subject to change without notice or obligation on the part of the manufacturer 2 50 10 00 75 1 13 CONDUIT HO...

Страница 21: ...e buckle 3 4 When maximum tension has been reached roll tool over buckle at same time reversing handle carefully at approximately three quarters turn to avoid breakage The band that is released will b...

Страница 22: ...ections are tight and clean Verify no stains exist around gasket areas Stains indicate leaking and gasket should be replaced Verify moisture weep hole on cabinet bottom is open and unobstructed Verify...

Страница 23: ...adhered to The Surface Care Frequency table below provides general guidelines to assist in configuring a schedule Please note that the frequency of care required to guard the Code Blue unit s surface...

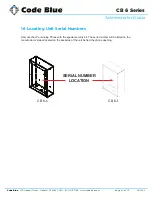
Страница 24: ...24 of 26 CB 6 Series Administrator Guide 16 Locating Unit Serial Numbers Remove the IP or Analog Phone with the special security bit The serial number will be listed on the manufacturer s label locat...

Страница 25: ...port for this product while under warranty is available at www codeblue com support In Case of Breakdown In case of system breakdown discontinue use and contact Tech Support at ts codeblue com or call...

Страница 26: ...e www codeblue com support 9 IA4100 Administrator Guide www codeblue com resources guides 10 IA3100 to IA4100 Upgrade Installation www codeblue com support faq 11 IP5000 Administrator Guide www codebl...

Отзывы: