


8
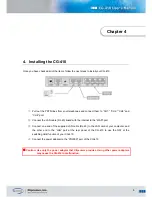
4. Installing the CG-410
Once you have checked all of the items, follow the next steps to install your CG-410.
①
Pull out the PSTN lines from your telephones and connect them to “CH1,” “CH2,” “CH3” and
“CH4” port.
②
Connect the LAN cable (RJ-45) linked with the Internet to the “WAN” port.
③
Connect one end of the supplied LAN cable (RJ-45) to the LAN card of your computer, and
the other end to the “LAN” port at the rear panel of the CG-410 to use the NAT or the
switching HUB function of your CG-410.
④
Connect the power adapter to the “POWER” port of the CG-410.
※
Caution: Use only the power adaptor that Clipcomm provides. Using other power adapters
may cause the CG-410 to malfunction.
Chapter 4
Содержание CG-410
Страница 1: ...1 ...
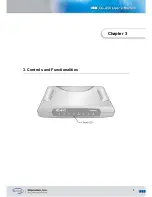
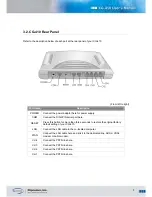
Страница 5: ...5 3 Controls and Functionalities Chapter 3 ...
Страница 35: ...35 ...