Disassembly
2 - 12 Removing the 3.75G Module
2.Disassembly
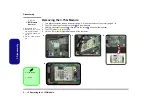
Removing the 3.75G Module
1.
Turn
off
the computer, remove the battery (
) and the component bay cover (
.
2.
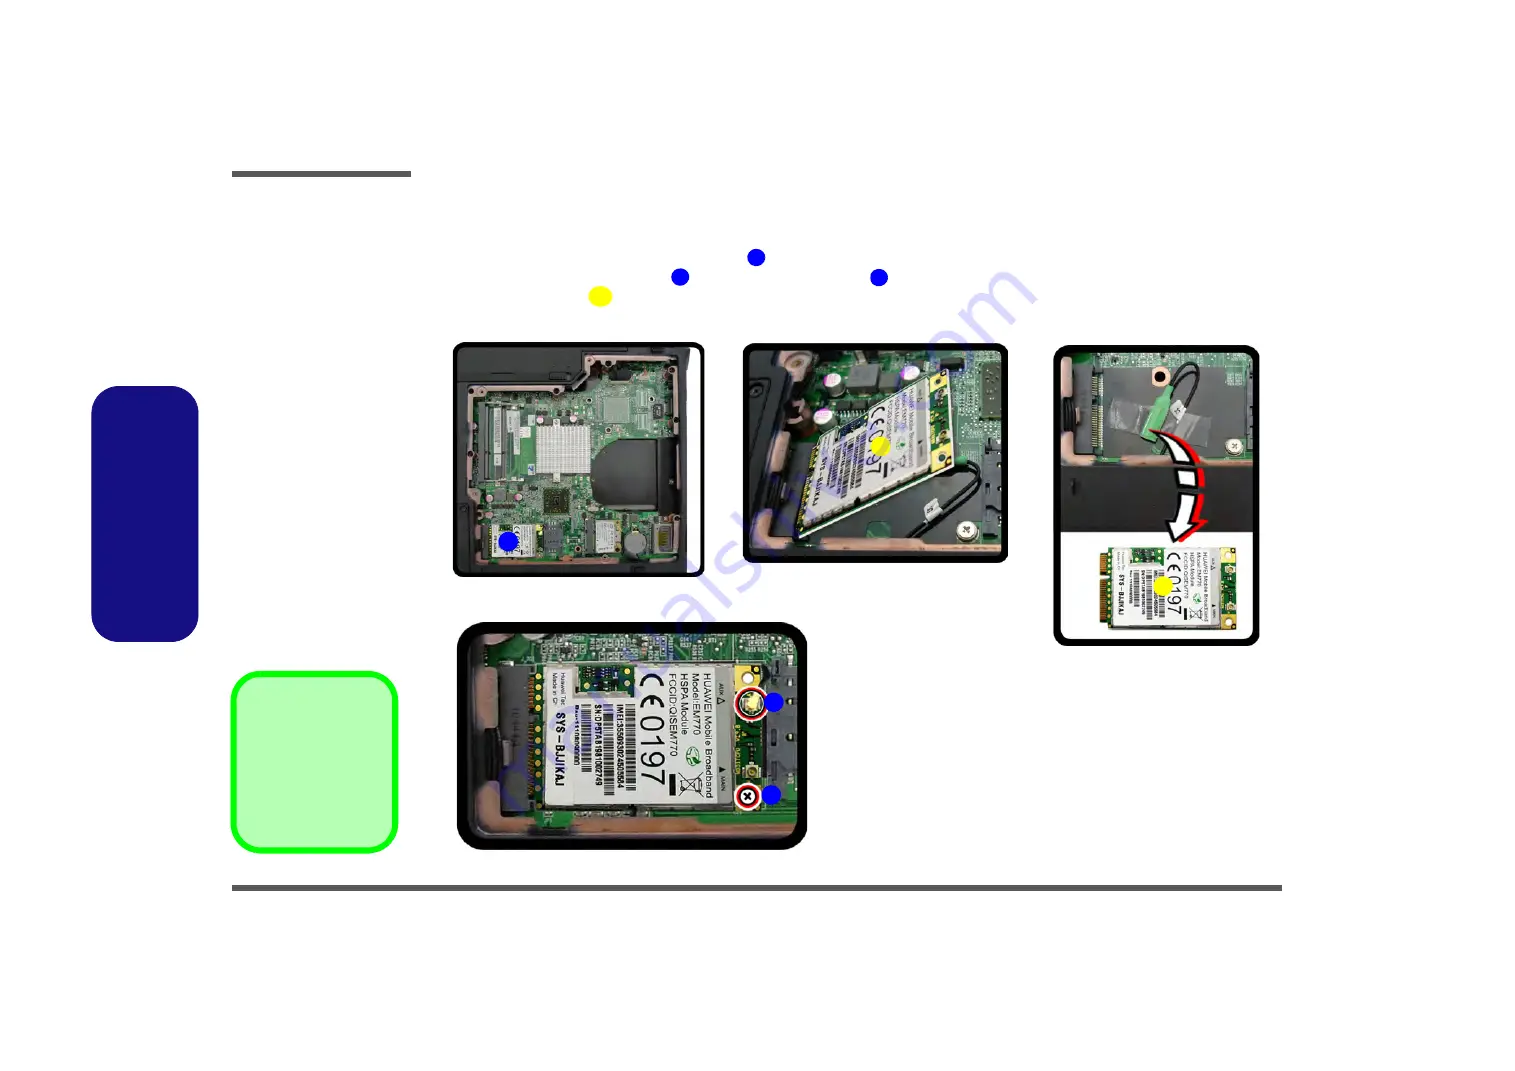
The 3.75G module will be visible at point
on the mainboard.
3.
Carefully disconnect the cable
, then remove the screw
from the module socket.
4.
The 3.75G module
will pop-up.
5.
Lift the 3.75G module (
Figure 8d
) up and off the computer.
Figure 8
3.75G Module
Removal
a. Remove the cover.
b. Disconnect the cable
and remove the screw.
c. The 3.75G module will
pop up.
d. Lift the 3.75G module
out.
1
2
3
4
4
b.
a.
d.
2
3
4
1
c.
d.
4. 3.75G Module.
•
1 Screw
Содержание W240BU
Страница 1: ...W241BU W241BUQ W240BU W245BUQ W248BUQ W249BUQ ...
Страница 2: ......
Страница 3: ...Preface I Preface Notebook Computer W241BU W241BUQ W240BU W245BUQ W248BUQ W249BUQ Service Manual ...
Страница 24: ...Introduction 1 12 Mainboard Overview Bottom Connectors 1 Introduction ...
Страница 38: ...Disassembly 2 14 2 Disassembly ...
Страница 42: ...Part Lists A 4 Top W245BUQ A Part Lists Top W245BUQ 灰色 非耐落 非耐落 黑色 頭徑 頭厚 號 度 黑色 Figure A 2 Top W245BUQ ...
Страница 46: ...Part Lists A 8 Bottom W248BUQ W249BU C A Part Lists Bottom W248BUQ W249BU C Figure A 6 Bottom W248BUQ W249BU C ...
Страница 48: ...Part Lists A 10 LCD W245BUQ A Part Lists LCD W245BUQ 華力 今皓 泰林 中性 電鑄薄膜鍍亮鉻 字體連結 銘板 銅箔接地 Figure A 8 LCD W245BUQ ...
Страница 49: ...Part Lists LCD W248BUQ C A 11 A Part Lists LCD W248BUQ C 華力 非耐落 無鉛 精乘 設變 Figure A 9 LCD W248BUQ C ...
Страница 52: ...Part Lists A 14 HDD A Part Lists HDD 無鉛 無鉛 Figure A 12 SATA DVD SUPER MULTI W248BUQ ...
Страница 79: ...Schematic Diagrams USB 3 0 VL800 B 27 B Schematic Diagrams USB 3 0 VL800 Sheet 26 of 41 USB 3 0 VL800 ...
Страница 97: ...www s manuals com ...


