Disassembly
Removing the System Memory (RAM) 2 - 9
2.Disassembly
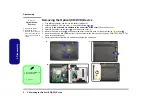
Removing the System Memory (RAM)
The computer has one memory socket for 200 pin Small Outline Dual In-line Memory Modules (SO-DIMM) supporting
DDR3
1333/ 1066MHz. The main memory can be expanded up to 8GB. The SO-DIMM modules supported are 1GB,
2GB and 4GB and
DDRIII
Modules. The total memory size is automatically detected by the POST routine once you turn
on your computer.
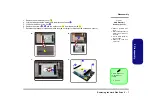
Memory Upgrade Process
1.
Turn
off
the computer, remove the battery (
) and the component bay cover (
2.
The RAM modules will be visible at point
on the main board
.
3.
Gently pull the two release latches on the sides of the memory socket.
4.
The RAM module
will pop-up (
Figure 6
b
), and you can then remove it.
5.
Insert a new module holding it at about a 30° angle and fit the connectors firmly into the memory slot.
6.
The module’s pin alignment will allow it to only fit one way. Make sure the module is seated as far into the slot as it
will go. DO NOT FORCE the module; it should fit without much pressure.
7.
Press the module in and down towards the mainboard until the slot levers click into place to secure the module.
Figure 5
RAM Module
Removal
a. Locate the memory
socket.
b. Remove the mod-
ule.
Contact Warning
Be careful not to touch
the metal pins on the
module’s connecting
edge. Even the clean-
est hands have oils
which can attract parti-
cles, and degrade the
module’s perfor-
mance.
1
2. RAM Module
2
2
b.
a.
1
Содержание W240BU
Страница 1: ...W241BU W241BUQ W240BU W245BUQ W248BUQ W249BUQ ...
Страница 2: ......
Страница 3: ...Preface I Preface Notebook Computer W241BU W241BUQ W240BU W245BUQ W248BUQ W249BUQ Service Manual ...
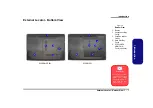
Страница 24: ...Introduction 1 12 Mainboard Overview Bottom Connectors 1 Introduction ...
Страница 38: ...Disassembly 2 14 2 Disassembly ...
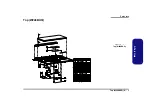
Страница 42: ...Part Lists A 4 Top W245BUQ A Part Lists Top W245BUQ 灰色 非耐落 非耐落 黑色 頭徑 頭厚 號 度 黑色 Figure A 2 Top W245BUQ ...
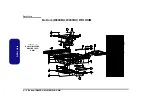
Страница 46: ...Part Lists A 8 Bottom W248BUQ W249BU C A Part Lists Bottom W248BUQ W249BU C Figure A 6 Bottom W248BUQ W249BU C ...
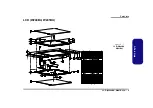
Страница 48: ...Part Lists A 10 LCD W245BUQ A Part Lists LCD W245BUQ 華力 今皓 泰林 中性 電鑄薄膜鍍亮鉻 字體連結 銘板 銅箔接地 Figure A 8 LCD W245BUQ ...
Страница 49: ...Part Lists LCD W248BUQ C A 11 A Part Lists LCD W248BUQ C 華力 非耐落 無鉛 精乘 設變 Figure A 9 LCD W248BUQ C ...
Страница 52: ...Part Lists A 14 HDD A Part Lists HDD 無鉛 無鉛 Figure A 12 SATA DVD SUPER MULTI W248BUQ ...
Страница 79: ...Schematic Diagrams USB 3 0 VL800 B 27 B Schematic Diagrams USB 3 0 VL800 Sheet 26 of 41 USB 3 0 VL800 ...
Страница 97: ...www s manuals com ...

