Disassembly
Disassembly Steps 2 - 5
2.Disassembly
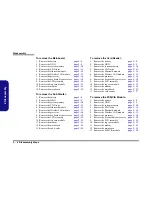
To remove the Top Case Module:
1. Remove the battery
page 2 - 8
2. Remove the HDD
page 2 - 9
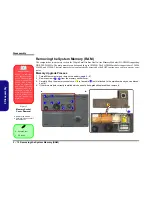
3. Remove the system memory
page 2 - 10
4. Remove the CD device
page 2 - 12
5. Remove the Bluetooth module
page 2 - 14
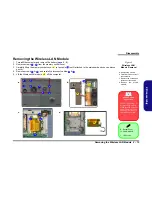
6. Remove the Wireless LAN module
page 2 - 15
7. Remove the processor
page 2 - 16
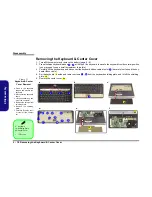
8. Remove the keyboard & center cover
page 2 - 18
9. Remove the LCD assembly
page 2 - 19
10. Remove the top case module
page 2 - 21
To remove the TouchPad:
1. Remove the battery
page 2 - 8
2. Remove the HDD
page 2 - 9
3. Remove the system memory
page 2 - 10
4. Remove the CD device
page 2 - 12
5. Remove the Bluetooth module
page 2 - 14
6. Remove the Wireless LAN module
page 2 - 15
7. Remove the processor
page 2 - 16
8. Remove the keyboard & center cover
page 2 - 18
9. Remove the LCD assembly
page 2 - 19
10. Remove the top case module
page 2 - 21
11. Remove the TouchPad
page 2 - 22
To remove the LED board:
1. Remove the battery
page 2 - 8
2. Remove the HDD
page 2 - 9
3. Remove the system memory
page 2 - 10
4. Remove the CD device
page 2 - 12
5. Remove the Bluetooth module
page 2 - 14
6. Remove the Wireless LAN module
page 2 - 15
7. Remove the processor
page 2 - 16
8. Remove the keyboard & center cover
page 2 - 18
9. Remove the LCD assembly
page 2 - 19
10. Remove the top case module
page 2 - 21
11. Remove the LED board
page 2 - 23
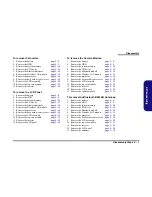
To remove the Modem:
1. Remove the battery
page 2 - 8
2. Remove the HDD
page 2 - 9
3. Remove the system memory
page 2 - 10
4. Remove the CD device
page 2 - 12
5. Remove the Bluetooth module
page 2 - 14
6. Remove the Wireless LAN module
page 2 - 15
7. Remove the processor
page 2 - 16
8. Remove the keyboard & center cover
page 2 - 18
9. Remove the LCD assembly
page 2 - 19
10. Remove the top case module
page 2 - 21
11. Remove the modem
page 2 - 24
Содержание D470V
Страница 1: ......
Страница 2: ......
Страница 3: ...Preface I Preface Notebook Computer D470V D480V Service Manual ...
Страница 14: ...Preface XII Preface ...
Страница 61: ...Part Lists Top D470V A 3 A Part Lists Top D470V Figure 1 Top D470V ...
Страница 62: ...Part Lists A 4 Bottom D470V A Part Lists Bottom D470V Figure 2 Bottom D470V 長卡時不使用 無鉛 無鉛 無鉛 ...
Страница 63: ...Part Lists LCD 17 D470V A 5 A Part Lists LCD 17 D470V Figure 3 LCD 17 D470V ...
Страница 64: ...Part Lists A 6 CD ROM Drive D470V A Part Lists CD ROM Drive D470V Figure 4 CD ROM Drive D470V ...
Страница 65: ...Part Lists CD RW Drive D470V A 7 A Part Lists CD RW Drive D470V Figure 5 CD RW Drive D470V ...
Страница 66: ...Part Lists A 8 DVD ROM Drive D470V A Part Lists DVD ROM Drive D470V Figure 6 DVD ROM Drive D470V ...
Страница 67: ...Part Lists Combo Drive D470V A 9 A Part Lists Combo Drive D470V Figure 7 Combo Drive D470V ...
Страница 68: ...Part Lists A 10 Hard Disk Drive D470V A Part Lists Hard Disk Drive D470V Figure 8 HDD Drive D470V ...
Страница 69: ...Part Lists Top D480V A 11 A Part Lists Top D480V Figure 9 Top D480V ...
Страница 70: ...Part Lists A 12 Bottom D480V A Part Lists Bottom D480V Figure 10 Bottom D480V 長卡時不使用 無鉛 無鉛 無鉛 ...
Страница 71: ...Part Lists LCD 17 D480V A 13 A Part Lists LCD 17 D480V Figure 11 LCD 17 D480V ...
Страница 72: ...Part Lists A 14 CD ROM Drive D480V A Part Lists CD ROM Drive D480V Figure 12 CD ROM Drive D480V ...
Страница 73: ...Part Lists CD RW Drive D480V A 15 A Part Lists CD RW Drive D480V Figure 13 CD RW Drive D480V ...
Страница 74: ...Part Lists A 16 DVD ROM Drive D480V A Part Lists DVD ROM Drive D480V Figure 14 DVD ROM Drive D480V ...
Страница 75: ...Part Lists Combo Drive D480V A 17 A Part Lists Combo Drive D480V Figure 15 Combo Drive D480V ...
Страница 76: ...Part Lists A 18 Hard Disk Drive D480V A Part Lists Hard Disk Drive D480V Figure 16 HDD Drive D480V ...
Страница 120: ...Schematic Diagrams B 44 B Schematic Diagrams ...

