Disassembly
Overview 2 - 3
2.Disassembly
Maintenance Precautions
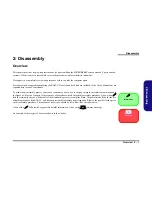
The following precautions are a reminder. To avoid personal injury or damage to the computer while performing a re-
moval and/or replacement job, take the following precautions:
1.
Don't drop it
. Perform your repairs and/or upgrades on a stable surface. If the computer falls, the case and other
components could be damaged.
2.
Don't overheat it
. Note the proximity of any heating elements. Keep the computer out of direct sunlight.
3.
Avoid interference
. Note the proximity of any high capacity transformers, electric motors, and other strong mag-
netic fields. These can hinder proper performance and damage components and/or data. You should also monitor
the position of magnetized tools (i.e. screwdrivers).
4.
Keep it dry
. This is an electrical appliance. If water or any other liquid gets into it, the computer could be badly
damaged.
5.
Be careful with power
. Avoid accidental shocks, discharges or explosions.
•Before removing or servicing any part from the computer, turn the computer off and detach any power supplies.
•When you want to unplug the power cord or any cable/wire, be sure to disconnect it by the plug head. Do not pull on the wire.
6.
Peripherals
– Turn off and detach any peripherals.
7.
Beware of static discharge
. ICs, such as the CPU and main support chips, are vulnerable to static electricity.
Before handling any part in the computer, discharge any static electricity inside the computer. When handling a
printed circuit board, do not use gloves or other materials which allow static electricity buildup. We suggest that
you use an anti-static wrist strap instead.
8.
Beware of corrosion
. As you perform your job, avoid touching any connector leads. Even the cleanest hands pro-
duce oils which can attract corrosive elements.
9.
Keep your work environment clean
. Tobacco smoke, dust or other air-born particulate matter is often attracted
to charged surfaces, reducing performance.
10.
Keep track of the components
. When removing or replacing any part, be careful not to leave small parts, such as
screws, loose inside the computer.
Cleaning
Do not apply cleaner directly to the computer, use a soft clean cloth.
Do not use volatile (petroleum distillates) or abrasive cleaners on any part of the computer.
Power Safety
Warning
Before you undertake
any upgrade proce-
dures, make sure that
you have turned off the
power, and discon-
nected all peripherals
and cables (including
telephone lines). It is
advisable to also re-
move your battery in
order to prevent acci-
dentally turning the
machine on.
Содержание D470V
Страница 1: ......
Страница 2: ......
Страница 3: ...Preface I Preface Notebook Computer D470V D480V Service Manual ...
Страница 14: ...Preface XII Preface ...
Страница 61: ...Part Lists Top D470V A 3 A Part Lists Top D470V Figure 1 Top D470V ...
Страница 62: ...Part Lists A 4 Bottom D470V A Part Lists Bottom D470V Figure 2 Bottom D470V 長卡時不使用 無鉛 無鉛 無鉛 ...
Страница 63: ...Part Lists LCD 17 D470V A 5 A Part Lists LCD 17 D470V Figure 3 LCD 17 D470V ...
Страница 64: ...Part Lists A 6 CD ROM Drive D470V A Part Lists CD ROM Drive D470V Figure 4 CD ROM Drive D470V ...
Страница 65: ...Part Lists CD RW Drive D470V A 7 A Part Lists CD RW Drive D470V Figure 5 CD RW Drive D470V ...
Страница 66: ...Part Lists A 8 DVD ROM Drive D470V A Part Lists DVD ROM Drive D470V Figure 6 DVD ROM Drive D470V ...
Страница 67: ...Part Lists Combo Drive D470V A 9 A Part Lists Combo Drive D470V Figure 7 Combo Drive D470V ...
Страница 68: ...Part Lists A 10 Hard Disk Drive D470V A Part Lists Hard Disk Drive D470V Figure 8 HDD Drive D470V ...
Страница 69: ...Part Lists Top D480V A 11 A Part Lists Top D480V Figure 9 Top D480V ...
Страница 70: ...Part Lists A 12 Bottom D480V A Part Lists Bottom D480V Figure 10 Bottom D480V 長卡時不使用 無鉛 無鉛 無鉛 ...
Страница 71: ...Part Lists LCD 17 D480V A 13 A Part Lists LCD 17 D480V Figure 11 LCD 17 D480V ...
Страница 72: ...Part Lists A 14 CD ROM Drive D480V A Part Lists CD ROM Drive D480V Figure 12 CD ROM Drive D480V ...
Страница 73: ...Part Lists CD RW Drive D480V A 15 A Part Lists CD RW Drive D480V Figure 13 CD RW Drive D480V ...
Страница 74: ...Part Lists A 16 DVD ROM Drive D480V A Part Lists DVD ROM Drive D480V Figure 14 DVD ROM Drive D480V ...
Страница 75: ...Part Lists Combo Drive D480V A 17 A Part Lists Combo Drive D480V Figure 15 Combo Drive D480V ...
Страница 76: ...Part Lists A 18 Hard Disk Drive D480V A Part Lists Hard Disk Drive D480V Figure 16 HDD Drive D480V ...
Страница 120: ...Schematic Diagrams B 44 B Schematic Diagrams ...


