27
CLEARSPAN
™
GREENHOUSES
Revision date: 10.03.14
ATTACH CONDUIT TO MAIN COVER ROLL-UP SIDE
Gather the parts:
• Assembled conduits
• Fabric clips #CC6212 (Divide quantity in half.)
• Tek screws (#FA4482B)
To this point, the main cover layers are secured to the
greenhouse and the roll-up portion of the main covers
along both sides are secured to and hanging down from the
poly latch U-channel.
1. Unfold the remaining portion of the main cover (if
needed) and evenly stretch it out on the ground along
the frame.
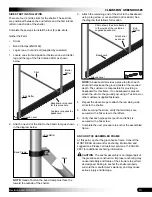
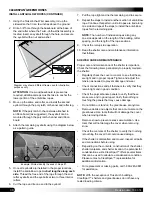
2. Working from the inside the frame
, roll the assembled
cover conduit onto the edge of the main cover.
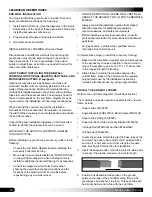
3. Verify that the cover and conduit are evenly positioned
and tuck the cover edge under the conduit and begin to
turn the conduit in a clockwise direction.
4. Secure the cover material to the conduit with Tek
screws and fabric clips evenly spaced along the
conduit.
5. Continue to roll the conduit until the excess cover
material is wound around the conduit.
6. Repeat these steps for the other side of the shelter.
7. With the excess cover material rolled up on the conduit
assemblies, continue with the
Twist-of-the-Wrist
Assembly
procedure.
TWIST-OF-THE-WRIST ASSEMBLY
Gather the parts:
• Aluminum channel
• Drive handle
• Gearbox and gearbox drive
• Mounting plate
• Bearing and threaded rod
• 3/8" nuts and washers
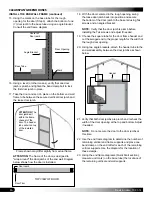
The Twist-of-the-Wrist Assembly is designed to roll up a
portion of the sides of the structure. The following steps
describe the assembly and its installation.
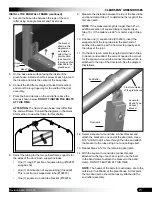
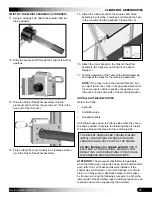
1. Drill a 5/16" hole through the cover conduit 1/2" from
the end of the conduit.
2. Insert a tubing adapter into the conduit and align
the holes of the adapter with the drilled holes in the
conduit.
Threaded Rod
Purlin
End
Rafter
Guide
Channel
Carriage
Bolt
Roll-up Side
Conduit
Frame shown
may differ from
actual frame.
Inside View
Fabric Clips
Diagram may show a different model and is used for
illustration purposes only.

