


ENGLISH
70
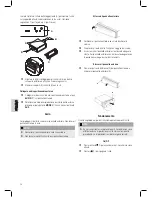
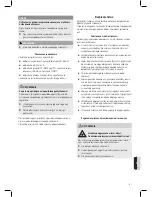
Installation in ISO Slot
A
B
C
D
C
Remove sleeve (D) and frame (B) from the unit. Use installa-
tion keys (C), if necessary.
Place the sleeve in the ISO slot.
Bend the claws outward with a screwdriver for perfect fit.
Check the sleeve for tight fit.
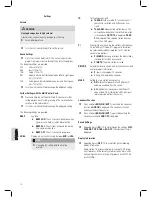
Connect the ISO female connectors of the unit with the two
ISO male connectors of the vehicle.
Connect the antenna to the antenna connector at the rear of
the unit.
Secure the unit against theft, if necessary. Attach bolt and
mounting strip with the fastening materials at the firewall.
Carefully slide the unit into the sleeve until it locks into place.
Press
RESET
(4) with a pen or other pointed object after all
connections are made.
Attach the front panel (A) as described under “Attach Front
Panel”.
CAUTION
Cable damage possible!
To avoid ca
►
ble damage observe the cables when sliding the
unit into the sleeve.
Attach the frame.
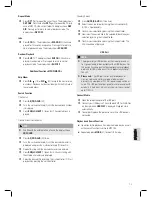
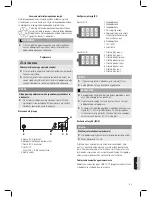
Remove Unit
Follow these instructions to remove the unit:
Remove the frame.
Insert left and right installation keys in the slots left and right
(the claws are now bent back).
Slide the unit out of the sleeve.
NOTE
Unevenness of the casing can cause the claws to lock.
►
Unlock the claws with the installation keys, if necessary.
Toyota or Nissan Installation
NOTE
Sleeve, frame and mounting strip are not needed.
►
Содержание AR 815 USB/CR
Страница 96: ...96 J ZYK POLSKI...
Страница 97: ...97 J ZYK POLSKI...
Страница 98: ...Stand 12 10 D 47906 Kempen Germany Industriering Ost 40 Internet http www clatronic de email info clatronic de...