7
English
7. Press [ OK (Y) ] to save WAP/Internet Parameters.
8. Press
Change Setting
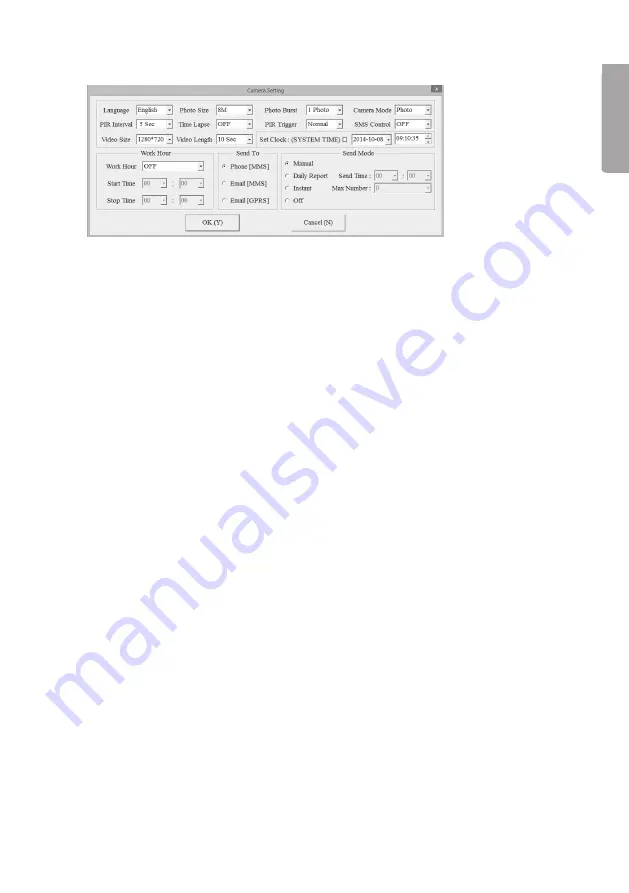
for other camera settings. The window below will appear.
Settings for attributes such as Language and PIR Interval can be made at
the top of the window. Further information about these settings can be found in
the
Performing settings using the remote control
section below
.
Other boxes in the window are:
•
Work hour
: Used if you only want the camera to be activated during certain hours
of the day.
•
Send to
: Select whether the photo is to be sent via MMS or e-mail. If you select
Phone [ MMS ], the photo will be sent to the telephone number which is entered
in accordance with point 10 below. If you select Email [ MMS ] or Email [ GPRS ],
the photo will be sent to the e-mail address which is entered in accordance with
point 10 below.
•
Send mode
: Select whether, or how often, the photos are to be sent. There are 4
choices available:
-
Manual
: A photo is only sent upon request via SMS or app.
-
Daily Report
: Choose a time when the camera sends a report about
the number of photos or videos that have been taken during 24 hours.
-
Instant
: The camera sends the photo as soon as it has been taken.
The maximum number of photos that can be sent during a 24 hour period
can be limited.
-
Off
: No photos are sent.
9. When you have made all the settings, press [ OK ] to save.
10. Enter the telephone numbers or e-mail addresses to which you want the camera
to send the photos in the
Customer Information Setting
box in the window
which appears under point 3 above. If you are using the BGTools app, the number
of the telephone which is to be used to control the camera with should be entered
in the
Admin... Number
field.
11. If you have not already connected the camera to your computer with the provided
USB cable, do it now.
12. Select the camera in the field for where your settings are to be saved.


