6
Parts & Service: 020 8988 7400 / E-mail: [email protected] or [email protected]
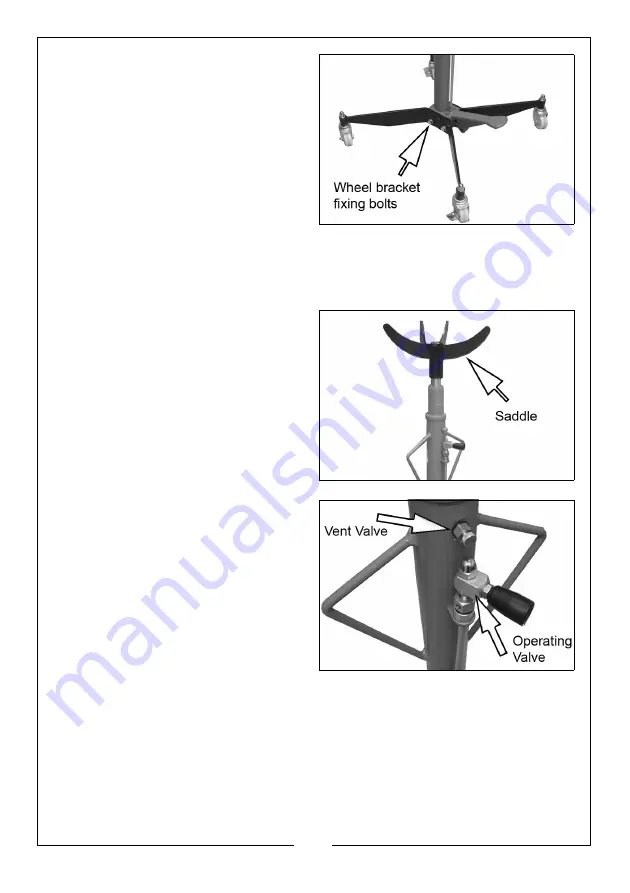
4. Lay the column on its side, and
bolt on the two wheel bracket
assemblies, with the castors facing
downwards ensuring the bracket
sits over the locating peg. Use the
two bolts and washers. Loosely
tighten the bolts, but DO NOT fully
tighten at this stage.
5. Raise the jack to the upright
position, resting on its castors and
ensure it is on firm level ground.
6. Using a set-square, and testing in two directions at 90° to each other,
ensure the column is vertical. When satisfied, tighten the column securing
bolts fully.
7. Place the saddle on top of the
ram.
8. Loosen the vent valve by hand.
• This will allow air to be vented
when the ram is descending.
NOTE:S
During transit or storage, it is possible that an air pocket may have developed
within the hydraulic ram, and the ram action may therefore appear to be
‘spongy’. As the ram is self bleeding, any air will be dispelled via the vent valve
and the ram action normalised, by raising and lowering the column a few
times while not under load.
If the column does not reach its full height, the ram oil level may require
topping up, as described in the Maintenance section.


