ASSEMBLY & OPERATING
INSTRUCTIONS
ORIGINAL INSTRUCTIONS GC0617 - ISSUE 2
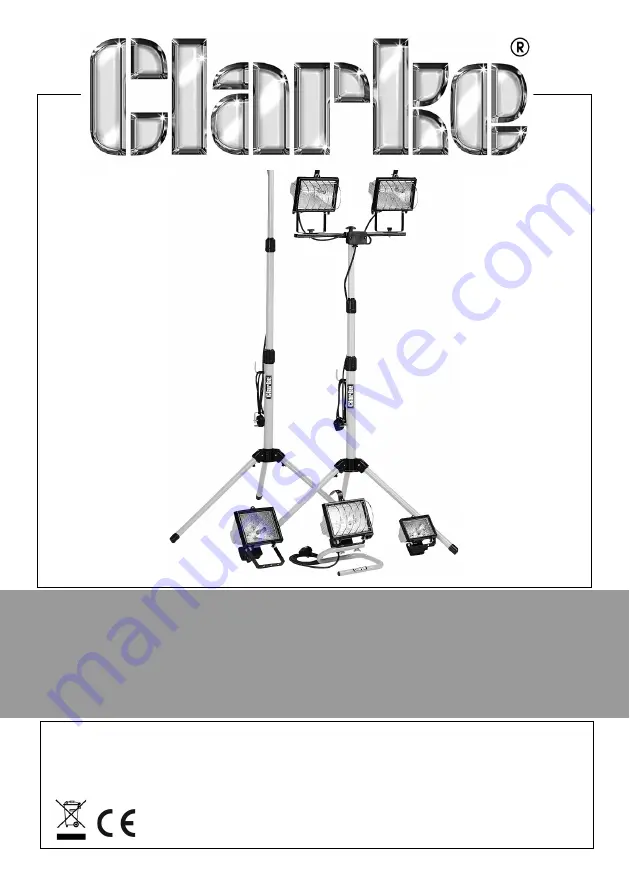
HALOGEN LIGHT
MODEL NO: CHL100-1000
PART NO: SEE PAGE 2
Страница 1: ...ASSEMBLY OPERATING INSTRUCTIONS ORIGINAL INSTRUCTIONS GC0617 ISSUE 2 HALOGEN LIGHT MODEL NO CHL100 1000 PART NO SEE PAGE 2...
Страница 2: ...manufacture for a period of 12 months from the date of purchase Please keep your receipt which will be required as proof of purchase This guarantee is invalid if the product is found to have been abu...
Страница 3: ...ury do not touch Wait until the power supply has been disconnected and the unit cooled down 6 Do not use this lamp in hazardous locations such as flammable or explosive environments 7 Do not sit direc...
Страница 4: ...r coloured GREEN or GREEN YELLOW Connect the BROWN coloured cord to the plug terminal marked a letter L or coloured RED We strongly recommend that this machine is connected to the mains supply via a R...
Страница 5: ...electrical stockists FUSE RATING The fuse in the plug must be replaced with one of the same rating and this replacement must be ASTA approved to BS1362 We strongly recommend that this machine is conn...
Страница 6: ...secure Do not use force when installing the bulb NOTE DO NOT TOUCH THE BULB WITH FINGERS this will cause damage If it has been touched wipe it carefully with a soft cloth dampened with methylated spi...
Страница 7: ...prox 30mm taking care not to damage the conductor insulation 6 Strip the conductor insulation for a distance of approx 8mm and twist the strands together on each conductor 7 Identify the terminals by...
Страница 8: ...y frame then insert the tubular base into the frame attachment as indicated in Fig 5 2 Line up the holes in the two sections of the frame then replace and tighten the fixing screw OTHER MODELS All oth...
Страница 9: ...n the respective locking collar anticlockwise to unlock Pull out the extension tube to the desired height and re lock by turning the collar clockwise NOTE In the interests of safety it is recommended...
Страница 10: ...the threaded hole on top of the column Ensure it is tight 4 Attach the lamps to the support bar using the single screw provided and shown at A Fig 10 NOTE The lamp may be swivelled by slackening the s...
Страница 11: ...Department ENVIRONMENTAL RECYCLING POLICY Through purchase of this product the customer is taking on the obligation to deal with the WEEE in accordance with the WEEE regulations in relation to the tr...
Страница 12: ......