Clarion VX316AU Скачать руководство пользователя страница 19

VX316AU         19

English

English

Owner’s Manual

CAUTION

  Do not try to put your hand or fingers in the disc insertion 

slot. Also never insert foreign objects into the slot.

  Do not insert discs where adhesive comes out from cel-

lophane  tape  or  a  rental  CD  label,  or  discs  with  marks 

where cellophane tape or rental CD labels were removed. 

It may be impossible to extract these discs from the unit 

and they may cause the unit to break down.

Notes: 

  Some CDs recorded on CD-R/RW mode may not be usable. 
  PBC toggle function for VCD is not supported in this unit.

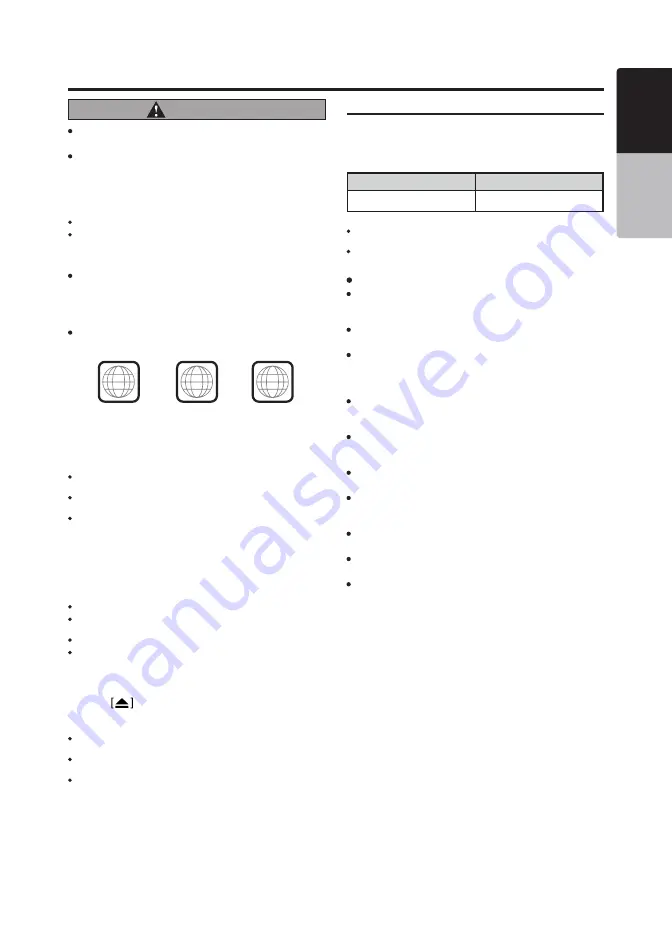
Note on region numbers

  The DVD video system assigns a region number to DVD 

video players and DVD discs by sales area. DVD video 

players sold in Asia can play back DVD discs with the re-

gion  number  “ALL”,  “3”  or  any  combination  of  numbers 

that also incorporate a “3”. 

  The  DVD  video  region  number  is  marked  on  the  disc 

jacket as shown below.

CD/USB Mode Operations

3

ALL

1

3

4

Watching/Listening to a disc

If a disc has been loaded, press the [HOME] button to select 

CD/DVD mode. 
Notes: 

  When CDDA disc or DVD is loaded, the play mode is automatically 

engaged.  

  When CDMP3 disc is inserted for the first time, the system will go to 

directory display. 

  If you reinsert the same disc, the system will resume playback. 

Loading a CD

Insert a CD into the center of the CD insertion slot with the 

labeled side facing up. The CD will begin reading and will 

start playing. 
Notes: 

  Do not insert another disc forcefully.
  Discs not bearing the logo mark and CD-ROMs cannot be played by 

this unit.

  Some CDs recorded in CD-R/CD-RW mode may not be usable.
  8cm compact disc is not supported. Do not attempt to insert the disc 

into the CD slot.


Eject the CD

Press the 

 button, then the disc will be ejected. The unit 

will direct return to Tuner mode.
Notes:

  If you force a CD into CD slot before auto reloading, this can damage 

the CD.

  If a CD (12 cm) is left in the ejected position for 15 seconds, the CD 

is automatically reloaded (Auto reload). 

  If you leave the ejected CD without removing it, it will be drawn into 

the unit automatically after about 15 seconds.

USB

This system can play audio files (MP3/WMA/AAC) stored in 

an USB memory which is recognized as “USB Mass Storage 

Class device”. You can use your USB memory as an audio 

device by simple copying desired audio files into it.  

Note:

  This system will not operate or may operate improperly with some 

USB memory. 

  Files protected with any DRM cannot be played.

 About USB memory device

  USB is an acronym for Universal Serial Bus, and refers 

to an external bus standard supporting data rates of 12 

Mbps. 

  This  unit  is  compatible  with  USB  1.1/2.0/3.0  with  maxi-

mum data transfer rates of 12 Mbps.

  USB memory devices that can be played by connecting 

to the unit’s USB cable are limited to those recognized as 

“USB mass storage class devices”; operation is not guar-

anteed with all USB memory devices.

  Devices compatible with “USB Mass Storage Class” can 

be used merely by connecting to the host device, without 

need for special drivers or application software.

  Consult  the  manufacturer  of  your  USB  memory  device 

for information regarding whether it is supported by “USB 

Mass Storage Class” standards.

  To  prevent  the  accidental  loss  of  data,  always  back  up 

important data on your computer.

  This unit does not support connections to a computer. In 

addition,  connections  made  through  a  USB  hub  device 

are also not supported.

  When a USB memory device is composed of two or more 

drives, only the first drive will be detected.

  USB memory devices with security functions cannot be 

played.

  The order in which tracks are recorded may differ depend-

ing  on  the  USB  memory  device  connected  (the  actual 

playback order may not be the same as that indicated on 

your computer’s display).

USB Digital Media Streaming

This unit supports USB Digital Media Streaming. USB Digital 

Media Streaming is a function used to play music files trans-

mitted using Media Transfer Protocol (MTP). 

Hot plugging function

This unit has the ability to recognize the changes of connect-

ing and disconnecting an USB memory/MTP device.

Mode

File System

USB

FAT16, FAT 32

Содержание VX316AU

Страница 1: ...VX316AU Owner s manual DVD Multimedia Station With 6 2 Touch Panel Control...

Страница 2: ...13 7 RADIO MODE OPERATIONS 14 Listening to the Radio 14 Seek Tuning 14 TP Seek 14 Manual Tuning 14 Autostore 14 Storing Preset Memory 15 Recalling a Preset Station 15 8 RDS OPERATIONS 15 RDS Radio Dat...

Страница 3: ...Operation 23 12 CD USB MTP AUDIO OPERATIONS 24 Playing Audio Files in CD USB memory MTP device 24 Play Pause Playback 24 Switch to Previous Next File or track 24 Fast Forward Fast Backward Operation 2...

Страница 4: ...Settings 33 Pairing with an External Device 33 Cancelling Pairing Mode 33 Connecting to a Bluetooth Device 33 Disconnecting a Bluetooth Device 33 Deleting a Bluetooth Device 34 Auto Answer Function 3...

Страница 5: ...ity via USB memory MTP device Built in Bluetooth Handsfree HFP Audio Streaming A2DP AVRCP and Phonebook PBAP External Digital Video Broadcast Terrestrial 2 DVB T2 support Front panel Auxiliary Input a...

Страница 6: ...earest Clarion ser vice center for safety Professional skills and experience are requires to do so As the driver you alone are responsible for your driving safety In order to avoid a traffic accident...

Страница 7: ...larion shall not be liable for any damage When using an USB memory stick we recommend that you backup your data stored on it before by using a per sonal computer etc Data files may be broken when usin...

Страница 8: ...and has been certified by the developer to meet Apple performance standards Apple is not responsible for the operation of this device or its compliance with safety and regulatory standards Please note...

Страница 9: ...to display Home Screen press again to return to current source Press and hold the knob to turn off the power Rotate the knob left or right to decrease or increase the volume RESET hole Reboot the sys...

Страница 10: ...nsure the tray is inserted in the correct direction Notes Misuse may result in rupture of the battery producing leakage of fluid and resulting in personal injury or damage to surrounding materials Alw...

Страница 11: ...turned on Press this button in CD USB MTP mode to enter exit the directory view Press this button in iPod mode to enter exit the iPod Menu Press this button in Radio mode to switch to the next band P...

Страница 12: ...FP profile is connected to the unit 5 Bluetooth indicator Lights up when Bluetooth is con nected to the unit 6 REG indicator 7 AF indicator 8 PTY indicator 9 TP indicator 10 TA indicator Note The Home...

Страница 13: ...ed when the parking brake is enabled when the car is parked The audio portion of the video can still be played but a blank screen will be displayed in place of the video display Video Output If an ext...

Страница 14: ...f you press the button TA in the display lights up and the unit automatically searches for a TP station 3 If a TP station is not received the unit continues the search operation Press the button to st...

Страница 15: ...T button recalls the stored radio frequency RDS Radio Data System Press the RDS button to select the RDS Tab The tab con trols will change accordingly This unit has a built in RDS decoder system that...

Страница 16: ...t broadcast reception is cancelled and the unit returns to the TA standby mode Searching for a TP station 1 When TP is not lit if you press the button TA in the display lights up and the unit automati...

Страница 17: ...ous receiving station Volume Setting of TA Emergency Broadcast and PTY The volume for TA emergency broadcast and PTY inter rupts can be set during their respective interrupts The factory default setti...

Страница 18: ...from CD Logical format File system When writing an MP3 WMA AAC file on a disc please select ISO9660 level 1 or level 2 without including ex pansion format as the writing software format Normal playbac...

Страница 19: ...ded Auto reload If you leave the ejected CD without removing it it will be drawn into the unit automatically after about 15 seconds USB This system can play audio files MP3 WMA AAC stored in an USB me...

Страница 20: ...ect direction as this will damage the USB memory device as well as the USB slot Watching Listening to a track with USB memory MTP device 1 If a USB memory MTP device have been inserted press the HOME...

Страница 21: ...to resume playback Skip Search a Chapter Press CHAPTER or CHAPTER button during playback Chapters are skipped down or up from current locations as many times as the button is pressed and playback sta...

Страница 22: ...recorded For details see the mark of the disc indicates that 8 kinds of subtitles have been recorded Depending on the disc switching may be completely im possible or impossible on some scenes 2 To tur...

Страница 23: ...e text will change as RPT OFF VIDEO RPT FLD RPT RPT OFF VIDEO RPT Video Repeat The current video will be repeated after finish playing FLD RPT Folder Repeat The video in current folder will be played...

Страница 24: ...ast forward and fast backward speed may differ depending on the media device Repeat Playback 1 Press the button to select the repeat status for playback The text will change accordingly 2 Every time t...

Страница 25: ...n to enter directory view 2 Press the track title on the display list The selected track will start playing 3 When the desired track is not displayed press and to flick the track list up and down 4 Wh...

Страница 26: ...Button 2 Effect Mode Toggle Button 3 Rotate Operation Button 4 Repeat Button 5 Next Picture Button 6 Previous Picture Button 7 Play Pause Button 8 Directory Path Display 9 Picture Number Display Play...

Страница 27: ...ng playback Releasing the button will resume playback at normal speed Note The fast forward and fast backward speed may differ depending on the iPod Tag Display Function Each time the button is presse...

Страница 28: ...gories Playlists Artists Albums Songs Genres Composers Audiobooks Podcasts Availability depends on iPod 1 Exit iPod Menu Button 2 Category Track List 3 Page Down Button 4 Page Up Button 5 Return Butto...

Страница 29: ...gmented or switch noises may be generated Playing Music After the connection with a Bluetooth audio player is estab lished the play mode is automatically engaged When playback is not started for some...

Страница 30: ...of contacts Notes Please check your phone s specification for supported profiles or consult with the nearest service centre for your phone compatibilities Select Phone Mode 1 Press the button on the...

Страница 31: ...Press the button to call the last called number Notes Depending on the mobile phone the Telephone Interrupt screen may be cancelled and the connection with this system may be disconnected when enteri...

Страница 32: ...tton 4 Press the button to hide the keypad Notes The search function only search for the first character of the contacts If the characters cannot be found it will search and display the fol lowing alp...

Страница 33: ...ode During Pairing mode press the button to cancel Pair ing mode The display will return to the Bluetooth Settings tab Connecting to a Bluetooth Device Automatic Connection The unit will automatically...

Страница 34: ...ting Auto Answer Function The Auto Answer feature allows the unit to automatically an swer any incoming call to the unit after a 5 seconds period Press Auto Answer in the Bluetooth Settings tab to tog...

Страница 35: ...e refer to the user manual of the DVB T2 receiver 19 HDMI MHL OPERATIONS This system has HDMI MHL input where you can display the video output from the connected device 1 Connect the video output devi...

Страница 36: ...ing connection 1 Connection with the iPhone with 30 pin connecter 2 Connection with the iPhone with lightning connector 3 Connection with the Android Phone 4 Connection with the equipment with HDMI ou...

Страница 37: ...e adjustment range for balance is R12 to F12 2 Pressing the button emphasizes the sound from the front speakers 3 Pressing the button emphasizes the sound from the rear speakers 4 Press the button to...

Страница 38: ...n the unit 1 Press the button to toggle the loudness function on or off The button display will change accordingly Subwoofer Controls High Pass and Low Pass Filters 1 Press the button to select a high...

Страница 39: ...at to AM or PM The button display will change accordingly Note The button is only available in 12 Hour clock display 1 Reset Button 2 Exit Button 3 Programmable Buttons 1 Select Programmable Steering...

Страница 40: ...Current Mode Layout 2 Next Category Button 3 Increase Effect Button 4 Progress Bar Display 5 Category Name Display 6 Decrease Effect Button 7 Previous Category Button Touch Panel Calibration Screen Ad...

Страница 41: ...on the light receptive part of the remote control unit it may not work The battery of the remote control unit is dead or there is no battery in the remote control unit Check the battery of the remote...

Страница 42: ...ot supported Use a file with supported video codec Video is played without audio Audio codec is not supported Use a video file with supported audio codec Music is muted and skips to the next file Musi...

Страница 43: ...from Phone mode Caller s voice sounds distorted or is intermittent Volume is too loud depends on the car environment speakers and microphone and half duplex mode is automatically triggered Try reduci...

Страница 44: ...engaged Check that the parking brake is engaged The display is dark The Brightness control is too low Adjust the Brightness properly The headlight of the vehicle is lit The display is made dark at ni...

Страница 45: ...t a proper device An error occurred when controlling the device Disconnect the device and reconnect it again The device is connected via the USB Hub Disconnect the device and reconnect directly to the...

Страница 46: ...Charging only Specification USB 2 0 Charging Power 1 5A iPod iPhone Supported iPod iPhone iPhone 6S Plus iPhone 6S iPhone 6 Plus iPhone 6 iPhone 5S iPhone 5C iPhone 5 iPhone 4S iPod Touch 6th Gen iPod...

Страница 47: ...Printed in Malaysia VX316AU...

Отзывы: