background image

3

English

About FCC


Warning


Changes or modifications to this unit not expressly ap-
proved by theparty responsible for compliance could 
void the user’s authority to operate theequipment.

NOTE:


G

 This equipment has been tested and found to comply with 
the limits for a Class B digital device, pursuant to Part 15 
of the FCC Rules. These limits are designed to provide 
reasonable protection against harmful interference in a 
residential installation. This equipment generates, uses and 
can radiate radio frequency energy and, if not installed and 
used in accordance with the instructions, may cause harmful 
interference to radio communications.

However, there is no guarantee that interference will not 
occur in a particular installation. If this equipment does 
cause harmful interference to radio or television recep-
tion, which can be determined by turning the equipment 
off and on, the user is encouraged to try to correct the 
interference by one or more of the following measures:


z

Reorient or relocate the receiving antenna.


z

Increase the separation between the equipment and receiver.


z

Connect the equipment into an outlet on a circuit differ-
ent from that to which the receiver is connected.


z

Consult the dealer or an experienced radio/TV technician for help.

This device complies with Part 15 of the FCC Rules. Op-
eration is subject to the following two conditions : 


This device may not cause harmful interference, and


This device must accept any interference received, 
including interference that may cause undesired opera-
tion.

About IC


This device complies with Industry Canada licence 
-exempt RSS standard(s). Operation is subject to the 
following two conditions: (1) this device may not cause 
interference, and (2) this device must accept any inter-
ference, including interference that may cause unde-
sired operation of the device.


Under Industry Canada regulations, this radio transmit-
ter may only operate using an antenna of a type and 
maximum (or lesser) gain approved for the transmitter 
by Industry Canada. To reduce potential radio inter-
ference to other users, the antenna type and its gain 
should be so chosen that the equivalent isotropically 
radiated power (e. i. r. p.) is not more than that neces-
sary for successful communication.


Conformément à la réglementation d’ Industrie Can-
ada, le présent émetteur radio peut fonctionner avec 
une antenne d’ un type et d’ un gain maximal (ou inf 
érieur) approuvé pour l’ émetteur par Industrie Canada. 
Dans le but de réduire les risques de brouillage radi-
oélectrique à l’ intention des autres utilisateurs, il faut 
choisir le type d’ antenne et son gain de sorte que la 
puissance isotrope rayonn  ée équivalente (p.i.r.e) ne 
dépasse pa l’ intensité nécessaire à l’ établissement d’ 

Содержание QY8000 Series

Страница 1: ...QY8000 QY8001 QY8002 QY8003 QY8050 QY8051 QY8052 QY8053 SERIES MODEL Navigation system manual ...

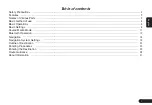
Страница 2: ...ious Parts 5 Basic method of use 6 Basic Operations 8 Basic Settings 8 Source Media Mode 11 Bluetooth Operation 13 Navigation 14 Navigation System Settings 19 Outline of Destination 23 Entering Procedures 23 Entering the Destination 25 Route Guidance 28 About Information 31 ...

Страница 3: ...ay or no voice play Or it may trigger accident fire or electric shock Contact NISSAN dealers Stop using it immediately when there is any foreign object water spill smoke or bad smell and contact designated NISSAN dealers Continuous use may trigger accident fire or electric shock Caution The volume during driving shall be adjusted so that the sound outside the vehicle can be heard Or it may cause a...

Страница 4: ...an for help This device complies with Part 15 of the FCC Rules Op eration is subject to the following two conditions This device may not cause harmful interference and This device must accept any interference received including interference that may cause undesired opera tion About IC This device complies with Industry Canada licence exempt RSS standard s Operation is subject to the following two ...

Страница 5: ...ct the internal structure of the player the player will stop playing automatically for protection when something abnormal occurs during the playing If the machine can t operate normally even if you oper ate as per the displayed instructions the machine may have malfunctions and you should contact NISSAN dealers Distortion may occur if the vehicle is driven on the road of harsh conditions or is vib...

Страница 6: ...l be hard to get it out and may result in failure Disc of Special Shape No disc in the shape of heart or octagon may be played or the machine will be damaged Do not use such kind of discs Disc Decoration Do not use any decoration to improve tone quality or protect disc such as disc case or protective case as the change in the thickness or dimension of the disc may result in failure Do not use any ...

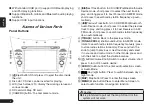
Страница 7: ... Device mode short press it to select the previous track to play and long press it to Fast Reverse in AM FM mode short press to search radio station frequency down automatically 8 BACK button Back to the previous mode 9 TUNE SCROLL knob sound button In AM FM mode rotate to search radio station frequency manualy press to store radio stations in memory Press and turn the knob to jump to previous or ...

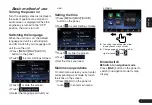
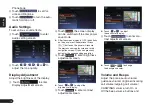
Страница 8: ...s Screen 3 Touch or slide the screen 4 Touch 5 Select the language and unit you use Setting the time 1 Press MENU MAP AUDIO button on the panel 2 Touch to enter Settings Screen 3 Touch or slide the screen 4 Touch 5 Set the clock you need Main menu operations On main menu screen you can enter corresponding work mode by touch the icons on the screen 1 Press MENU on the panel or touch to enter main m...

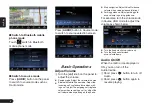
Страница 9: ...l ringtone volume when mak ing a call adjust the outgoing call ringtone volume when receiving a call or adjust the call volume when speaking on the phone z z Map navigation Adjust Voice Guidance volume when voice guidance interrupt z z Parking guidance Adjust parking guid ance volume in parking guidance For example turn the volume knob in Source USB mode to adjust the volume as shown below z z Tur...

Страница 10: ...ones and audio devices 1 Touch to enter Bluetooth setting screen z z When there is no Bluetooth pairing equipment record the items Con nect with Bluetooth and Paired Device List will be invalid 2 Touch to turn Bluetooth On or Off 3 Touch to Select the mobile phone or audio device to pair You can operate as per the information prompted 4 Touch to view Hands free Phone and Audio player list 5 Touch ...

Страница 11: ...tons on the panel are still operational Press button on the panel will resume the previous source play screen or map navigation screen Or you can press any button for the corresponding operation 3 Touch to enter brightness adjustment screen z Touch or to adjust the brightness of display 4 Touch to enter contrast adjustment screen z Touch or to adjust the contrast of display 5 Touch to enter con tr...

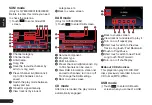
Страница 12: ...he quick menu 4 Touch the quick menu to rearrange it Source Media Mode 1 Press AUDIO button on the panel to enter source screen Only for QY8000 8001 8050 8051 Only for QY8002 8052 8254 FM AM mode 1 Touch to enter FM AM screen 1 2 3 2 Back to source screen 3 View station list RDS info and turn on or off HD TA REG AF mode z HD mode only for QY8000 8001 8050 8051 z TA REG AF mode only for QY8002 8003...

Страница 13: ... 1 Service component 2 Program type 3 DAB infomation 4 Preset channel list Station list Up to 18 channels can be saved 5 View DAB information station list and extra channels turn on or off TA change the DAB settings 6 Back to source screen CD mode After disc is loaded the play mode is automatically engaged 1 2 3 4 5 6 7 1Back to source screen 2View track list and select to play it 3Turn on or off ...

Страница 14: ...omposers and audio books Turn on or off the Display of Album Artwork 3Turn on or off repeat play 4Short touch switch to Previous Track Long touch Fast Backward 5Touch to Play Pause 6Short touch switch to next Track Long touch Fast Forward 7Turn on or off shuffle play Bluetooth Audio mode Before setting phone you need to pair the mobile phone with this unit 1 Touch to enter Bluetooth Audio screen 1...

Страница 15: ...t the PIN minimum 4 digits and maximum 16 digits to pair the audio device 4 After entering the PIN touch and operate as per the information prompted 5 After successful pairing it will automatically return to Bluetooth Setting screen Bluetooth Telephone 1 Touch to enter Phone screen 2 Touch to edit and delete Quick Dial number 3 Touch to view Call History records 4 Touch to view Phone book 5 Touch ...

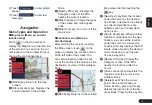
Страница 16: ...the screen You can set the location under the cur sor at the centre of the screen as the destination or store it to the Address Book 5 5 1 2 3 4 1 BACK key Returns to the scrolled Map screen before touching the key 2 New Dest key Sets the location under the cursor as the destina tion When a destination is already set the old destination is can celled as soon as the new desti nation is set 3 Add to...

Страница 17: ...e direction because the perspective of the trav elling direction can be adjusted as required Indicators on the map Indicators displayed on the Map screen are different according to the conditions at that time This section explains the main indicators dis played on the Map Indicators on the map of the current location 1 3 2 3 4 1 Audio mark Indicates the current source mode 2 Vehicle mark Indicates...

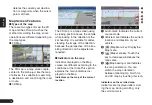
Страница 18: ...m the current location to the next way point or destination are displayed Manipulating the Map Screen Scrolling the map Touching the Map screen displays a cursor at the centre of the screen and you can scroll the map For the 2D map touch the map to move the map to the touched position and keep touching the map to scroll the map towards the touched direction For the 3D map touch the upper part of t...

Страница 19: ...ew Settings screen z z Intersection During the route guid ance mode displays the Intersection Close up display which displays the turning direction of the next guidance junction at the left of the screen z z Turn List During the route guidance mode displays the list of the name dis tance and turning direction of the guid ance junctions at the left of the screen z z Full Map Changes to display one ...

Страница 20: ...e Large Medium Small Birdview Angle key Changes the angle of the 3D map Touch to raise the angle and to lower the angle z z This control is available when 3D is selected North Up when Zoomed Out key Turn on or off north up when zoomed Names Displayed on Map key Change the names of place facili tiy and road displayed on map Left Split Map Settings key Change settings of Map Orienta tion Long Range ...

Страница 21: ...em to edit it 3 Touch to adjust the location by moving the cursor on the Map screen 4 Touch to delete the regis tered Home location 5 Touch to register it Stored Locations Register locations in the Address Book You can register up to 200 lo cations and can also edit the regis tered locations To register Location 1 Touch 2 Touch 3 Search for the location you wish to register by a similar way as for...

Страница 22: ...ocation of the Avoid Area Resize Area key You can change the size of the Avoid Area Large Medium or Small then touch FWY key You can set whether to avoid freeway passing the Avoid Area Delete key Delete the current Avoid Area 4 Touch to register it Deleting the Stored Items You can delete various data stored in the navigation system 1 Touch 2 Touch the item key to delete Delete Home Location key D...

Страница 23: ...ication displayed on the Map screen z z Destination Sets to display the ar rival time to the destination z z Waypoint Sets to display the arrival time to the next waypoint or destination Route Settings You can change settings concerning the route guidance 1 Touch to enter route Settings screen 2 Touch the desired item key Basic Route Type key You can change the conditions of route calculation z z ...

Страница 24: ... key To change the keyboard type QWERTY type and ABC type Tracking Dots Displayed on Map key To change the setting of the tracking dots displayed on map Adjust Current Location key You can correct the vehicle position on the Map screen by Scroll the map Resetting All Navigation Settings to Defaults You can reset all the Navigation set tings to return to the factory settings Note G G Though all the...

Страница 25: ... exist z z You need to touch to enter Destination screen when a route had exist 3 Touch to enter Street Address screen 4 Touch Note G G You can omit the state province name entry and directly enter a road name Proceed to step 9 5 Enter the state province name you wish to go to by touching the characters on the screen Change Area key To change the country area Current state key Use current state Sp...

Страница 26: ...ay Map screen is displayed You can adjust the location of the destination Add to Route key When the des tination is already set the speci fied location is set as the waypoint Store Location key Register the specified location into the Address Book Details key Displayinformation about the specified place if it is included in the map data 9 Touch the route guidance will be started The place found is...

Страница 27: ...rest POI Select the category of the place nar row down the data by specifying the area or entering the name and then select the place you wish to go to By touching you can also search a place by simply entering the name 1 Touch 2 Touch your desired category When a additional category list is dis played touch a category again to select one 3 Set the narrow down conditions for the places By Name key...

Страница 28: ...usly registered then set it as the new route Note To use this function one or more registered routes are required 1 Touch 2 Touch the route you wish to go from the displayed stored route list 3 Touch By Phone number If the telephone number of the facility is available use this to find the facility by entering the number Note G G Telephone numbers that were stored for stored destinations can also b...

Страница 29: ...estina tion then touch More Routes key You can change to other suggested routes with a different priority condition Route Info key Shows the information of the suggested route selected on the screen Add Waypoint key Adds waypoints to the suggested route displayed on the map Up to five waypoints can be specified 3 Touch Note G G When you search a place far from the current location change the map s...

Страница 30: ...vehicle position and will change while travelling When you get near to the next guid ance point the left display is auto matically changed to the Junction Map You can set to display the Turn List screen always in the route guidance mode 1 2 1 Turn List The list of the guidance points and turning directions are displayed from the items near to the vehicle position and it will change while travellin...

Страница 31: ... 1 Touch to enter Route Info screen Turn List key Display the list of route information The guidance points from the current location to the destination are displayed with the list format Simulation key Simulate the route guidance with moving the vehicle mark automatically on the Map screen Store Route key Store the speci fied route A maximum of 5 routes can be stored and they can be easily retrie...

Страница 32: ...ng the desired setting item 4 Touch The route is recal culated with specified conditions Setting the diverting distance Search for a diverted route where the section from the current location up to the specified distance is avoided 1 Touch to enter the Detour screen 2 Touch the distance you want to avoid The route where the section of se lected distance is avoided is auto matically calculated and ...

Страница 33: ......

Отзывы: