background image

Touch & hold [    ] will to 

scroll down items continu-

osly.

[       ] slider

  Select  a  station  while  in  the  Radio  mode  or 

select a track while in the USB mode.

  Select the folder while in the USB mode.

[      ] key

  Switch Title display.

  Touch and hold the key for 1 second or longer 

to switch the display layout (Title mode  

Indicator mode     Clock).

[     ] key

  Touch  the  key  to  set  the  TA  (Traffic 

Announcement) standby mode.

FZ409E

5

6

FZ409E

English

MAIN UNIT / 

APPAREIL PRINCIPAL 

/ HAUPTGERÄT  


/

 APPARECCHIO PRINCIPALE

 / HOOFDTOESTEL    


/

 UNIDAD PRINCIPAL

 / HUVUDENHET /

 UNIDADE PRINCIPAL

Note: Be sure to unfold this page and refer to the front diagrams as you read each chapter.

Remarque: Veuillez déplier cette page et vous référer aux schémas quand vous lisez chaque chapitre.

Hinweis: Bitte diese Seite ausfalten und beim Lesen der einzelnen Kapital die Frontdiagramme beachten.

Nota: Assicurarsi di aprire questa pagina e fare riferimento a questi diagrammi quando si legge ciascun capitolo.

Opmerking: Vouw deze pagina uit en zie tevens de afbeeldingen van het voorpaneel tijdens het doorlezen van de volgende hoofdstukken.

Nota: Cuando lea los capítulos, despliegue esta página y consulte los diagramas.

Observera: Vik ut denna sida för att kunna se figurerna över bilstereons framsida medan du läser de olika kapitlen.

Nota: Certifique-se de abrir esta página e consulte os diagramas frontais conforme realiza a leitura de cada capítulo.

CONTROLS/ LES COMMANDES/ 

REGLER/ CONTROLLI/ 

REGELAARS/ CONTROLES/ 

KONTROLLER/ CONTROLOS

English

Français

Deutsch

Italiano

Nederlands

Español

Svenska

Português

2.

7

FZ409E

English

3. NOMENCLATURE

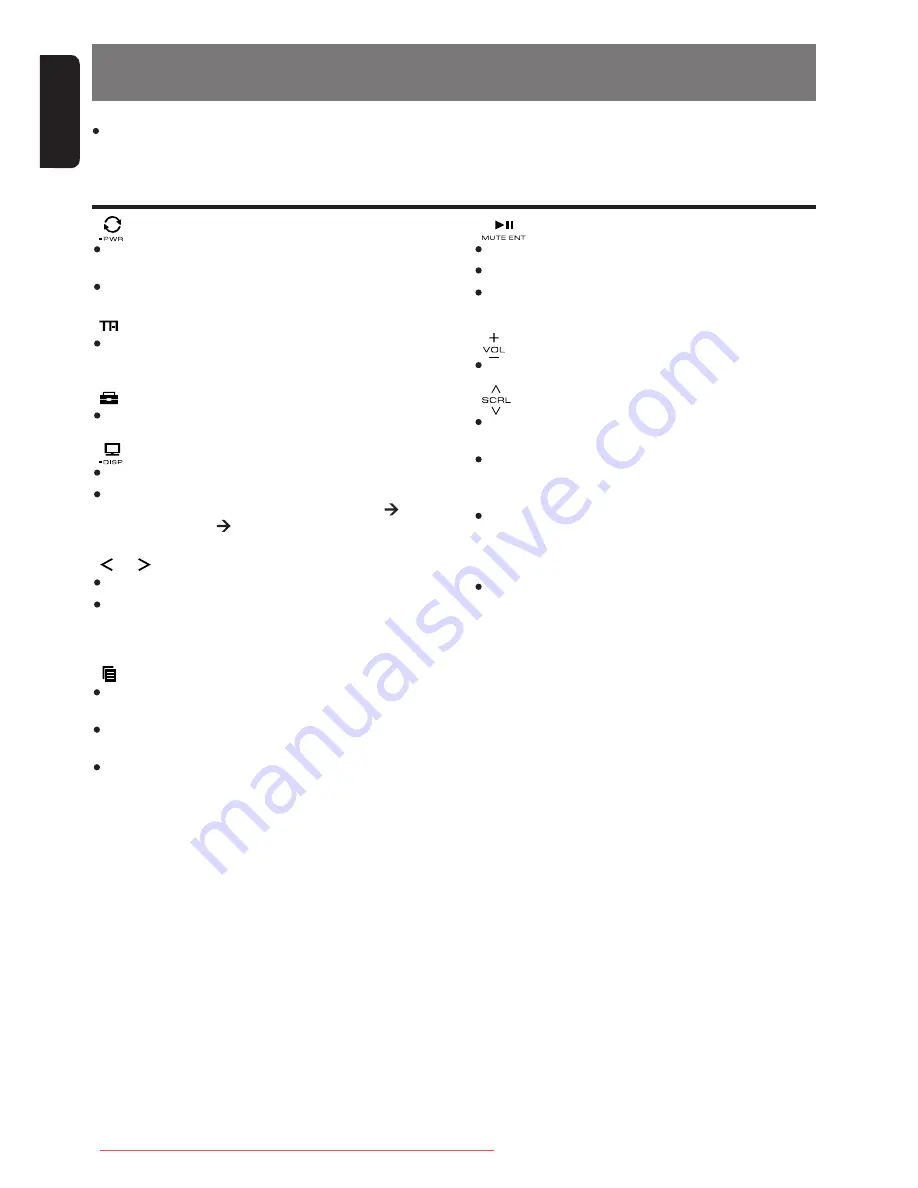
[      ] key

  Touch and hold the key for 1 second or longer 

to turn off the power.

  Switch to Source menu.

Note: 

  Be sure to read this chapter referring to the front diagrams of chapter “

2. CONTROLS

” on page 5.

Names of the Buttons and Their Functions

[     ] key

  Switch to ADJ menu.

[    ]/[    ] key

  This key is used to make various settings. 

  Touch and hold the key for 1 second or longer to 

enter the Fast-forward or Fast backward mode 

while in USB mode.

[           ] key

  Play or pause a track while in the USB mode.

  Toggle Mute on/off while in the Radio mode.

  Touch and hold the key for 2 seconds or longer 

to memory new value during setting mode.

[      ] slider

  Adjust the volume.

[     ] key

  Switch the band, or seek tuning or manual tuning 

while in the Radio mode.

  Switch to List Search, or Top folder while in the 

USB mode.

  Switch  between  last  menu  level  and  Play 

display,  or Top  iPod  menu  while  in  the  iPod 

mode.  

[USB PORT]

  USB  memory  device  insertion  port  (at  rear 

panel).

[AUX] input

  The input jack for connecting an external device 

(at rear panel).

Slider’s Key Operation

Touch  &  hold  slider  [      ] 

will increase volume con-

tinuosly.

Touch & hold slider [    ] 

will decrease volume con-

tinuosly.

Touch & hold [    ] will to 

scroll  up  items  continu-

osly.

Slide

Touch  and  release  [      ] 

once  will  increase  the 

volume 1 step.

Touch  and  release  [      ] 

once  will  decrease  the 

volume 1 step.

Touch  and  release  [      ] 

once  will  scroll  up  items 

1 step.

Touch  and  release  [      ] 

once will scroll down items 

1 step.

Downloaded from Caradio-Manual.com Manuals

Содержание FZ409E

Страница 1: ...AAC USB MP3 WMA AAC RECEIVER RECEPTOR DE USB MP3 WMA AAC USB MP3 WMA AAC RECEIVER RECEPTOR DE USB MP3 WMA AAC Owner s manual Mode d emploi Bedienungsanleitung Istruzioni per l uso Gebruiksaanwijzing Manual de instrucciones Bruksanvisning Manual de instruções Downloaded from Caradio Manual com Manuals ...

Страница 2: ...enclosed warranty card and keep it carefully with this manual Nederlands Hartelijk bedankt voor de aankoop van dit Clarion product Lees a u b deze gebruiksaanwijzing compleet door alvorens dit apparaat in gebruik te nemen Bewaar deze gebruiksaanwijzing nadat u ze gelezen hebt op een gemakkelijke plaats bv in het dashboardkastje Lees wat in de bijgesloten garantiekaart staat en bewaar ze samen met ...

Страница 3: ...ns 11 Radio Mode Operations 16 Radio Data System Operations 18 USB Operations 21 iPod Operations 25 Common Operations 29 6 TROUBLESHOOTING 33 7 ERROR DISPLAYS 34 8 SPECIFICATIONS 35 Contents English 3 FZ409E The use of apparatus in moderate climates Manufactured under license from BBE Sound Inc Licensed by BBE Sound Inc under one or more of the following US patents 5510752 5736897 BBE and BBE symb...

Страница 4: ...nd found to comply with the limits for a Class B digital de vice pursuant to Part 15 of the FCC Rules These limits are designed to provide reason able protection against harmful interference in a residential installation This equipment generates uses and can radi ate radio frequency energy and if not installed and used in accordance with the instructions may cause harmful interference to radio com...

Страница 5: ...mi quando si legge ciascun capitolo Opmerking Vouw deze pagina uit en zie tevens de afbeeldingen van het voorpaneel tijdens het doorlezen van de volgende hoofdstukken Nota Cuando lea los capítulos despliegue esta página y consulte los diagramas Observera Vik ut denna sida för att kunna se figurerna över bilstereons framsida medan du läser de olika kapitlen Nota Certifique se de abrir esta página e c...

Страница 6: ...nctions key Switch to ADJ menu key This key is used to make various settings Touch and hold the key for 1 second or longer to enter the Fast forward or Fast backward mode while in USB mode key Play or pause a track while in the USB mode Toggle Mute on off while in the Radio mode Touch and hold the key for 2 seconds or longer to memory new value during setting mode slider Adjust the volume key Swit...

Страница 7: ...d slider will decrease volume con tinuosly Touch hold will to scroll up items continu osly Slide Touch and release once will increase the volume 1 step Touch and release once will decrease the volume 1 step Touch and release once will scroll up items 1 step Touch and release once will scroll down items 1 step Downloaded from Caradio Manual com Manuals ...

Страница 8: ...times unevenness of color and brightness might be occurred depend on the point of view to watch in a characteristic A descending line across the screen will be displayed regularly to prevent OEL Display burn in Please note that these are not hardware software failures as it happens to be the structure of the organic electro luminescence display Display Items OEL Screen Title display Downloaded fro...

Страница 9: ...4 Replace the cover and slide in until it clicks into place Notes Misuse may result in rupture of the battery producing leakage of fluid and resulting in personal injury or damage to surrounding materials Always follow these safety precautions Use only the designated battery When replacing the battery insert properly with polarities oriented correctly Do not subject battery to heat or dispose of in...

Страница 10: ...ess and hold the button for 2 seconds or longer Auto store Scan play Press and hold the button for 1 second or longer to perform folder scan play AF function on and off Press and hold the button for 1 second or longer REG function on and off Repeat play Press and hold the button for 1 second or longer to perform folder repeat play PTY mode on and off Random play Press and hold the button for 1 sec...

Страница 11: ...is unit will switch to previous mode after system check Selecting a mode 1 Touch the key to switch to Source menu 2 Touch the corresponding key beside the Source mode name to enter into desired mode Adjusting the volume 1 Slide up along the or touch the key to increases the volume 2 Slide down along the or touch the key to decreases the volume The volume level is from 0 minimum to 33 maximum Switc...

Страница 12: ...ndicator mode Clock Example iPod Sound adjustments You can adjust a sound effect or tone quality to your preference When CT data is not received ap pears in the display for Title mode and Indicator mode while appears in the display for Clock mode 1 Touch the key to switch to ADJ menu 2 Select SOUND in the menu to enter Sound Adjustment mode 3 Slide along the slider or touch key the Sound Adjustmen...

Страница 13: ...1st selected item 3 3 Touch key to select Gain G center frequency F or Q factor Q 3 4 Slide along slider or touch key to adjust the value The factory default setting G 0 Adjustment range 7 to 7 F 500Hz Adjustment range 500 1k 2k Q 1 0 Adjustment range 0 7 1 0 1 4 2 0 Adjusting the mid This adjustment can be performed only when the BEAT EQ is set to CUSTOM 3 1 Select MID 3 2 Touch key to enter deta...

Страница 14: ...gs touch the ENT key to return to the 1st selected item Adjusting the fader 3 1 Select FADER 3 2 Touch key to enter detail setting stage 3 3 Slide along slider or touch key to adjust the balance of the rear and front speakers The factory default setting is CENTER Adjustment range FRONT 12 to REAR 12 3 4 After completing settings touch the ENT key to return to the 1st selected item Adjusting the ba...

Страница 15: ...or 120 3 1 Select S W VOL 3 2 Touch key to enter detail setting stage 3 3 Slide along slider or touch key to increases or decreases the subwoofer volume Setting the subwoofer You can set the low pass filter of subwoofer 3 1 Select S W LPF 3 2 Touch key to enter detail setting stage 3 3 Slide along slider or touch key to select the setting in sequence THROUGH 60 90 120 The factory default setting is...

Страница 16: ...2 types of seek tuning DX SEEK and LOCAL SEEK DX SEEK can automatically tune in to receivable broadcast stations LOCAL SEEK can tune in to only broadcast stations with a good reception sensitivity 1 Touch the key and select the desired band FM or AM If is lit in the display touch and hold the key for 1 second or longer in the display goes off and seek tuning is now avail able If is lit in the disp...

Страница 17: ...ds to recall a preset station Method 1 3 1 Select P CH MEMORY 3 2 Touch key to enter detail setting stage 3 3 Slide along slider or touch key to select the desired preset station 3 4 Touch ENT key for less than 1 second to recall the stored radio frequency Method 2 1 Touch the key to select the desired band 2 Slide along slider or touch key to select the desired preset station 3 Touch ENT key to r...

Страница 18: ...the Radio Data System broadcast station being received has traffic announcement programmes Setting the TA standby mode If you touch the key when only is lit in the display and light in the display and the unit is set into the TA standby mode until a traffic announcement is broadcast When a traf fic announcement broadcast starts TRA INFO appears in the display If you touch the key while a traffic annou...

Страница 19: ...Select PTY 3 2 Touch key to enter detail setting stage 3 3 Slide along slider or touch key to select ON or OFF 3 4 After completing settings touch the ENT key to return to the 1st selected item OFF PTY in the display goes off and PTY standby mode is cancelled Cancelling a PTY interrupt broadcast Touch the key during the PTY interrupt broadcast the PTY interrupt is cancelled and the unit returns to...

Страница 20: ...y default setting is ON 3 1 Select AF 3 2 Touch key to enter detail setting stage 3 3 Slide along slider or touch key to select ON or OFF 3 4 After completing settings touch the ENT key to return to the 1st selected item ON AF in the display lights and AF function turns on OFF AF in the display goes off and AF function turns off If the reception of the current broadcast sta tion deteriorates SEARC...

Страница 21: ...aximum data transfer rates of 12 Mbps USB memory devices that can be played by connecting to the unit s USB cable are limited to those recognized as USB mass storage class devices operation is not guaranteed with all USB memory devices Devices compatible with USB Mass Storage Class can be used merely by connecting to the host device without need for special drivers or application software Consult ...

Страница 22: ...gh sound quality This means that several mu sic CDs can be recorded on a USB memory de vice to allow a long listening time Depends on the USB memory device storage capacity Precautions when creating MP3 WMA AAC file Usable sampling rates and bit rates See USB page 35 for details To disable DRM Digital Rights Management 1 When using Windows Media Player 9 10 11 click on TOOL OPTIONS MUSIC RE CORD ta...

Страница 23: ...acks are read into the unit The order in which tracks are recorded may differ depending on the device connected the actual playback order may not be the same as that indicated on your computer s display To listen to tracks on a connected USB memory device 1 Touch the key to switch to the Source menu and select the USB When USB memory device is selected playback except DRM files will begin from the ...

Страница 24: ...re return to the 1st selected item 3 5 During scan will keep blinking All scan play starts from the next track after the track currently being played Scan play This function allows you to locate and play the first 10 seconds of all the tracks in current folder 3 1 Select SCAN 3 2 Touch key to enter detail setting stage 3 3 Slide along slider or touch key to select TRACK 3 4 Touch the ENT key TRACK ...

Страница 25: ...CK 3 4 Touch the ENT key TRACK RANDOM will be displayed for 2 seconds before return to the 1st selected item 3 5 lights in the display 3 Touch ENT key to enter Music menu list or Video menu list For iPod which does not support video play display will display Music menu list directly If MUSIC is selected playback will begin from the last file that was played on the iPod iPod Operations This section ...

Страница 26: ...he ENT key REPEAT OFF will be displayed for 2 seconds before return to the 1st selected item Random play Play all albums within a selected category in ran dom order Corresponds to Shuffle Albums command on iPod 3 1 Select RANDOM 3 2 Touch key to enter detail setting stage 3 3 Slide along slider or touch key to select TRACK 3 4 Touch the ENT key TRACK RANDOM will be displayed for 2 seconds before re...

Страница 27: ...h key to select a track within a category iPod Operations Selecting category from the iPod Video menu 1 Touch and hold the key for 1 second or longer 2 Select to switch to Music menu or Video menu 3 If VIDEO is selected from the list iPod Video menu categories will be displayed Note Repeat and Random mode operations are not supported when in the iPod menu mode 4 Slide along slider or touch key to ...

Страница 28: ...h the ENT key to return to the 1st selected item Note The setting will only take effect after disconnecting and re connecting the iPod 3 4 After completing settings touch the ENT key to return to the 1st selected item Notes During iPod Simple mode ON iPod Mode will be displayed as below and cannot switch to other display layout During Simple Mode On do not operate from iPod and this unit at the sa...

Страница 29: ... as following order DISP BRIGHT BEEP CODE SCREEN SAVER AUTO SCROLL SCROLL SPEED DIMMER BLINKING LED AMP CANCEL TEL SWITCH SYSTEM CHECK If no operation is performed for more than 10 seconds ADJ mode is cancelled and the display returns to the previous mode Setting the beep The factory default setting is ON 3 1 Select BEEP 3 2 Touch key to enter detail setting stage 3 3 Touch the key to select ON or...

Страница 30: ...ion on the operation display corresponding to the button op eration is shown for about 30 seconds and the display returns to the screen saver display The factory default setting is ON Common Operations 3 6 MEMORY XXXX will be displayed for 2 sec onds where XXXX is the entered digits 3 6 If successfully delete the registered code DELETED will be displayed for 2 seconds and back to 1st item 3 7 If u...

Страница 31: ...ry default setting is 3 3 1 Select SCROLL SPEED 3 2 Touch key to enter detail setting stage 3 3 Slide along slider or touch key to adjust the speed value Parameter range 1 5 OFF To scroll just 1 time ON To scroll automatically Setting the dimmer control You can set the dimmer control ON or OFF The factory default setting is ON 3 1 Select DIMMER 3 2 Touch key to enter detail setting stage 3 3 Touch...

Страница 32: ...a system check from the adjust mode when required 3 1 Select SYSTEM CHECK 3 2 Touch ENT key SYSTEM CHECK ap pears in the display 3 3 After finish checking this unit will switch to previous mode Notes This unit requires hands free kit that supports AUX input as a source of cellular phone audio input Please consult your local authorized Clarion dealer for more information on the hands free kit offere...

Страница 33: ...ins no MP3 WMA AAC files The files are not proper MP3 WMA AAC format Record MP3 WMA AAC files properly to the device Use only properly encoded MP3 WMA AAC files The device isn t recognized Connectors are loose Disconnect the device and reconnect securely Can t insert the device The MP3 WMA AAC files are improperly encoded Use only properly encoded MP3 WMA AAC files Connectors are loose Disconnect the de...

Страница 34: ...perly encoded Use only properly encoded MP3 WMA AAC files The iPod contains no audio files Insert an iPod containing audio files Do not support the HUB devices Disconnect the devices and reconnect If the devices are still not recognized try replacing with a different devices Do not use the HUB devices Over current detection ERROR 3 iPod mode CUR ERR HUB ERR ERROR 2 Downloaded from Caradio Manual com ...

Страница 35: ...67 kg Dimensions 178 mm Width X 50 mm Height X 154 2 mm Depth Audio Maximum Power Output 200 W 50 W X 4 ch Power Output 4 X 18 W DIN 45324 B 14 4 V Bass Control Action 100 Hz 14 dB Middle Control Action 1 kHz 14 dB Treble Control Action 10 kHz 14 dB Line Output with A C 1 kHz 10 kΩ 1 8 V USB USB 1 1 and 2 0 compatible with a maximum transfer rates of up to 12Mbps Full speed Folder Level Limit 8 Le...

Страница 36: ...Co Ltd Printed in Malaysia Imprimé en Malaisie Gedruckt in Malaysia Stampato in Malaysia Gedrukt in Maleisi Impreso en Malasia Tryckt i Malaysia Impresso na Malásia PE 8504 E Clarion Co Ltd 280 8769 01 Downloaded from Caradio Manual com Manuals ...

Отзывы: