Chapter 3 Names and Functions of Printer Parts
−
9
−
Chapter
3
Names and Functions of Printer Parts
This chapter describes the names and functions of each part of the printer.
3.1 Printer main body
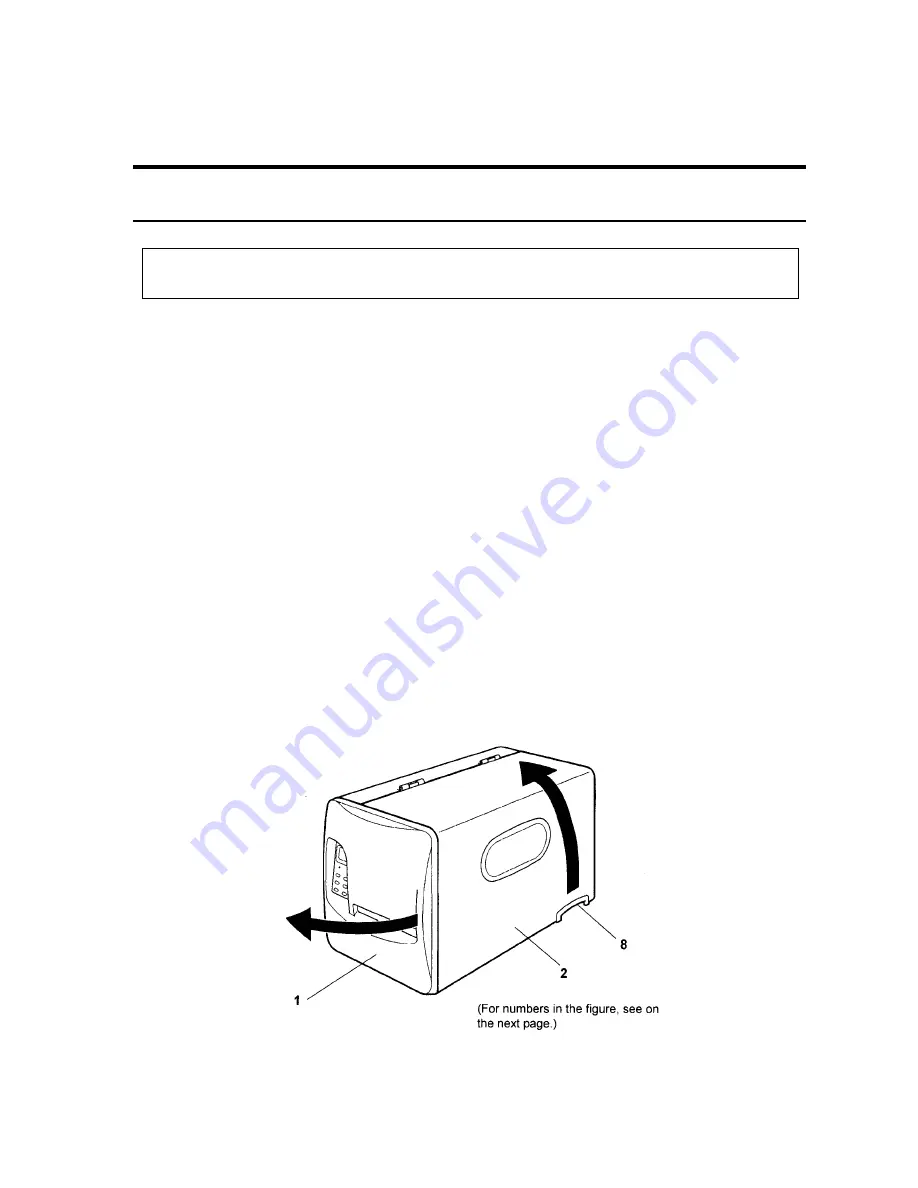
1
Opening/closing and detachment of the front cover
To open the front cover, catch hold of the right edge of the front cover with your fingers and open it in
the direction as shown with arrow. To close the front cover, return the right edge of the front cover to
the original position and push it lightly and the magnet on the lower right corner will hold the front
cover and the printer main body frame firmly. To remove the front cover, first open it fully then vertically
lift up the hinged left side of the cover.
2
Opening/closing of the right side cover
The right side cover (viewed from the front) is opened while holding the lower curved grip of the cover.
The cover should be opened all the way until it stops at the hinges. To close the cover, close it fully
while holding the grip of the cover and release your hand.
3
Grip to open/close the right side cover
Содержание CLP-9001
Страница 1: ......
Страница 9: ... viii ...
Страница 13: ...Chapter 2 Safety Precautions 4 ...
Страница 14: ...Chapter 2 Safety Precautions 5 ...
Страница 15: ...Chapter 2 Safety Precautions 6 ...
Страница 16: ...Chapter 2 Safety Precautions 7 ...
Страница 17: ...Chapter 2 Safety Precautions 8 ...
Страница 20: ...Chapter 3 Names and Functions of Printer Parts 11 ...
Страница 27: ...Chapter 4 Media Paper and Ribbon 18 4 2 Paper size ...
Страница 41: ...Chapter 5 Power ON and Using the Control Panel 32 5 4 Navigating the Menu System ...
Страница 42: ...Chapter 5 Power ON and Using the Control Panel 33 5 5 Changing Menu Values ...
Страница 43: ...Chapter 5 Power ON and Using the Control Panel 34 5 6 Permanently Saving Printer Settings ...
Страница 44: ...Chapter 5 Power ON and Using the Control Panel 35 5 7 Producing a Test or Configuration Print ...
Страница 45: ...Chapter 5 Power ON and Using the Control Panel 36 5 8 Turning the printer OFF ...
Страница 47: ...Chapter 6 Configuring Your Printer Using the Menus 38 6 2 Page Setup Menu ...
Страница 48: ...Chapter 6 Configuring Your Printer Using the Menus 39 6 3 System Setup Menu ...
Страница 49: ...Chapter 6 Configuring Your Printer Using the Menus 40 ...
Страница 50: ...Chapter 6 Configuring Your Printer Using the Menus 41 6 4 After Print Menu ...
Страница 51: ...Chapter 6 Configuring Your Printer Using the Menus 42 6 5 Interface Setup Menu ...
Страница 52: ...Chapter 6 Configuring Your Printer Using the Menus 43 6 6 Permanently Saving Settings Menu 6 7 Test Mode Menu ...
Страница 53: ...Chapter 6 Configuring Your Printer Using the Menus 44 6 8 Menu Mode Description ...
Страница 54: ...Chapter 6 Configuring Your Printer Using the Menus 45 ...
Страница 55: ...Chapter 6 Configuring Your Printer Using the Menus 46 ...
Страница 56: ...Chapter 6 Configuring Your Printer Using the Menus 47 ...
Страница 57: ...Chapter 6 Configuring Your Printer Using the Menus 48 ...
Страница 59: ...Chapter 7 Troubleshooting 50 ...
Страница 60: ...Chapter 7 Troubleshooting 51 7 2 Error messages and corrective actions ...
Страница 61: ...Chapter 7 Troubleshooting 52 ...
Страница 63: ...Chapter 8 Maintenance 54 8 2 Cleaning method ...
Страница 64: ...Chapter 9 Specifications 55 Chapter 9 Specifications 9 1 General specifications ...
Страница 68: ...Chapter 9 Specifications 59 9 3 Printable area The accurate print position is illustrated below ...
Страница 69: ...Chapter 9 Specifications 60 9 4 Adjustable sensor ...
Страница 70: ...Chapter 9 Specifications 61 9 5 Auto Cutter optional ...
Страница 72: ......


