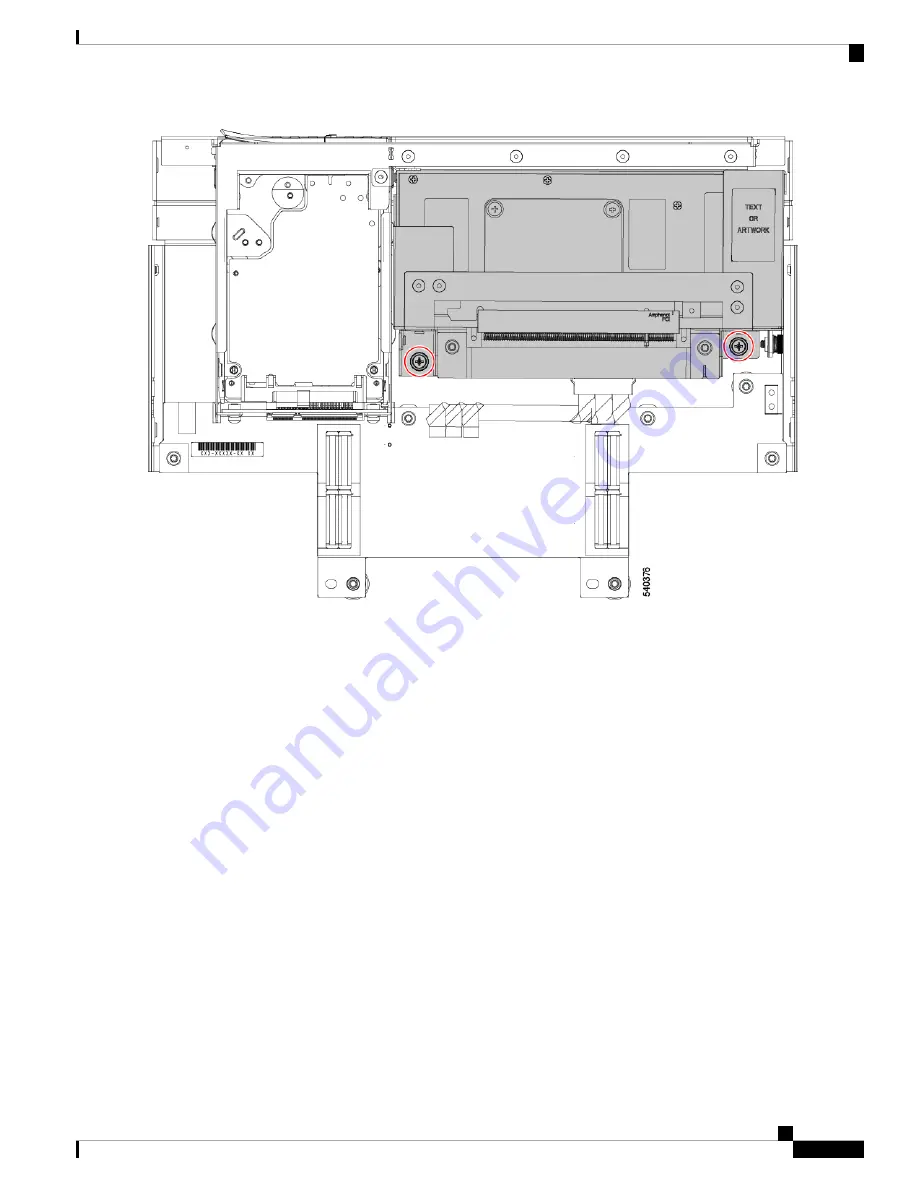
Step 4
Using a #2 Phillips screwdriver, remove the 2 Phillips-head screws from the GPU cage.
Step 5
Slide the GPU cage towards the rear of the front mezzanine GPU board.
Step 6
Holding the front edge of the GPU cage (the end opposite the 2 Phillips0-ead screws you loosened), rotate the GPU cage
90 degrees so that its vertical.
The front of the cage has a "T" nut as a retention feature. If you cannot rotate the GPU cage up, it is probably obstructed
by the "T" nut. Repeat the previous step until the GPU cage rotates easily.
When rotating the GPU cage upward, make sure not to scrape or damage other parts on the compute node or
the front mezzanine GPU module.
Note
Cisco UCS X10c Front Mezzanine GPU Module Installation and Service Guide
15
Servicing the GPU Module
Removing the GPU Cage


