background image

AC-Powered Chassis

AC power modules operate in the input range of 180 VAC to 264 VAC, 47 to 63 Hz (nominal input level of
200 to 240 VAC).

Power redundancy requirements vary based on the system configuration (number and type of line cards, etc.).
AC-powered systems are 2N protected. A minimum of two power supplies are required for redundant operation.

Each of the AC power inputs requires a separate dedicated branch circuit. Note that the circuit breaker and
fuse lockout procedures should follow the rules and regulations in the National Electrical Code (NEC) and
any local codes.

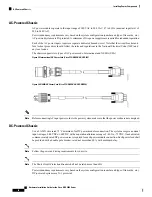
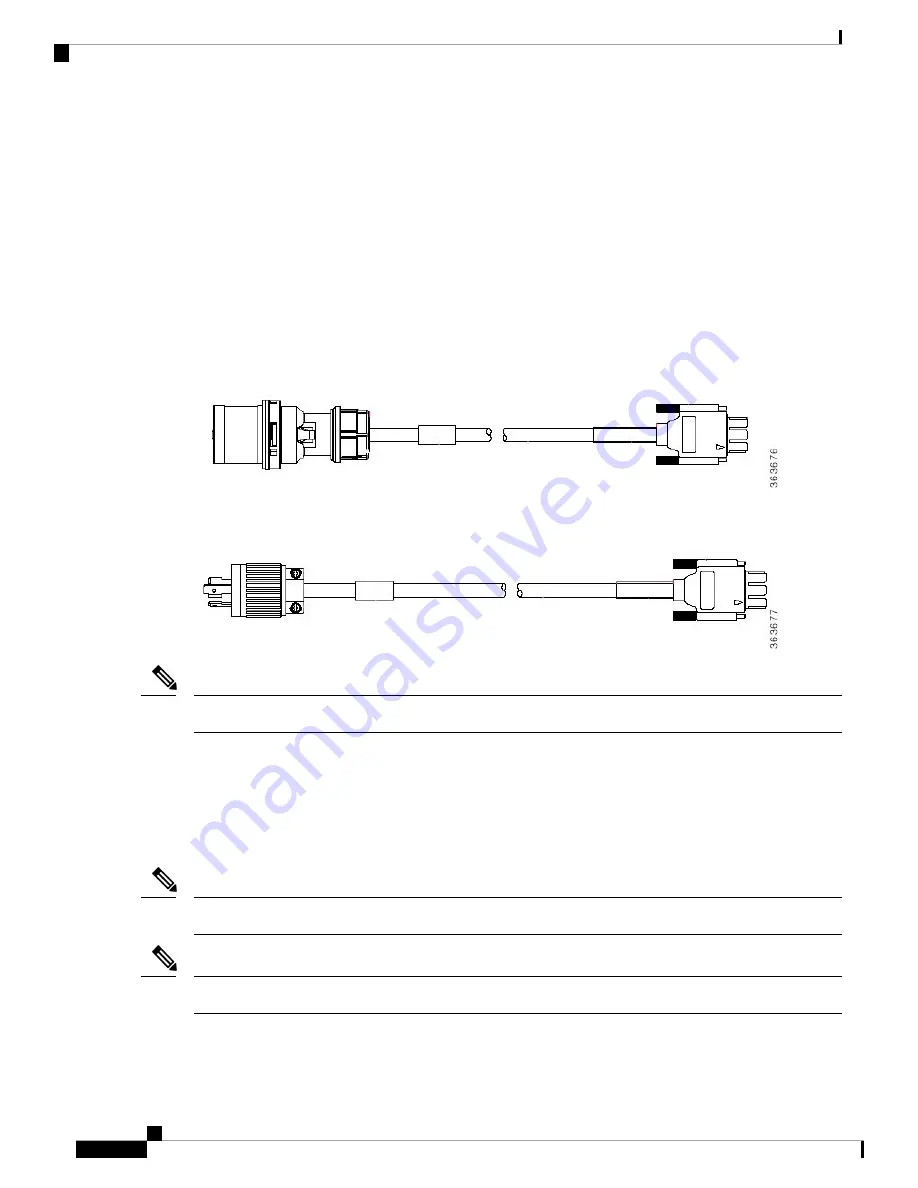
The chassis supports two types of AC power cords: International and NEMA (USA).

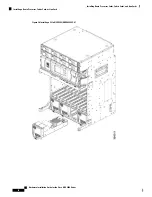
Figure 37: International AC Power Cord (Cisco PID NCS4K-AC-CBL-IEC)

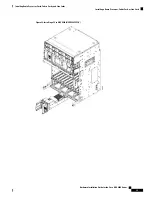
Figure 38: NEMA AC Power Cord (Cisco PID NCS4K-AC-CBL-NEMA)

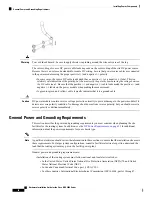
Before connecting AC input power cords to the power system, make sure that the power cords are not energized.

Note

DC-Powered Chassis

Use a 6 AWG wire rated 75°C minimum, for DC power modules connection. The system accepts a nominal
input voltage of -48 VDC or -60VDC, with an operational tolerance range of -40.5 to -72 VDC. One dedicated,
commensurately rated DC power source is required for each power module connection. Each power feed shall
be provided with a double pole breaker, rated not more than 60A, with medium delay.

Follow the power and sizing requirements for your site.

Note

The Short Circuit Protection Breaker shall not be rated more than 60A.

Note

Power redundancy requirements vary based on the system configuration (number and type of line cards, etc.).
DC-powered systems are N+1 protected.

Hardware Installation Guide for the Cisco NCS 4000 Series

52

Installing Power Components

AC-Powered Chassis

Содержание NCS 4000 Series

Страница 1: ... Guide for the Cisco NCS 4000 Series First Published 2017 12 11 Americas Headquarters Cisco Systems Inc 170 West Tasman Drive San Jose CA 95134 1706 USA http www cisco com Tel 408 526 4000 800 553 NETS 6387 Fax 408 527 0883 ...

Страница 2: ......
Страница 3: ...nd Fabric Cards FC are installed The Cisco NCS 4009 chassis contains a single card cage where the RPs and LCs are installed The FCs are installed beneath this card cage The following table indicates the slots available for the supported cards NCS 4009 NCS 4016 Chassis 2 2 Route Processors 9 16 Line Cards 4 4 Fabric Cards Both the NCS 4016 and NCS 4009 are rack mountable It is compatible with the f...

Страница 4: ...odifications to a facility Therefore you should plan the site well in advance of the scheduled delivery of the chassis system Note Figure 1 Front View of the NCS 4016 Fiber management areas 2 4 Power trays 2 each containing four power modules Power tray 0 PS0 contain PS0 PM0 PS0 PM1 PS0 PM2 and PS0 PM3 power modules Power tray 1 PS1 contain PS1 PM0 PS1 PM1 PS1 PM2 and PS1 PM3 power modules 1 Hardw...

Страница 5: ...lot RP0 and RP1 5 External connection unit ECU Craft panel is attached on top of the ECU Air outlet is on the back 2 Air inlet 6 Fan trays 2 3 Figure 2 Front View of the Cisco NCS 4009 Hardware Installation Guide for the Cisco NCS 4000 Series 3 Chassis Overview About the Cisco NCS 4016 and Cisco NCS 4009 Chassis ...

Страница 6: ...he intelligence of the system by functioning as the system controller and providing route processing and chassis management The RP cards also monitor system alarms and control the system fans The LEDs on the front panel indicate active alarm conditions Route Processor Cards RPs The FCs provide the switch fabric for the routing system and performs the cross connect function of the routing system co...

Страница 7: ... before removing or installing a power tray Note The following guidelines are for your safety and to protect equipment The guidelines do not include all hazards Be alert Never attempt to lift an object that might be too heavy for you to lift by yourself Keep the work area clear and dust free during and after installation Do not allow dirt or debris to enter into any laser based components Keep too...

Страница 8: ... We recommend use of an ESD preventive wrist strap whenever you handle network equipment or one of its components For guidelines to prevent ESD damage see Preventing Electrostatic Discharge on page 29 Two ESD jacks are provided one at the top of the chassis and one at the bottom of the chassis Figure 3 ESD Jacks Top of Chassis Top ANSI jacket point 2 Top ETSI connection point 1 Hardware Installati...

Страница 9: ...eparing to Mount the Chassis in a Rack on page 9 Mounting the Chassis into a Rack on page 24 Preparing the Rack for Chassis Installation Install the chassis into one of the following standard racks ANSI 19 inch or 23 inch 2 or 4 post ETSI For the ANSI 19 inch rack the minimum front opening must be 17 72 inches 450 mm to allow for chassis insertion Note If you are installing a single chassis in a r...

Страница 10: ...unting kits Make sure that floor mounting bolts are accessible especially if annual re torquing of bolts is required Figure 4 Single NCS 4016 Chassis Mounted in Rack Before you move the chassis or mount the chassis into the rack we recommend that you do the following Hardware Installation Guide for the Cisco NCS 4000 Series 8 Mounting the Chassis Preparing the Rack for Chassis Installation ...

Страница 11: ...lowing steps Installing the Mounting Brackets This section explains how to install the top and bottom mounting brackets for the specific type of rack you are using For 2 post ANSI racks the brackets are installed in the middle position For 4 post ANSI racks and ETSI cabinets the brackets are installed in the front position Prerequisites Make sure that you have the correct type of mounting brackets...

Страница 12: ...Figure 5 Attaching Chassis Mounting Brackets in NCS 4009 Hardware Installation Guide for the Cisco NCS 4000 Series 10 Mounting the Chassis Installing the Mounting Brackets ...

Страница 13: ...hassis Mounting Brackets in NCS 4016 Various types of bracket installation are shown in these illustrations Hardware Installation Guide for the Cisco NCS 4000 Series 11 Mounting the Chassis Installing the Mounting Brackets ...

Страница 14: ...re 7 Attaching ANSI 19 Inch Brackets to Front 4 Post Rack or Middle 2 Post Rack in NCS 4009 Hardware Installation Guide for the Cisco NCS 4000 Series 12 Mounting the Chassis Installing the Mounting Brackets ...

Страница 15: ...re 8 Attaching ANSI 19 Inch Brackets to Front 4 Post Rack or Middle 2 Post Rack in NCS 4016 Hardware Installation Guide for the Cisco NCS 4000 Series 13 Mounting the Chassis Installing the Mounting Brackets ...

Страница 16: ...re 9 Attaching ANSI 23 Inch Brackets to Front 4 Post Rack or Middle 2 Post Rack in NCS 4009 Hardware Installation Guide for the Cisco NCS 4000 Series 14 Mounting the Chassis Installing the Mounting Brackets ...

Страница 17: ...e 10 Attaching ANSI 23 Inch Brackets to Front 4 Post Rack or Middle 2 Post Rack in NCS 4016 Hardware Installation Guide for the Cisco NCS 4000 Series 15 Mounting the Chassis Installing the Mounting Brackets ...

Страница 18: ...ttaching ETSI Brackets to Front in NCS 4009 Figure 12 Attaching ETSI Brackets to Front in NCS 4016 Hardware Installation Guide for the Cisco NCS 4000 Series 16 Mounting the Chassis Installing the Mounting Brackets ...

Страница 19: ... define the aid brackets position Tools and Equipment Number 2 Phillips screwdriver Cisco NCS 4016 installation kit NCS4K INST KIT Cisco NCS 4009 installation kit NCS4009 INST KIT Steps Procedure Step 1 Attach the aid brackets to the rack below where the chassis will sit Tighten the two screws to firmly attach the brackets to the rack Hardware Installation Guide for the Cisco NCS 4000 Series 17 Mo...

Страница 20: ...ks with different mounting hole patterns the aid brackets have groups of screw holes on either side The mounting holes in the aid brackets are spaced so that one mounting hole in each hole group aligns with a corresponding hole in the equipment rack By using the corresponding mounting hole in the same hole group on the opposite side of the rack you can keep both the aid brackets leveled Hardware I...

Страница 21: ... a rack remove the front door of the chassis to ensure that the door is not damaged in any way Tools and Equipment ESD preventive wrist strap Number 2 Phillips screwdriver medium and small slot head screwdrivers NCS 4016 front door Cisco PID NCS4016 DOOR NCS 4009 front door Cisco PID NCS4009 DOOR Steps Procedure Step 1 Turn the knob to unlock the door Step 2 Open the door Step 3 Loosen the screw t...

Страница 22: ...Figure 14 Disconnecting the Ground Cable in NCS 4009 Hardware Installation Guide for the Cisco NCS 4000 Series 20 Mounting the Chassis Removing and Replacing the Chassis Door ...

Страница 23: ...ing the Ground Cable in NCS 4016 Step 4 Move down the pin to release the door from the chassis hinge Hardware Installation Guide for the Cisco NCS 4000 Series 21 Mounting the Chassis Removing and Replacing the Chassis Door ...

Страница 24: ... Figure 17 Releasing the Bottom Hinge Pin Step 6 To replace the front door after the chassis is mounted on the rack a Remove the screw and washer from the chassis fixing point Hardware Installation Guide for the Cisco NCS 4000 Series 22 Mounting the Chassis Removing and Replacing the Chassis Door ...

Страница 25: ... and then into the machined block c Using a Phillips screwdriver insert and tighten the screws to a torque value of 11 5 in lb 1 3 N m Figure 19 NCS 4009 with Door Ground Strap Retrofit Kit Installed ANSI Hardware Installation Guide for the Cisco NCS 4000 Series 23 Mounting the Chassis Removing and Replacing the Chassis Door ...

Страница 26: ...n the knob to lock Mounting the Chassis into a Rack This section describes how to mount the chassis into a rack The figure below shows the chassis mounting hardware ready for rack mounting Hardware Installation Guide for the Cisco NCS 4000 Series 24 Mounting the Chassis Mounting the Chassis into a Rack ...

Страница 27: ... the aid brackets are installed on the rack Tools and Equipment Number 2 Phillips screwdriver Mechanical lifting device such as a scissor lift or other suitable lifting device NCS 4016 installation kit shipped with the chassis contains installation aid brackets and screws Cisco PID NCS4K INST KIT Hardware Installation Guide for the Cisco NCS 4000 Series 25 Mounting the Chassis Mounting the Chassis...

Страница 28: ... chassis with the installation aid brackets Note Figure 22 Example Using a Scissor Lift to Position the Chassis in the Rack Step 3 Move the chassis With at least two people stand in front of the chassis and carefully push the chassis into the rack Step 4 Move the lift aid away from the front of the chassis Step 5 Push carefully until the mounting brackets contact the rack mounting bracket with the...

Страница 29: ...Figure 23 Chassis Mounting Holes Hardware Installation Guide for the Cisco NCS 4000 Series 27 Mounting the Chassis Mounting the Chassis into a Rack ...

Страница 30: ...with a hole in the equipment rack or the optional center mount bracket Use the corresponding mounting hole in the same hole group on the opposite side of the chassis to level the chassis in the rack Note Step 7 Use the screwdriver to fully tighten the screws Tighten the screws to a torque value of 22 in lb 2 5 N m Hardware Installation Guide for the Cisco NCS 4000 Series 28 Mounting the Chassis Mo...

Страница 31: ...ctrostatic discharge ESD damage which can occur when electronic cards or components are improperly handled results in complete or intermittent failures We recommend use of an ESD preventive wrist strap whenever you handle network equipment or one of its components Always use an ESD preventive wrist or ankle strap and ensure that it makes good skin contact Connect the equipment end of the connectio...

Страница 32: ...NCS 4016 and downward for cards in the bottom row in the NCS 4016 chassis Every FC LC and RP card has a key mounted on the board that matches a corresponding slot on the chassis side top of each card slot This key slot mechanism prevents a card from being inserted into the wrong non matching card slot It also prevents a card from being inserted upside down When a card is inserted into the wrong ca...

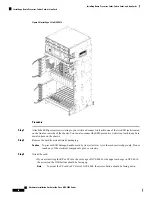
Страница 33: ...ps The following steps describe how to install a filler card Figure 24 LC Slot Filler Card Procedure Step 1 Determine the correct orientation of the filler card In NCS 4016 if you are installing the card in the top rack the arrow should be pointing up If you are installing the card in the bottom rack the arrow should be pointing down In NCS 4009 the arrow on the faceplate should be pointing up Har...

Страница 34: ... Identify the filler card to be removed from the card cage Use the number 2 Phillips screwdriver and turn the two captive screws on the front panel of the card counterclockwise to loosen the card from the slot Step 2 Grasp the filler card handle with one hand and gently pull it halfway from the slot Step 3 Place one hand under the filler card to guide it Step 4 Holding the filler card underneath a...

Страница 35: ...400G FC LC is twice that of the 200G FC LC The 200G and the 400G fabric cards support a single chassis only in NCS 4009 Compatible with 400G LC Compatible with 200G LC FC PID Chassis No Yes NCS4009 FC S 200G NCS 4009 Yes Yes NCS4009 FC2 S 400G NCS4009 FC2F S 400G No Yes NCS4016 FC M 200G NCS 4016 Yes Yes NCS4016 FC2 M 400G An Auxiliary Fan Tray Cisco PID NCS4009 FAN FC is attached to the NCS4009 F...

Страница 36: ...ts collateral optical networking network convergence system 4000 series datasheet c78 736495 html 2 Port 100Gbps and 10 Port 10Gbps OTN and Packet NCS4K 2H10T OP KS Line Card See datasheet at https www cisco com c en us products collateral optical networking network convergence system 4000 series datasheet c78 736604 html 24 Port Low Rate OTN NCS4K 24LR O S Line Card See datasheet at https www cis...

Страница 37: ...ive wrist strap Number 2 Phillips screwdriver Route processor RP Cisco PID NCS4K RP Fabric card FC in NCS 4016 Cisco PID NCS4016 FC M or NCS4016 FC2 M Fabric card FC in NCS 4009 Cisco PID NCS4009 FC S or NCS4009 FC2 S or NCS4009 FC2F S The FC in NCS 4009 contains only one ejector lever and one captive screw Note For easier installation install all FCs before securing any fasteners Tip Auxiliary Fa...

Страница 38: ...o install a card Figure 26 Installing a RP Card in NCS 4009 Hardware Installation Guide for the Cisco NCS 4000 Series 36 Installing Route Processor Cards Fabric Cards and Line Cards Installing a Route Processor Fabric Card or Line Card ...

Страница 39: ...ptive screws 3 Direction of insertion 1 OIR buttons 4 Ejector levers 2 Hardware Installation Guide for the Cisco NCS 4000 Series 37 Installing Route Processor Cards Fabric Cards and Line Cards Installing a Route Processor Fabric Card or Line Card ...

Страница 40: ...talling a FC in NCS 4009 NCS4009 FC2 S Hardware Installation Guide for the Cisco NCS 4000 Series 38 Installing Route Processor Cards Fabric Cards and Line Cards Installing a Route Processor Fabric Card or Line Card ...

Страница 41: ...talling a FC in NCS 4009 NCS4009 FC2F S Hardware Installation Guide for the Cisco NCS 4000 Series 39 Installing Route Processor Cards Fabric Cards and Line Cards Installing a Route Processor Fabric Card or Line Card ...

Страница 42: ... 30 Installing a FC in NCS 4016 Hardware Installation Guide for the Cisco NCS 4000 Series 40 Installing Route Processor Cards Fabric Cards and Line Cards Installing a Route Processor Fabric Card or Line Card ...

Страница 43: ... 31 Installing a LC in NCS 4009 Hardware Installation Guide for the Cisco NCS 4000 Series 41 Installing Route Processor Cards Fabric Cards and Line Cards Installing a Route Processor Fabric Card or Line Card ...

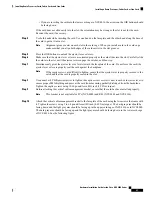
Страница 44: ... handle a card by its ejector lever s or the card carrier edges only Do not touch any of the electrical components pins or circuitry Caution Step 3 Orient the card If you are inserting the RP or LC into the card cage of NCS 4009 or the upper card cage in NCS 4016 the arrows on the OIR buttons should be facing up To orient the FC card in FC slots of NCS 4009 the ejector button should be facing down...

Страница 45: ...fficult to tighten ensure that the ejector lever is properly secured to the catch and that the card is properly seated in the slot Note Step 8 Use a number 2 Phillips screwdriver to tighten the captive screw or screws next to each card ejector lever to ensure proper EMI shielding and prevent the card from becoming partially dislodged from the backplane Tighten the captive screws using 10 60 pound ...

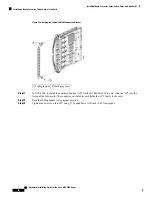
Страница 46: ...e of the fabric card The connector on the fabric card holds the AFT firmly to the card Step 12 Push the sliding handle to its original position Step 13 Tighten the screws on the AFT using 5 75 pound force lbf inch 0 65 Nm torque Hardware Installation Guide for the Cisco NCS 4000 Series 44 Installing Route Processor Cards Fabric Cards and Line Cards Installing a Route Processor Fabric Card or Line ...

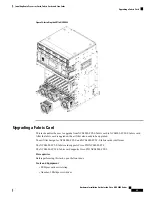
Страница 47: ...CS4009 FC2 S and NCS4009 FC2F S fabric cards is different The NCS4009 FC2 S fabric card supports Cisco PID NCS4009 FTF The NCS4009 FC2F S fabric card supports Cisco PID NCS4009 FTF 2 Prerequisites Before performing this task open the front door Tools and Equipment ESD preventive wrist strap Number 2 Phillips screwdriver Hardware Installation Guide for the Cisco NCS 4000 Series 45 Installing Route ...

Страница 48: ...s LED turns green When the card status LED is solid yellow either software initialization is in progress during bootup or a fault exists on the board When the card status LED is blinking yellow the card is not fully seated When the card status LED is off verify that the card is installed correctly There could be no power applied to the card a power fault or a hardware fault Verify that there is po...

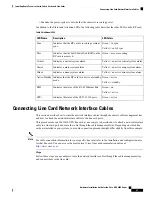
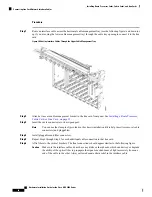
Страница 49: ...SFP Connecting Line Card Network Interface Cables This section describes how to route the network interface cables through the chassis cable management tray and how to attach the network interface cables to the line card ports This procedure uses an 20x10GE OTN line card as an example to describe how to attach a network interface cable to a line card port and route the cable through the cable mana...

Страница 50: ...ion kit to help insert or remove cable connectors and pluggables Note Step 4 Install pluggables and fiber connectors Step 5 Repeat Step1 through Step 4 for each additional cable connection to that line card Step 6 Affix fibers to the vertical brackets The final connections should appear similar to the following figure Make sure the interface cables do not have any kinks or sharp bends which can de...

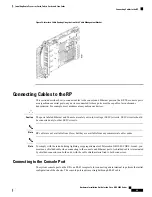
Страница 51: ... from Cisco but they are available from any commercial cable vendor Note To comply with the intra building lightning surge requirements of Telecordia GR 1089 CORE Issue 6 you must use a shielded cable when connecting to the console and Ethernet ports A shielded cable is terminated by shielded connectors on both ends with the cable shield material tied to both connectors Note Connecting to the Cons...

Страница 52: ...cial cable vendors Use cables that comply with EIA TIA 568 standards Note Ethernet management ports are primarily used as Telnet ports into the chassis they are also used for booting or accessing Cisco software images over a network to which an Ethernet port is directly connected We strongly caution you to consider the security implications of enabling routing functions on these ports Caution The ...

Страница 53: ...em Ensure all power connection wiring conforms to the rules and regulations in the National Electrical Code NEC as well as local codes Each power tray includes 4 power modules each The chassis has two power trays for redundancies each tray can provide the full power to the chassis The power tray provides electrical connections to the chassis backplane Each power module can be individually plugged ...

Страница 54: ...er Cord Cisco PID NCS4K AC CBL NEMA Before connecting AC input power cords to the power system make sure that the power cords are not energized Note DC Powered Chassis Use a 6 AWG wire rated 75 C minimum for DC power modules connection The system accepts a nominal input voltage of 48 VDC or 60VDC with an operational tolerance range of 40 5 to 72 VDC One dedicated commensurately rated DC power sour...

Страница 55: ...s are not in service Be sure uninsulated conductors are not accessible when cover is in place Statement 1086 Warning Only trained and qualified personnel should be allowed to install replace or service this equipment Statement 1030 Warning Before connecting DC power cables to the power system make sure that the input power cords are not energized Note Ensure that there is a readily accessible disc...

Страница 56: ...larity but you should correct a reverse polarity condition immediately Caution General Power and Grounding Requirements This section describes the power and grounding requirements you must consider when planning the site facilities for the routing system In addition see the DC Power Requirements on page 55 for additional information about the power requirements for your chassis type A qualified el...

Страница 57: ...source must provide single phase AC power and have its own circuit breaker The AC power receptacles used to plug in the chassis must be the grounding type The grounding conductors that connect to the receptacles should connect to protective earth ground at the service equipment AC single phase input Single phase 200 to 240 VAC nominal 50 to 60 Hz 17A maximum Each AC power shelf contains four speci...

Страница 58: ...l office ground system or interior equipment grounding system permanently to one of the two supplemental bonding and grounding connections on the back or side of the chassis to meet Network Equipment Building System NEBS requirements as well as safety compliance requirements These grounding points are referred to as the NEBS bonding and grounding points These bonding and grounding connections sati...

Страница 59: ...NEBS grounding point on right side of the chassis 1 Lock washers 3 Hardware Installation Guide for the Cisco NCS 4000 Series 57 Installing Power Components NEBS Supplemental Unit Bonding and Grounding Guidelines ...

Страница 60: ...0 625 to 0 75 inch 15 86 to 19 05 mm spacing between them and a wire receptacle able to accept a 4 AWG or larger multistrand copper wire This lug part of the kit is similar to those used for the DC input power supply leads Two M6 round head screws and two locking washers nickel plated brass is ideal Hardware Installation Guide for the Cisco NCS 4000 Series 58 Installing Power Components NEBS Suppl...

Страница 61: ...ug and screws provided in chassis accessory kit Ground cable Crimping tool and lug specific die 3 8 inch drive socket wrench 3 8 inch drive torque wrench rated to include 35 in lb 3 95 N m To ensure a satisfactory ground connection we recommend 4 AWG multistrand copper ground cable This cable is not available from Cisco it is available from any commercial cable vendor The cable should be sized acc...

Страница 62: ...acturer to crimp the lug to the ground cable Step 2 Use the torque driver to attach the lug and ground cable to either grounding point The two grounding point screws are required for proper bonding and grounding of the chassis and should not be removed Note Hardware Installation Guide for the Cisco NCS 4000 Series 60 Installing Power Components Installing the Chassis Ground Cable ...

Страница 63: ...s 2 Screws 1 Figure 44 Attaching to Side NEBS Bonding and Grounding Point in the NCS 4016 Screws 2 NEBS grounding point on right side of the chassis 1 Lock washers 3 Hardware Installation Guide for the Cisco NCS 4000 Series 61 Installing Power Components Installing the Chassis Ground Cable ...

Страница 64: ...to a grounding point at your site according to site requirements Installing an AC or DC Power Tray The power tray is preinstalled on the chassis The following procedure describes how to install an AC or DC power tray in the chassis Tools and Equipment 6 inch number 2 Phillips screwdriver Hardware Installation Guide for the Cisco NCS 4000 Series 62 Installing Power Components Installing an AC or DC...

Страница 65: ...ay if you feel any resistance The power modules are keyed to prevent AC modules from being plugged into a DC power tray or a DC module into an AC power tray Forcing a module into the incorrect tray can cause damage to the module and the tray Caution Each power module has three status LEDs located on the front left side of its faceplate Table 3 Power Module LED Status Indicator Lights Meaning Color...

Страница 66: ...ing the power module into the power tray Caution Follow these steps to install the AC or DC power modules into the chassis Procedure Step 1 Remove the filler caps from the slots where you want to install the power modules Step 2 Using two hands to support the power module slide it into the power tray Hardware Installation Guide for the Cisco NCS 4000 Series 64 Installing Power Components Installin...

Страница 67: ...Figure 46 Example of Inserting the AC Power Module in the NCS 4016 Hardware Installation Guide for the Cisco NCS 4000 Series 65 Installing Power Components Installing AC or DC Power Modules ...

Страница 68: ...on Adapter If you have limited access to the back of the chassis or limited space behind the chassis you can use the DC Power Front Connection Adapter This DC adapter moves the DC power connections from the back of the chassis to the front of the chassis This may be desirable in ETSI rack installations Hardware Installation Guide for the Cisco NCS 4000 Series 66 Installing Power Components Install...

Страница 69: ...nch number 1 Phillips screwdriver One DC Power Front Connection Adapter NCS4K DC FA includes brackets 3 8 Ratchet Wrench 7 16 Socket and a Torque Wrench Steps Procedure Step 1 Install the DC FA front access brackets on the sides toward the front of the DC adapter There are three different types of bracket depending upon rack type ANSI 19 inch or 23 inch and ETSI Choose the correct type for your sp...

Страница 70: ...ear cable guide on top of the chassis toward the rear and attach the insulator sheet on top of the chassis toward the front Hardware Installation Guide for the Cisco NCS 4000 Series 68 Installing Power Components Installing the DC Power Front Connection Adapter ...

Страница 71: ...sheet 2 Rear cable guide 1 Step 3 Place the DC adapter on top of the chassis using the embossed references on the top chassis cover Hardware Installation Guide for the Cisco NCS 4000 Series 69 Installing Power Components Installing the DC Power Front Connection Adapter ...

Страница 72: ...ar of the of DC adapter to the chassis terminal blocks Follow the connections scheme as shown on the labels available on the DC adapter and the chassis Hardware Installation Guide for the Cisco NCS 4000 Series 70 Installing Power Components Installing the DC Power Front Connection Adapter ...

Страница 73: ... rear cover to protect the cables Step 6 Install the chassis and DC adapter subassembly in the rack or cabinet Attach the chassis brackets and DC brackets to the rack Hardware Installation Guide for the Cisco NCS 4000 Series 71 Installing Power Components Installing the DC Power Front Connection Adapter ...

Страница 74: ...Step 7 Connect the power cables coming from batteries or from the PDU unit to the DC adapter terminal blocks on the front side of the unit See the Connecting Power to the Chassis on page 73 Hardware Installation Guide for the Cisco NCS 4000 Series 72 Installing Power Components Installing the DC Power Front Connection Adapter ...

Страница 75: ...ecting Power to an AC Powered Chassis Follow these steps to connect the AC power cords to the chassis Connect each AC power supply to a dedicated power source branch circuit Each AC input power supply operates at a nominal input level of 200 to 240 VAC Note Hardware Installation Guide for the Cisco NCS 4000 Series 73 Installing Power Components Connecting Power to the Chassis ...

Страница 76: ... Power Connections to an AC Power Tray Step 6 Plug the other end of the AC power cord into the AC source receptacle Step 7 Proceed to the Powering On the Chassis on page 79 Connecting Power to a DC Powered Chassis This section contains the procedures to connect the DC source power cables to a DC powered chassis The color coding of source DC power cable leads depends on the color coding of the site...

Страница 77: ...the positive and negative power terminal studs of each input must be greater than 90 KOhm The resistance between each positive terminal stud and bare metal surface on the power shelf must be greater that 10 MOhms The resistance between each negative terminal stud and bare metal surface on the power shelf must be greater that 10 MOhms Typical hand held Ohm meters will not measure 10 MOhms instead t...

Страница 78: ...s to a Power Tray for a Single DC Power Module Power System Step 6 Replace the clear plastic safety covers over the connection terminal studs Hardware Installation Guide for the Cisco NCS 4000 Series 76 Installing Power Components Connecting Power to a DC Powered Chassis ...

Страница 79: ...Covers over the Power Tray Connection Terminals Step 7 Proceed to the Powering On the Chassis on page 79 Hardware Installation Guide for the Cisco NCS 4000 Series 77 Installing Power Components Connecting Power to a DC Powered Chassis ...

Страница 80: ... cords from the power tray receptacles Do not turn off the switch on the power tray to remove AC power cords An individual AC power cord can be unplugged while the system is powered from other AC power sources Note Step 4 Repeat steps 1 to 3 if you want to disconnect another individual AC power source Reconnecting AC Power To reconnect an individual AC power cord to a power tray see Connecting Pow...

Страница 81: ...ect DC power to a DC power tray see Connecting Power to a DC Powered Chassis on page 74 Powering On the Chassis Follow these steps to turn on power to an AC powered or DC powered chassis Procedure Step 1 Power on the circuit breaker to your power sources one at a time Step 2 Verify that the correct Power Input LED on each power module in the tray is lit one input on the LED flashes and both inputs...

Страница 82: ...Hardware Installation Guide for the Cisco NCS 4000 Series 80 Installing Power Components Powering On the Chassis ...

Отзывы: