


20
Chapter 5: Windows Driver Installation
Driver Installation
Wireless-G PrintServer
Driver Installation
1. Make sure you have no programs or applications running on your computer.
2. If you haven’t already done so, insert the Setup CD-ROM into the computer’s CD-ROM drive. The Setup CD-
ROM should run automatically. If it does not, click the
Start
button and choose
Run
. In the field that appears,
enter
D:\setupWizard.exe
(if “D” is the letter of your CD-ROM drive).
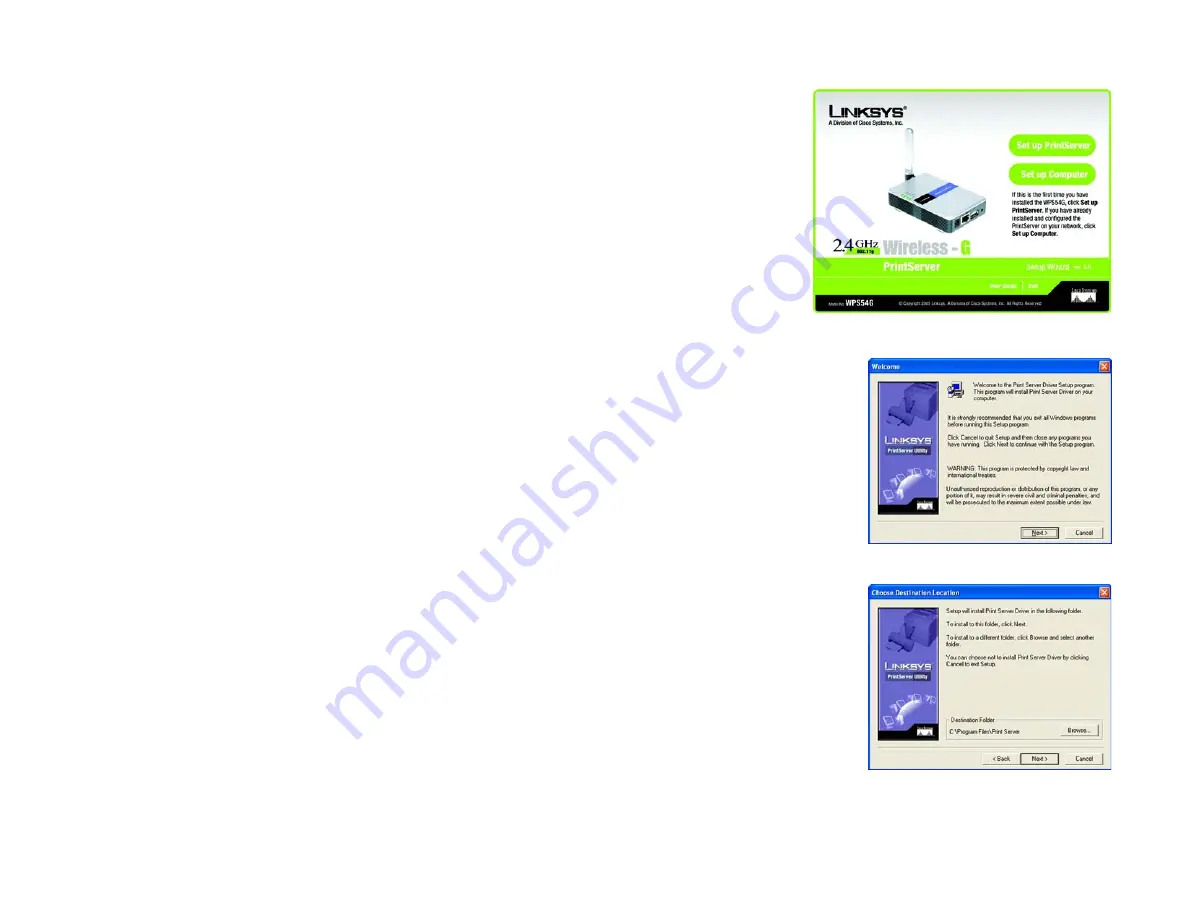
3. When you see the
Welcome
screen, click
Set up Computer
to continue.
If you have not set up the PrintServer, click
Set up PrintServer
. Then proceed to “Chapter 4: Configuring the
PrintServer Using the Setup Wizard”.
To view the User Guide, click
User Guide
. To end the installation, click
Exit
.
4. The
Welcome
screen of the Print Server Driver program will appear first. Click
Next
to continue with the
driver installation, or click
Cancel
to quit the setup program and then close the open programs.
5. The
Choose Destination Location
screen will appear. Choose the location where the driver’s folder will be
installed. To install the driver in the default location, click
Next
to continue.
If you want the folder to be installed in a different location, click the
Browse
button and select the location.
Then click
Next
to continue.
You can also click
Back
to return to the previous screen or click
Cancel
to end the driver installation.
Figure 5-3: Choose Destination Location
Figure 5-2: Driver Setup Welcome
Figure 5-1: Welcome
Содержание Linksys WPS54G
Страница 1: ......


