Cisco HWIC-4ESW and HWIC-D-9ESW EtherSwitch Interface Cards
How to Configure EtherSwitch HWICs
44
Book Title
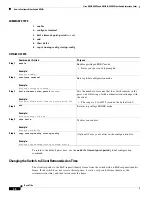
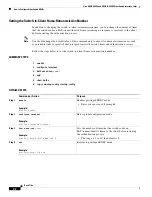
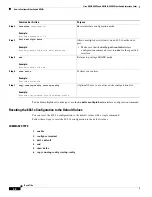
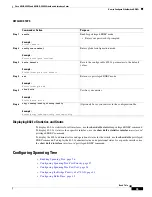
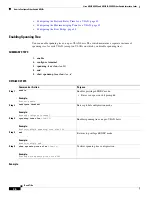
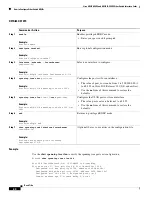
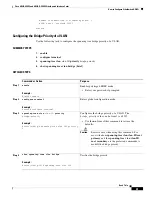
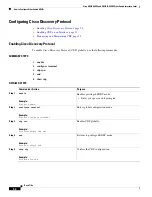
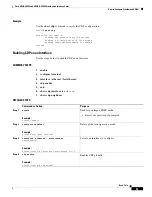
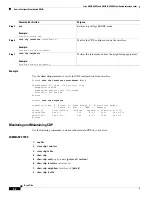
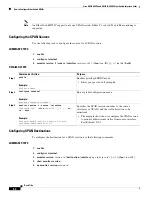
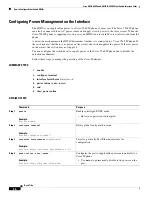
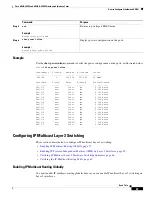
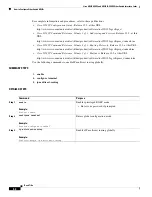
DETAILED STEPS
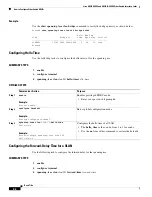
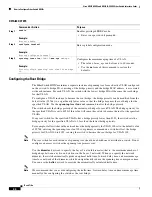
Configuring the Root Bridge
The EtherSwitch HWIC maintains a separate instance of spanning tree for each active VLAN configured
on the switch. A bridge ID, consisting of the bridge priority and the bridge MAC address, is associated
with each instance. For each VLAN, the switch with the lowest bridge ID will become the root bridge
for that VLAN.
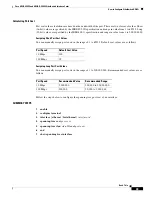
To configure a VLAN instance to become the root bridge, the bridge priority can be modified from the
default value (32768) to a significantly lower value so that the bridge becomes the root bridge for the
specified VLAN. Use the
spanning-tree vlan root
command to alter the bridge priority.
The switch checks the bridge priority of the current root bridges for each VLAN. The bridge priority for
the specified VLANs is set to 8192 if this value will cause the switch to become the root for the specified
VLANs.
If any root switch for the specified VLANs has a bridge priority lower than 8192, the switch sets the
bridge priority for the specified VLANs to 1 less than the lowest bridge priority.
For example, if all switches in the network have the bridge priority for VLAN 100 set to the default value
of 32768, entering the spanning-tree vlan 100 root primary command on a switch will set the bridge
priority for VLAN 100 to 8192, causing the switch to become the root bridge for VLAN 100.
Note
The root switch for each instance of spanning tree should be a backbone or distribution switch. Do not
configure an access switch as the spanning tree primary root.
Use the
diameter
keyword to specify the Layer 2 network diameter (that is, the maximum number of
bridge hops between any two end stations in the Layer 2 network). When you specify the network
diameter, the switch automatically picks an optimal hello time, forward delay time, and maximum age
time for a network of that diameter, which can significantly reduce the spanning tree convergence time.
You can use the
hello
keyword to override the automatically calculated hello time.
Note
We recommend that you avoid configuring the hello time, forward delay time, and maximum age time
manually after configuring the switch as the root bridge.
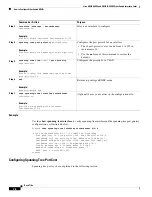
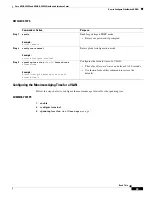
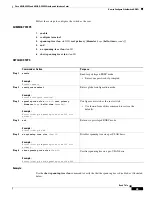
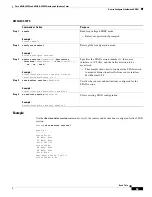
Command or Action
Purpose
Step 1
enable
Example:
Router> enable
Enables privileged EXEC mode.
•
Enter your password if prompted.
Step 2
configure
terminal
Example:
Router# configure terminal
Enters global configuration mode.
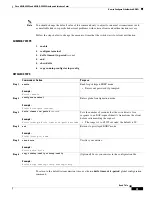
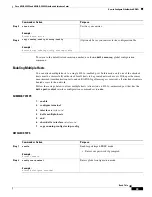
Step 3
spanning
-
tree vlan
vlan
-
ID
max
-
age
max
-
age
Example:
Router(config)# spanning-tree vlan 200 max-age
30
Configures the maximum aging time of a VLAN.
•
The value of
max_age
can be from 6 to 40 seconds.
•
Use the
no
form of this command to restore the
defaults.

