


www.cisco.com
10
Cisco IP Video Phone E20
Administrator guide
D14330.12
Administrator guide Cisco IP Video Phone E20, TE4.1 November 2011.
All contents are Copyright © 2010–2011, Cisco Systems, Inc. All rights reserved.
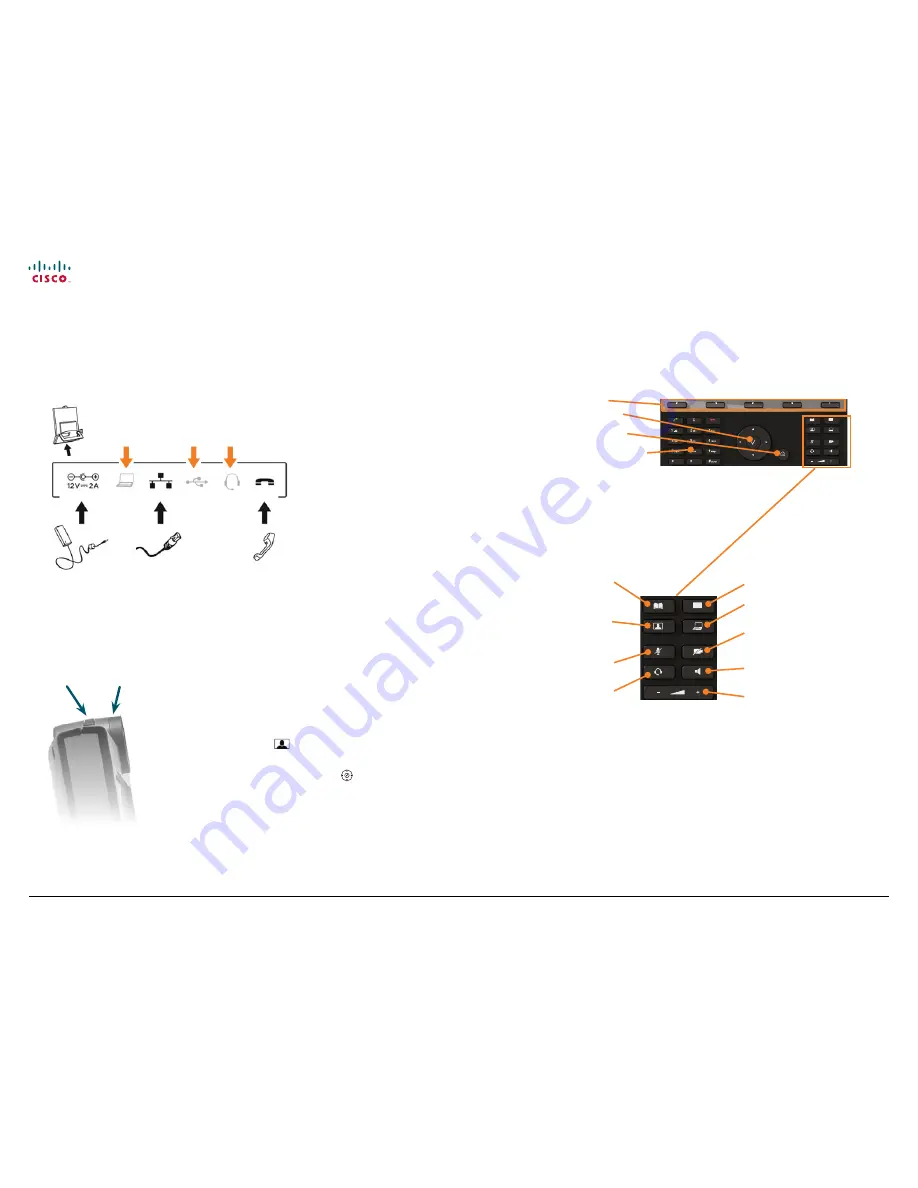
Connecting the E20 to the LAN
Optional PC connection: If you have a single LAN wall outlet only, you may
connect your PC to the PC-socket of the E20.
Your PC and the E20 will then share the LAN connection.
Power supply
Handset
Local area
network (LAN)
Optional PC
connection
Optional telephone
style headset
connection
Connect
USB stick for
screensaver
Focus
ring
Privacy shutter
open / close
Before you start making video calls,
make sure that your picture is displayed
properly.
1.
Open the privacy shutter by turning the
front ring of the camera.
2.
Display your own picture by pressing
the
key.
3.
Adjust your picture vertically by using
the
up
and
down
key.
4.
Adjust sharpness by turning the focus
ring on the camera.
Adjusting the E20 camera
The E20 keyboard
Listen to voice mail
For future applications
Open the phone book
Display selfview (what
others see from your
system)
Switch your microphone
on and off
Listen through
headset
Volume control
Listen through built-in
speaker
Switch your camera
on and off
Softkey control buttons
Show and hide main menu
Navigation keys and OK key
This part is similar to, and works in
the same way as, a telephone


