


When inserting DIMMs, use firm but not excessive pressure. If you damage a socket, you will have
to return the router to the factory for repair.
.
Caution
Step 5
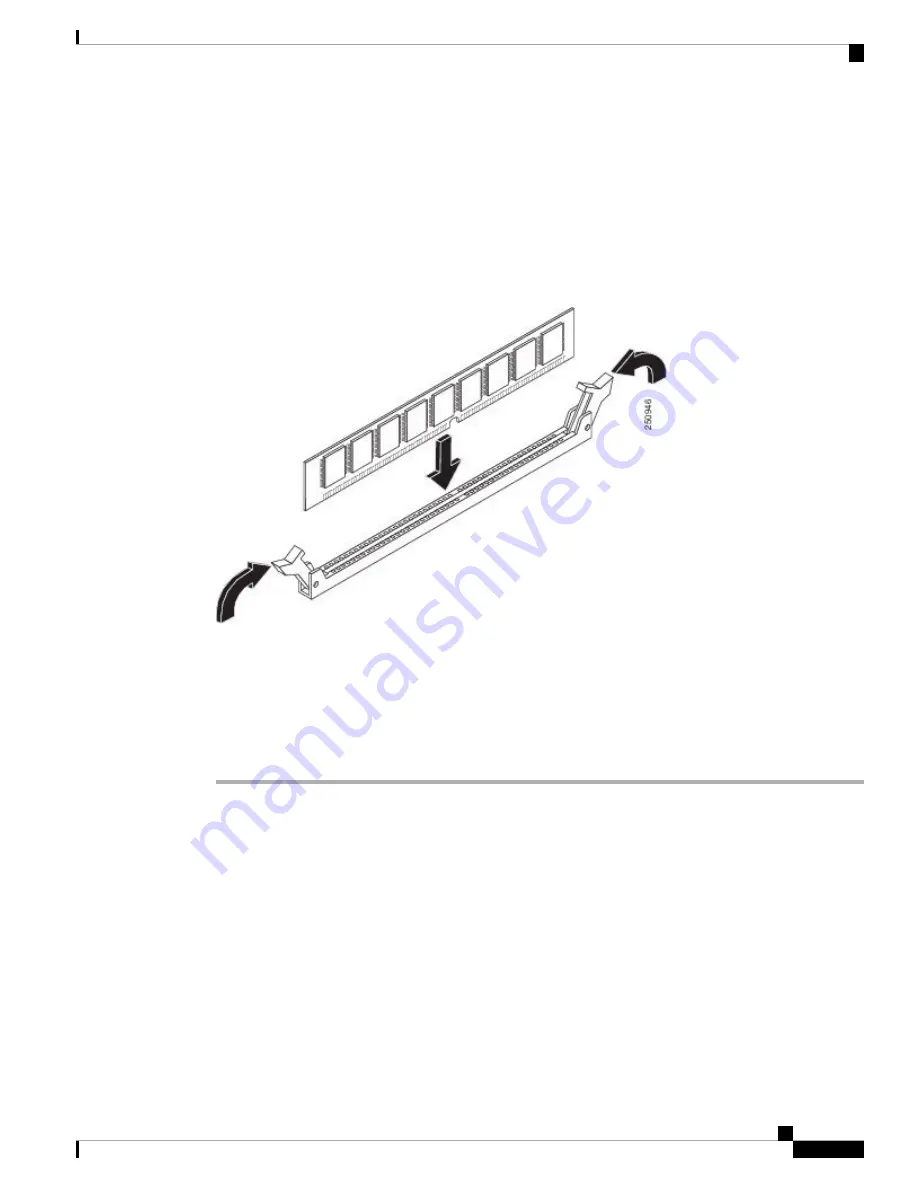
Use light insertion force and insert smoothly, but ensure that the DIMM is inserted straight. If necessary, rock
the DIMM gently back and forth to seat it properly. The following figure shows how to install the DIMM in
the socket.
Figure 13: Installing a DIMM in the Socket
Step 6
After the DIMM is installed, check whether the release levers are flush against the sides of the DIMM socket.
If they are not, the DIMM might not be seated properly. If the DIMM appears misaligned, carefully remove
it according to the removal procedure and then reseat it in the socket. Push the DIMM firmly back into the
socket until the release levers are flush against the sides of the DIMM socket.
Step 7
Replace the chassis top cover. Install the top surface screws, side screws and tighten them slightly
Step 8
Install the power supplies into the chassis and power up the router.
Removing and Replacing Fans
Removing the Fans
Before you begin
Perform the following steps before you begin the process of removing the fans :
• Use an ESD-preventive wrist strap.
• Back up the data that you want to save.
Cisco Catalyst 8500 Series Edge Platforms Hardware Installation Guide
45
Removing and Replacing FRUs
Removing and Replacing Fans


