


Step 5
Replace the server in the rack, replace cables, and then fully power on the server by pressing the Power button.
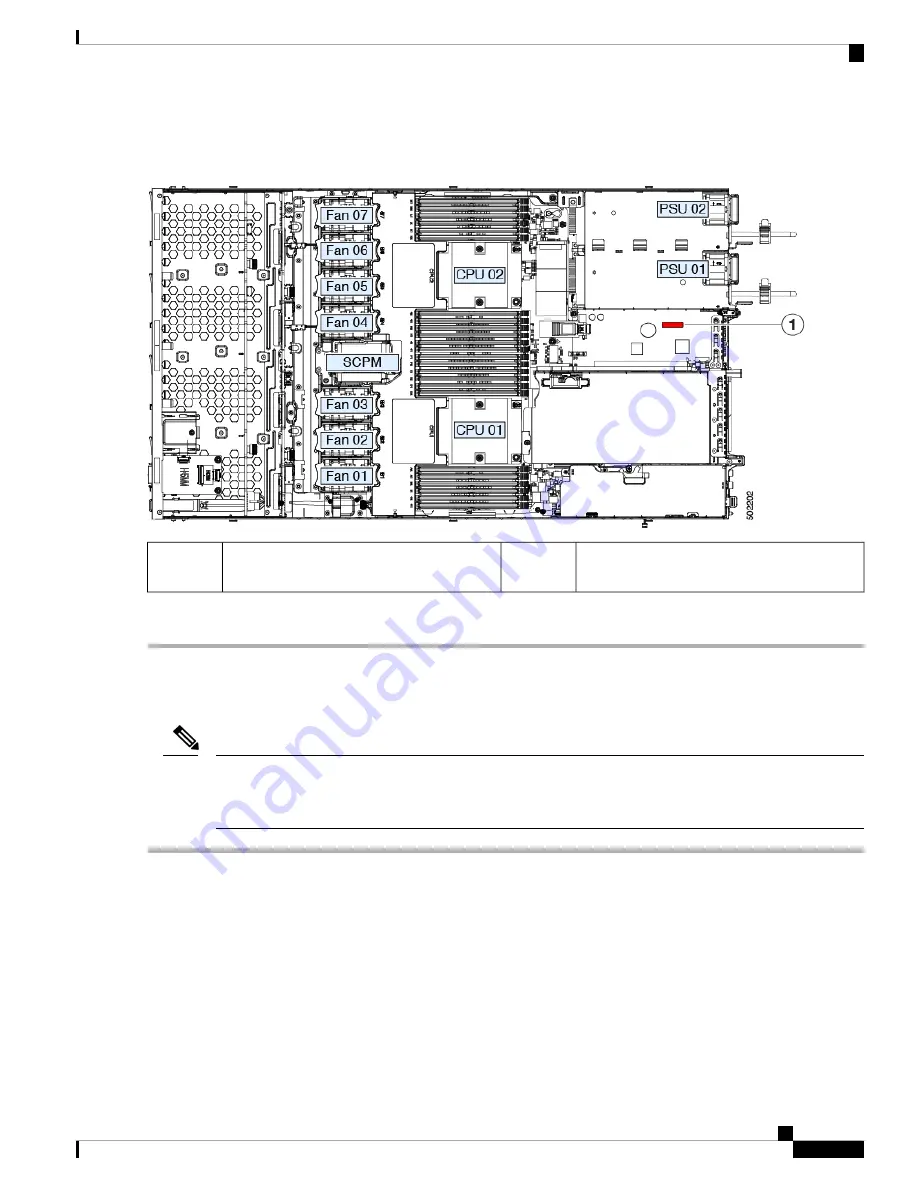
Figure 43: Location of the TPM Socket
-
TPM socket location on motherboard below
any card in PCIe riser 2
1
Step 6
Continue with
Enabling the TPM in the BIOS, on page 83
.
Enabling the TPM in the BIOS
After hardware installation, you must enable TPM support in the BIOS.
You must set a BIOS Administrator password before performing this procedure. To set this password, press
the
F2
key when prompted during system boot to enter the BIOS Setup utility. Then navigate to
Security >
Set Administrator Password
and enter the new password twice as prompted.
Note
Step 1
Enable TPM Support:
a) Watch during bootup for the F2 prompt, and then press
F2
to enter BIOS setup.
b) Log in to the BIOS Setup Utility with your BIOS Administrator password.
c) On the BIOS Setup Utility window, choose the
Advanced
tab.
d) Choose
Trusted Computing
to open the TPM Security Device Configuration window.
e) Change TPM SUPPORT to
Enabled
.
f)
Press
F10
to save your settings and reboot the server.
Step 2
Verify that TPM support is now enabled:
a) Watch during bootup for the F2 prompt, and then press
F2
to enter BIOS setup.
Cisco APIC M3/L3 Server Installation and Service Guide
83
Maintaining the Server
Enabling the TPM in the BIOS


