27
Cisco Aironet 1300 Series Lightweight Outdoor Access Point Mounting Instructions
78-17634-01
Mounting the Access Point
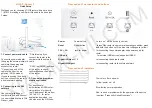
Figure 9
Rooftop Support Bolt Locations
Step 3
Align the holes in the mast pipe with the holes in the base plate.
Step 4
Insert the long flanged hex bolt and washer into the upper holes on the base plate and through the mast
pipe (see
Figure 9
).
Step 5
Place a washer and hex nut on the end of the long flanged hex bolt and hand-tighten.
Step 6
Position the mast pipe and base plate as shown in
Figure 9
.
Step 7
Align the lower square hole in the mast pipe with the semi-circular cut-out on the base plate.
Step 8
Place the carriage bolt into the square hole on the inside of the mast pipe.
Step 9
Place a washer and hex nut on the end of the carriage bolt and hand-tighten.
Step 10
Repeat Steps 8 and 9 for the other square hole.
You have completed the assembly of your rooftop or wall mount. To mount your rooftop or wall mount,
please refer the
“Mounting the Access Point” section on page 10
.
1
Long flanged hex bolt
3
Carriage bolt
2
Carriage bolt
88949
1
2
3


