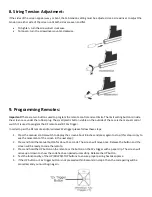
8. String Tension Adjustment:
If the sides of the screen appear wavy or bent, the tab tension setting must be adjusted. Use a screwdriver to adjust the
tension on either side of the screen until both sides are even and flat.
•
To tighten, turn the screwdriver clockwise
•
To loosen, turn the screwdriver counter-clockwise.
9. Programming Remotes
:
Important!
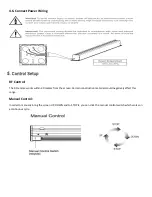
There are two buttons used to program the remote control and set limits. The limit setting button is inside
the screen case under the rubber plug. The small plastic button visible on the outside of the case is the manual control
switch. It is used to program the RF remote and RF 12v trigger.
In order to pair the RF remote and/or wireless 12v trigger please follow these steps:
1.
Press the manual control switch to deploy the screen about 8 inches and press again to stop. (this step is only to
see the movement of the screen in the next step).
2.
Press and hold the manual button for about 5 seconds. The screen will move once. Release the button and the
screen will be ready to code the remote.
3.
Press and hold the UP button on the remote or the button on the 12v trigger with a paper clip. The screen will
move up or down to show the code has been paired successfully. Release the UP button.
4.
Test the functionality of the UP/DOWN/STOP buttons to ensure proper pairing has taken place.
5.
If the UP button or 12v trigger button is not pressed within 8 seconds in step 3 then the code pairing will be
cancelled, and you must begin again.
Содержание Harbour 2
Страница 1: ...In Ceiling Tab Tensioned Projection Screen ...
Страница 3: ... Electric or Cordless Drill Level Pencil Screwdriver Ladder Hacksaw ...
Страница 6: ...Z Bracket Installation 4 4 Install the Suspension Brackets Hardware ...
Страница 14: ......
Страница 15: ......


