


EVF4
SECULINE Co., Ltd
20
21
Setting User Controls
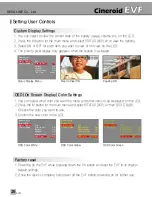
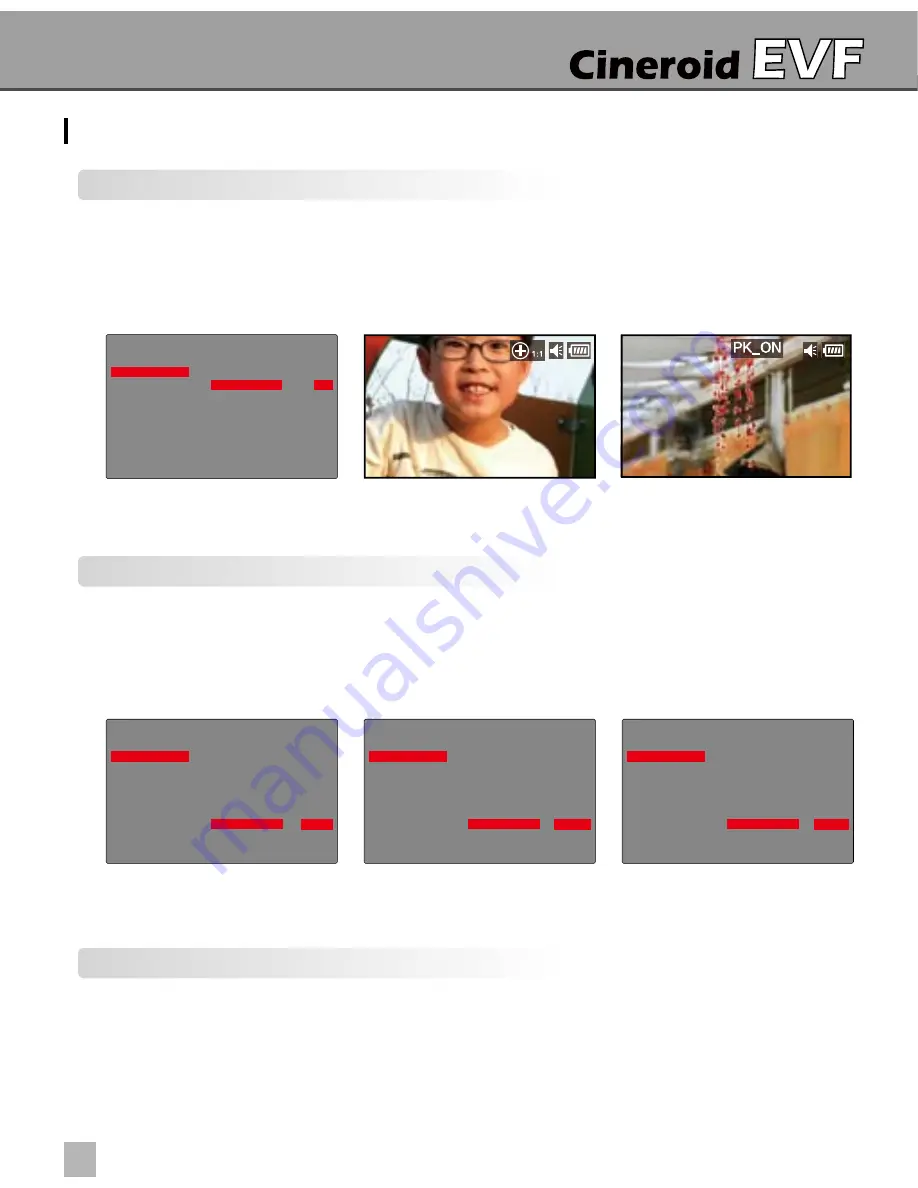
Custom Display Settings
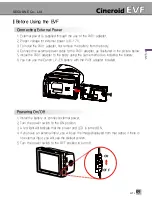
1. You can select to view the current state of the battery usage, volume, etc. on the LCD.
2. Press the M button for the main menu and select STATUS DISPLAY to view the options.
3. Select ON or OFF for each item you want to view or not view on the LCD.
4. The pixel to pixel display only appears when the feature is activated.
OSD (On Screen Display) Color Settings
1. You can select what color you want the menu and other items to be displayed on the LCD.
2. Press the M button for the main menu and select STATUS DISPLAY then OSD COLOR.
Choose the color you want to use.
3. Confirm the new color in the LCD.
Status Display Menu
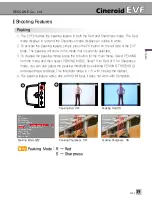
Peaking ON
Pixel to Pixel ON
OSD Color Yellow
Monochrome B/W
Screen Filp
Status Display
Custom Setup
Exit
Pixel to Pixel ON
Battery Status
ON
Speaker Status ON
Video Format Display
ON
OSD Color Yellow
OSD Color Green
Monochrome B/W
Screen Filp
Status Display
Custom Setup
Exit
Pixel to Pixel ON
Battery Status
ON
Speaker Status ON
Video Format Display
ON
OSD Color Green
Monochrome B/W
Screen Filp
Status Display
Custom Setup
Exit
Pixel to Pixel ON
Battery Status
ON
Speaker Status ON
Video Format Display
ON
OSD Color White
OSD Color White
Monochrome B/W
Screen Filp
Status Display
Custom Setup
Exit
Pixel to Pixel ON
Battery Status
ON
Speaker Status ON
Video Format Display
ON
OSD Color White
Factory reset
1. Powering on the EVF while pressing down the PK button will reset the EVF to its original
default settings.
2. Once the reset is complete, fully power off the EVF before powering on for further use.


