background image

DC-1100

Compact Size Fanless Computer

|  User’s Manual

21

Chapter 2: Jumpers and Connectors

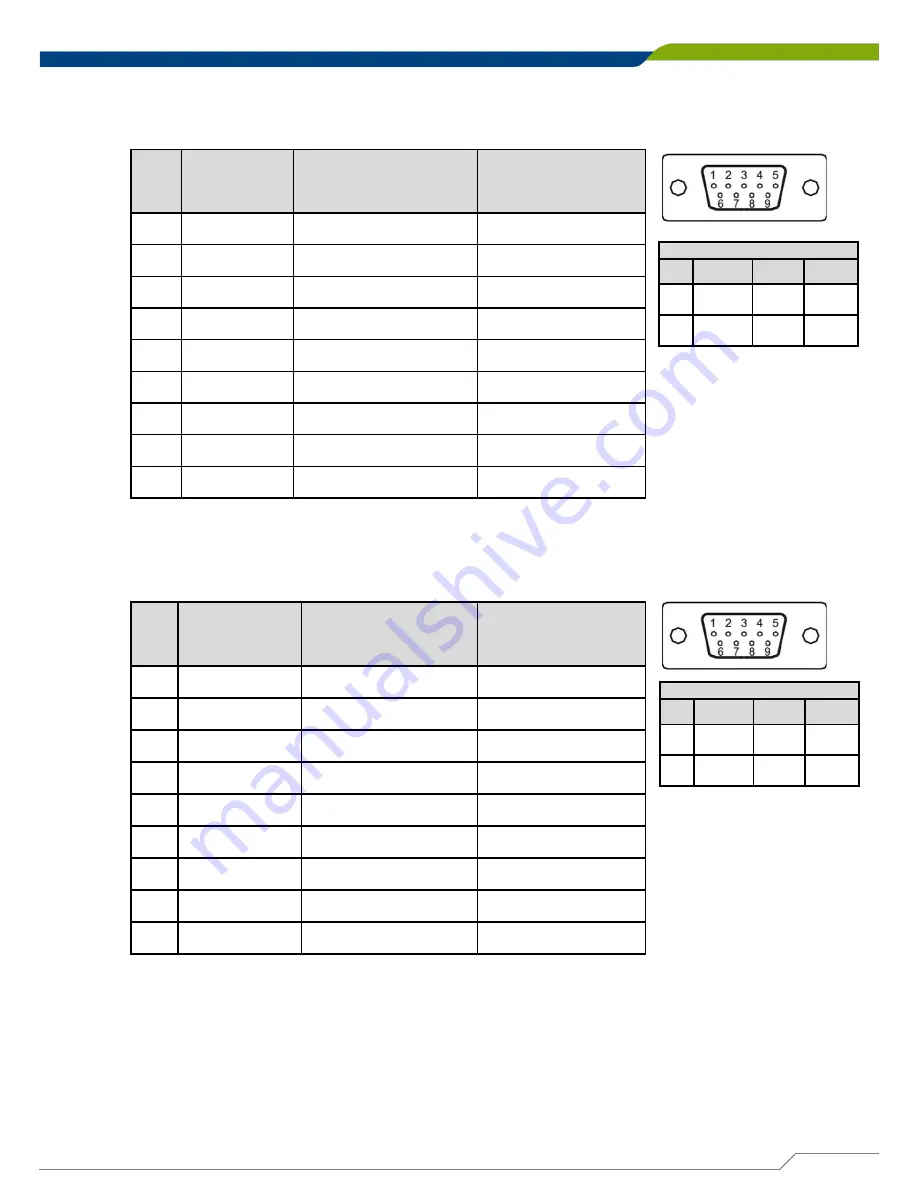
COM2_1: RS232 / RS422 / RS485 Connector

Connector Type: 9-pin D-Sub

Pin

RS232 

Definition

RS422 / 485 Full 

Duplex Definition

RS485 Half Duplex

Definition

1

DCD2

TX2-

DATA2-

2

RxD2

TX2+

DATA2+

3

TxD2

RX2+

4

DTR2

RX2-

5

GND2

6

DSR2

7

RTS2

8

CTS2

9

RI2

COM3_1: RS232 / RS422 / RS485 Connector

Connector Type: 9-pin D-Sub

Pin

RS232 

Definition

RS422 / 485 Full 

Duplex Definition

RS485 Half Duplex

Definition

1

DCD3

TX3-

DATA3-

2

RxD3

TX3+

DATA3+

3

TxD3

RX3+

4

DTR3

RX3-

5

GND3

6

DSR3

7

RTS3

8

CTS3

9

RI3

Power over Serial PIN Definitions

Pin

RS232 

RS422/ 

485

RS485

5

GND

GND

GND

9

0/5/12V

0/5/12V

0/5/12V

Power over Serial PIN Definitions

Pin

RS232 

RS422/ 

485

RS485

5

GND

GND

GND

9

0/5/12V

0/5/12V

0/5/12V

Содержание DC-1100

Страница 1: ...Fanless Computing Solution Compact Size Fanless Computer DC 1100 ...

Страница 2: ...tings 16 2 2 Locations of the Jumper and Connector 16 2 2 1 Top View 16 2 2 2 Bottom View 17 2 2 3 Daughterboard view 17 2 3 List of Switch Jumper Connector 18 2 4 Switch Definition 19 2 5 Jumper Definition 19 2 6 Connector Definition 20 Chapter 3 System Setup 3 1 Removing the Chassis Bottom Cover 31 3 2 Removing the Chassis 32 3 3 Installing a Half Size Mini PCIe Card on Top Side 33 3 4 Installin...

Страница 3: ...4 3 5 CPU Configuration 59 4 3 6 PPM Configuration 60 4 3 7 Thermal Configuration 61 4 3 8 IDE Configuration 62 4 3 9 Compatibility Support Module Configuration 63 4 3 10 USB Configuration 64 4 4 Chipset 65 4 4 1 North Bridge 65 4 4 2 South Bridge 67 4 5 Security 69 4 5 1 Administrators Password 69 4 5 2 Users Password 69 4 6 Boot 70 4 6 1 Setup Prompt Timeout 70 4 6 2 Bootup NumLock State 70 4 6 ...

Страница 4: ...equency energy and if not installed and used in accordance with the instruction manual may cause harmful interference to radio communications Operation of this equipment in a residential area is likely to cause harmful interference in which case the user will be required to correct the interference at his own expense CE The product s described in this manual complies with all application European ...

Страница 5: ... the problems on the Cincoze Service Form for the RMA number apply process Charges may be incurred for certain repairs Cincoze will charge for repairs to products whose warranty period has expired Cincoze will also charge for repairs to products if the damage resulted from acts of God environmental or atmospheric disturbances or other external forces through misuse abuse or unauthorized alteration...

Страница 6: ...problem The exact wording of any error messages Conventions Used in this Manual Prefaces This indication alerts operators to an operation that if not strictly observed may result in severe injury WARNING This indication alerts operators to an operation that if not strictly observed may result in safety hazards to personnel or damage to equipment CAUTION This indication provides additional informat...

Страница 7: ... greater than the voltage and current rating marked on the product 9 Position the power cord so that people cannot step on it Do not place anything over the power cord 10 All cautions and warnings on the equipment should be noted 11 If the equipment is not used for a long time disconnect it from the power source to avoid damage by transient overvoltage 12 Never pour any liquid into an opening This...

Страница 8: ...dded System 1 2 Utility DVD Driver 1 3 DIO Terminal Block Connector Female 1 4 Power Terminal Block Connector Female 1 5 DVI I to VGA Adapter 1 6 Screw Pack 1 7 Wall Mount Kit 1 Note Notify your sales representative if any of the above items are missing or damaged Ordering Information Model No Product Description DC 1100 Intel Atom E3845 Quad Core Compact Size Fanless Computer and 2x Mini PCIe Exp...

Страница 9: ...SL 3 SL6 SL3 EU 2 heads power cord EU G type to IEC C13 H05VV F 0 75mm2 3G Black 1 8M SL 6 SL 3 QP026 SL3 UK 2 heads power cord UK I type to IEC C13 H05VV F 0 75mm2 3G Black 1 8M QP026 SL 3 VESA DC DC series VESA Mount Kit SIDE DC DC series SIDE Mount Kit DINRAIL Diamond series DIN RAIL Mount Kit 59381560000E MINI DIN M PS 2 KB MS TO MINI DIN F PS 2 KB MINI DIN F PS 2 MS L 10CM 59381560000E N0307 ...

Страница 10: ...Product Introductions Chapter 1 ...

Страница 11: ...l I O bracket for Mini PCIe expansion E13 No 10R 0514062 Certified 1 1 Overview DC 1100 is a high performance compact size 185mm W x 131mm D x 54mm H system designed with onboard Intel Atom E3845 Quad Core 1 91GHz processor rich I O unique expansion capability and wide range 9 48V DC power input It supports the latest USB 3 0 technology With features including completely cable less designed specia...

Страница 12: ...32 422 485 with Auto Flow Control 2x Antenna Hole 1x Power Switch 1x AT ATX Switch Digital Input Output 4x Digital Input Source Type Input Voltage Dry Contact Logic 0 Close to GND Logic 1 Open Input Voltage Logic 0 3V max Logic 1 5V min DI to COM 4x Digital Output Supply Voltage 5 30VDC Sink Current 580 mA max per channel Power Support AT ATX Mode 1x 3 pin Terminal Block Connector with Power Input...

Страница 13: ... O bracket Used to customized I O output 1 3 2 Rear Panel DC IN Used to plug a DC power input with terminal block DVI I port Used to connect a DVI monitor or connect optional split cable for dual display mode LAN port Used to connect the system to a local area network USB 3 0 port Used to connect USB 3 0 2 0 1 1 device USB 2 0 port Used to connect USB 2 0 1 1 device DisplayPort Used to connect a D...

Страница 14: ...DC 1100 Compact Size Fanless Computer User s Manual 14 Chapter 1 Product Introductions 1 4 Mechanical Dimensions Unit mm ...

Страница 15: ...Jumpers and Connectors Chapter 2 ...

Страница 16: ...s short If you remove the jumper cap or place the jumper cap on just one pin the jumper is open Refer to below for examples of the 2 pin and 3 pin jumpers when they are short on and open off Chapter 2 Jumpers and Connectors 1 2 Open 1 2 Short Two Pin Jumpers 1 2 3 Pins 1 and 2 are short 1 2 3 All pins are open 1 2 3 Pins 2 and 3 are short Three Pin Jumpers 2 2 Locations of the Jumpers and Connecto...

Страница 17: ...DC 1100 Compact Size Fanless Computer User s Manual 17 Chapter 2 Jumpers and Connectors 2 2 2 Bottom View 2 2 3 Daughter board view ...

Страница 18: ...22 RS 485 Connector COM12_SEL1 COM34_SEL1 COM1 COM2 COM3 COM4 with Power Select DC_IN1 3 pin DC 9 48V Power Input Connector DIO1 4DI 4DO Connector DP1 DisplayPort Connector DVI_I1 DVI I Connector LAN1 LAN2 LAN Port LED1 Power HDD Access LED Status MIC1 Mic in Jack MINIPCIE1 MINIPCIE2 Mini PCI Express Socket POWER1 Power Connector PS2_1 Keyboard Mouse Connector PWR_SW1 Power Switch SATA1 SATA with ...

Страница 19: ...atus Default ON Clear CMOS 2 5 Jumpers Definitions COM12_SEL1 COM1 COM2 with Power Select Connector Type 2X5 10 pin Header 2 0mm pitch COM1 COM2 Pin Definition Pin Definition 1 3 On 5V 2 4 On 5V 3 5 On 12V 4 6 On 12V 7 9 On Default Reserved 8 10 On Default Reserved COM34_SEL1 COM3 COM4 with Power Select Connector Type 2X5 10 pin Header 2 0mm pitch COM3 COM4 Pin Definition Pin Definition 1 3 On 5V ...

Страница 20: ...3 SATA_TX2 PC3 NC PC12 NC S4 GND PC4 NC PC13 3 3V S5 SATA_RX2 PC5 NC PC14 3 3V S6 SATA_RX2 PC6 NC PC15 GND S7 GND PC7 GND PC16 GND PC8 NC PC17 NC PC9 NC COM1_1 RS232 RS422 RS485 Connector Connector Type 9 pin D Sub Pin RS232 Definition RS422 485 Full Duplex Definition RS485 Half Duplex Definition 1 DCD1 TX1 DATA1 2 RxD1 TX1 DATA1 3 TxD1 RX1 4 DTR1 RX1 5 GND1 6 DSR1 7 RTS1 8 CTS1 9 RI1 Power over S...

Страница 21: ...4 DTR2 RX2 5 GND2 6 DSR2 7 RTS2 8 CTS2 9 RI2 COM3_1 RS232 RS422 RS485 Connector Connector Type 9 pin D Sub Pin RS232 Definition RS422 485 Full Duplex Definition RS485 Half Duplex Definition 1 DCD3 TX3 DATA3 2 RxD3 TX3 DATA3 3 TxD3 RX3 4 DTR3 RX3 5 GND3 6 DSR3 7 RTS3 8 CTS3 9 RI3 Power over Serial PIN Definitions Pin RS232 RS422 485 RS485 5 GND GND GND 9 0 5 12V 0 5 12V 0 5 12V Power over Serial PI...

Страница 22: ...D4 RX4 4 DTR4 RX4 5 GND4 6 DSR4 7 RTS4 8 CTS4 9 RI4 DC_IN1 DC Power Input Connector 9 48V Connector Type Terminal Block 1X3 3 pin 5 0mm pitch Pin Definition 1 9 48VIN 2 Chassis GND 3 GND DIO1 Digital Input Output Connector Connector Type Terminal Block 1X10 10 pin 3 5mm pitch Pin Definition Pin Definition 1 DC INPUT 6 DO1 2 DI1 7 DO2 3 DI2 8 DO3 4 DI3 9 DO4 5 DI4 10 GND Power over Serial PIN Defin...

Страница 23: ...DC 1100 Compact Size Fanless Computer User s Manual 23 Chapter 2 Jumpers and Connectors ...

Страница 24: ...UX_P 6 DP_LANE1_N 16 GND 7 DP_LANE2_P 17 DP_AUX_N 8 GND 18 DP_HPD 9 DP_LANE2_N 19 GND 10 DP_LANE3_P 20 DP_PWR DVI_I1 DVI I Connector Pin Definition Pin Definition 1 DVI_TX2 16 DVI Hot Plug Detect 2 DVI_TX2 17 DVI_TX0 3 GND 18 DVI_TX0 4 NC 19 GND 5 NC 20 NC 6 DDC_CLOCK 21 NC 7 DDC_DATA 22 GND 8 VGA VSYNC 23 DVI_TXCLK 9 DVI_TX1 24 DVI_TXCLK 10 DVI_TX1 C1 VGA_RED 11 GND C2 VGA_GREEN 12 NC C3 VGA_BLUE...

Страница 25: ...k Off No Activity Steady Orange 100Mbps Network Link Off 10Mbps Network Link LAN2 RJ45 with LEDs Port Pin Definition Pin Definition 1 LAN2_MDI0P 5 LAN2_MDI2N 2 LAN2_MDI0N 6 LAN2_MDI1N 3 LAN2_MDI1P 7 LAN2_MDI3P 4 LAN2_MDI2P 8 LAN2_MDI3N Act LED Status Definition Link LED Status Definition Blinking Yellow Data Activity Steady Green 1Gbps Network Link Off No Activity Steady Orange 100Mbps Network Lin...

Страница 26: ...CI Express Socket Pin Definition Pin Definition Pin Definition 1 WAKE 19 NC 37 GND 2 3 3V 20 3 3V 38 USB2_3P 3 NC 21 GND 39 3 3V 4 GND 22 MINIPCIE RST 40 GND 5 NC 23 MINIPCIE_RXN 41 3 3V 6 1 5V 24 3 3V 42 NC 7 CLKREQ 25 MINIPCIE_RXP 43 GND 8 UIM_PWR 26 GND 44 NC 9 GND 27 GND 45 NC 10 UIM_DATA 28 1 5V 46 NC 11 MINIPCIE_CLKN 29 GND 47 NC 12 UIM_CLK 30 SMB_CLK 48 1 5V 13 MINIPCIE_CLKP 31 MINIPCIE_TXN...

Страница 27: ...LKREQ 25 MINIPCIE_RXP 43 GND 8 NC 26 GND 44 NC 9 GND 27 GND 45 NC 10 NC 28 1 5V 46 NC 11 MINIPCIE_CLKN 29 GND 47 NC 12 NC 30 SMB_CLK 48 1 5V 13 MINIPCIE_CLKP 31 MINIPCIE_TXN 49 NC 14 NC 32 SMB_DATA 50 GND 15 GND 33 MINIPCIE_TXP 51 NC 16 NC 34 GND 52 3 3V 17 NC 35 GND 18 GND 36 USB_2N POWER1 Power Connector Connector Type 1X4 pin Wafer 2 0mm pitch Pin Definition 1 5V 2 GND 3 GND 4 12V PS2_1 Keyboar...

Страница 28: ...D 5 NC 6 GND SATA1 SATA with Power Connector Pin Definition Pin Definition 1 GND 12 GND 2 SATA_TX1 13 GND 3 SATA_TX1 14 5V 4 GND 15 5V 5 SATA_RX1 16 5V 6 SATA_RX1 17 GND 7 GND 18 GND 8 3 3V 19 GND 9 3 3V 20 12V 10 3 3V 21 12V 11 GND 22 12V SIM1 SIM Card Socket Pin Definition C1 UIM_PWR C2 UIM_RESET C3 UIM_CLK C5 GND C6 UIM_VPP C7 UIM_DATA CD NC COM GND ...

Страница 29: ...finition 1 5V 2 USB_DATA0 3 USB_DATA0 4 GND USB2_2 USB2_3 USB2 0 Connector Type A Pin USB2_2 Definition USB2_3 Definition 1 5V 5V 2 USB_DATA2 USB_DATA3 3 USB_DATA2 USB_DATA3 4 GND GND USB3_1 USB 3 0 Connector Type A Pin Definition Pin Definition 1 5V 6 USB3_RX 2 USB2_DATA 7 GND 3 USB2_DATA 8 USB3_TX 4 GND 9 USB3_TX 5 USB3_RX ...

Страница 30: ...System Setup Chapter 3 ...

Страница 31: ...he bottom side face up loosen the 4 screws of bottom cover and place them aside 3 1 Removing the Chassis Bottom Cover In order to prevent electric shock or system damage before removing the chassis cover must turn off power and disconnect the unit from power source WARNING 2 Remove the cover from the chassis ...

Страница 32: ...r s Manual 32 Chapter 3 System Setup 3 2 Removing the Chassis 1 Loosen the 3 screws as mark on photo and place them aside 2 Hold front and rear panels and lift up the body of unit vertically 3 Turn over the body of the unit and place it gently ...

Страница 33: ...ze Fanless Computer User s Manual 33 Chapter 3 System Setup 3 3 Installing a Half Size Mini PCIe Card on Top Side 1 Locate the Mini PCIe slot 2 Use provided two screws on bracket to fasten the module and bracket together ...

Страница 34: ... Manual 34 Chapter 3 System Setup 3 Tilt the Mini PCIe module at 45 degree angle and insert it to the slot until the gold pated connector of module contacted firmly with the slot 45 4 Press down the module and use the two screws to fix the module ...

Страница 35: ...alling a Full Size Mini PCIe Card on Top Side 1 Locate the Mini PCIe slot 2 Tilt the Mini PCIe module at 45 degree angle and insert it to the slot until the gold pated connector of module contacted firmly with the slot 3 Press down the module and use the two screws to fix the module 450 ...

Страница 36: ...ling Antennas 1 Remove the antenna hole covers at rear panel 2 Have antenna jack penetrate through the hole 3 Put on washer and fasten the nut with antenna jack Please installing a Mini PCIe Wireless Lan Card on top side before you put on washer and fasten the nut with antenna jack CAUTION ...

Страница 37: ...DC 1100 Compact Size Fanless Computer User s Manual 37 Chapter 3 System Setup 4 Assemble the antenna and antenna jack together 5 Attach the RF connector at another end of cable onto the module ...

Страница 38: ... System Setup 3 6 Installing a Half Size Mini PCIe Card on Bottom Side 1 Turn over the body of unit Unscrew the 3 screws on HDD bracket and remove the bracket 2 Locate the Mini PCIe slot 3 Use provided two screws on bracket to fasten the module and bracket together ...

Страница 39: ...Manual 39 Chapter 3 System Setup 4 Tilt the Mini PCIe module at 45 degree angle and insert it to the slot until the gold pated connector of module contacted firmly with the slot 5 Press down the module and use the two screws to fix the module 450 ...

Страница 40: ...lling a Full Size Mini PCIe Card on Bottom Side 1 Locate the Mini PCIe slot 2 Tilt the Mini PCIe module at 45 degree angle and insert it to the slot until the gold pated connector of module contacted firmly with the slot 3 Press down the module and use the two screws to fix the module 450 ...

Страница 41: ...pty HDD bracket by unscrewing the 3 screws 2 Make the PCB side of the HDD face up place the HDD bracket on it Ensure the direction of bracket is correct and use 4 provided screws to assemble HDD and HDD bracket together 3 Turn over the HDD bracket Connect the HDD bracket to the SATA connector of the unit and fasten the 3 screws ...

Страница 42: ...Installing a SODIMM 1 Locate SODIMM socket 2 Tilt the SODIMM module at a 45 degree angle and insert it to SODIMM socket until the gold pated connector of module contacted firmly with the socket 45 3 Press the module down until its fixed firmly by the two locking latches on the sides ...

Страница 43: ...nstalling the Chassis 1 Hold the body of unit level the 3 screw holes with the hollow studs on the chassis 2 Make sure the either sides of front and rear panels are in the chassis grooves and insert the body of unit into Chassis Use the 3 screws to fasten the body and chassis together ...

Страница 44: ...ze Fanless Computer User s Manual 44 Chapter 3 System Setup 3 11 Installing the Chassis Bottom Cover 1 Level the grooves on bottom cover with front and rear panels Put on the cover 2 Fasten the 4 screws to fix the cover ...

Страница 45: ...ize Fanless Computer User s Manual 45 Chapter 3 System Setup 3 12 Installing a SIM Card 1 SIM card slot is at the front panel of the system 2 Remove the mounting cover by unscrewing the two screws 3 Insert the SIM card ...

Страница 46: ... Compact Size Fanless Computer User s Manual 46 Chapter 3 System Setup 3 13 Installing a CFast Card 1 Locate the CFast card slot 2 Remove the mounting cover by unscrewing the two screws 3 Insert the CFast card ...

Страница 47: ... holes are at the bottom of system Use provided 4 screws to fasten the bracket with each side of system together DC 1100 offers a wall mount option so that customers can install the system on the wall in a convenient and economical ways 2 Fasten the screws through the bracket mounting hole to mount system on the wall ...

Страница 48: ...es are at the bottom of system Fasten the 4 screws to fix the side mount bracket with system together 2 Fasten the screws through the bracket mounting hole to mount system on the wall DC 1100 offers a side mount option so that customers can install the system to the right or left side of wall to create effective of space ...

Страница 49: ... Fasten the 4 screws to fix the first bracket with system DC 1100 offers a VESA mount option so that customers can mount system with panel complying with VESA 75mm and 100 mm standard for various usage 2 Fasten the 4 screws through the second bracket mounting holes with panel 3 Hang the system on the back of panel by using the hooks on second bracket ...

Страница 50: ...er 3 System Setup 3 17 DIN Rail Mount Bracket DC 1100 offers a DIN Rail mount option so that customers can install system on the DIN Rail 1 The mounting holes are at the bottom of system Fasten the 2 screws to fix the DIN Rail mount bracket with system together ...

Страница 51: ...BIOS Setup Chapter 4 ...

Страница 52: ... Move to select item Esc Quit the BIOS Setup Enter Select item Page Up Increases the numeric value or makes changes Page Down Decreases the numeric value or makes changes Tab Select setup fields F1 General help F2 Previous value F7 Boot device select F3 Load Optimized defaults F10 Save configuration and Exit Main Menu The main menu lists the setup functions you can make changes to You can use the ...

Страница 53: ... CMOS Setup Utility the Main Menu as shown below will appears on the screen Use arrow keys to move among the items and press Enter to accept or enter a sub menu 4 2 1 System Date Set the date Please use Tab to switch between data elements 4 2 2 System Time Set the time Please use Tab to switch between time elements ...

Страница 54: ...DC 1100 Compact Size Fanless Computer User s Manual 54 Chapter 4 BIOS Setup 4 3 Advanced Setup 4 3 1 ACPI Settings Enable or disable BIOS ACPI Auto Configuration ...

Страница 55: ...he Super IO Configuration and change the value of the selected option Serial Port 1 Configuration Serial Port This item will allow users to enable or disable serial port COM1 Mode Select Change the Serial interface Select RS232 RS422 or RS485 interface Change Settings This setting is used to change the address IRQ settings of the specified serial port ...

Страница 56: ...Select RS232 RS422 or RS485 interface Change Settings This setting is used to change the address IRQ settings of the specified serial port Serial Port 3 Configuration Serial Port This item will allow users to enable or disable serial port COM3 Mode Select Change the Serial interface Select RS232 RS422 or RS485 interface Change Settings This setting is used to change the address IRQ settings of the...

Страница 57: ...or RS485 interface Change Settings This setting is used to change the address IRQ settings of the specified serial port Watch Dog Function You can setup the system watch dog timer a hardware timer that generates a reset when the software that it monitors does not respond as expected each time the watch dog polls it Watch Dog Mode Change the Watch dog mode Select Sec or Min mode Watch Dog Timer Use...

Страница 58: ...S Setup 4 3 3 Hardware Monitor These items display the current status of all monitored hardware devices components such as voltages and temperatures 4 3 4 Serial Port Console Redirection Console Redirection This item allows users to enable or disable console redirection ...

Страница 59: ... Windows NT4 0 Default Disabled Execute Disable Bit Enables or disables Intel Execute Disable Bit function Hardware Prefetcher Enables or disables L2 Cache Hardware Prefetcher Adjacent Cache Line Prefetch Enables or disables L2 prefetching of adjacent cache lines Intel Virtualization Technology Enables or disables Intel Virtualization Technology Virtualization enhanced by Intel Virtualization Tech...

Страница 60: ...ng functions Enhanced C state Enables or disables Intel CPU Enhanced Halt C1E function a CPU power saving function in system halt state When enabled the CPU core frequency and voltage will be reduced during system halt state to decrease power consumption This item is configurable only when CPU C state Report is enabled Max CPU C state Allows user to determine the maximum C state that the CPU will ...

Страница 61: ...hes this value the operating system will shut down the system This item is configurable only when DTS is enabled Passive Trip Point Allows user to set the CPU temperature threshold If the CPU temperature reaches this value the CPU frequency will be automatically reduced This item is configurable only when DTS is enabled DTS Enables or disables the CPU overheating protection function Default Disabl...

Страница 62: ...rial ATA SATA This item will allow users to enable or disable Serial ATA SATA Mode This item will allow users to select IDE or AHCI Mode Serial ATA Port 0 This item will allow users to enable or disable Serial ATA Port 0 Serial ATA Port 1 This item will allow users to enable or disable Serial ATA Port 1 ...

Страница 63: ...om operating systems that only support UEFI option ROM This item is configurable only when CSM Support is set to Enabled Wake on LAN This item will allow users to enable or disable wake on LAN function PXE Function This item will allow users to enable or disable PXE function Storage Allows user to select whether to enable the UEFI or legacy option ROM for the storage device controller Do not launc...

Страница 64: ...e used in MS DOS XHCI Hand off Determines whether to enable XHCI USB3 0 Hand off feature for an operating system without XHCI USB3 0 Hand off support EHCI Hand off Determines whether to enable EHCI Hand off feature for an operating system without EHCI Hand off support USB Mass Storage Driver Support Enables or disables support for USB storage devices ...

Страница 65: ...ct Size Fanless Computer User s Manual 65 Chapter 4 BIOS Setup 4 4 Chipset 4 4 1 North Bridge This section provides information on the installed memory size and memory onboard graphics related configuration options ...

Страница 66: ...e or disable Integrated Graphics Device IGD Turbo Enable This item will allow users to enable or disable IGD Turbo Primary Display Auto or IGFX or PEG or PCIE or SG optimal to Primary Display GFX Boost This item will allow users to enable or disable GFX Boost Aperture Size Aperture size optimal between 128MB 256MB or 512MB DOP CG This item will allow users to enable or disable DOP CG GTT Size GTT ...

Страница 67: ...le of interfacing to USB 1 0 2 0 and 3 0 compatible devices The specification is also referred to as the USB 3 0 Host Controller specification USB 2 0 EHCI Support This setting disables enables the USB EHCI controller The Enhanced Host Controller Interface EHCI specification describes the register level interface for a Host Controller for the Universal Serial Bus USB Revision 2 0 USB RMH Mode This...

Страница 68: ...e PCI Express Port 2 Speed Change the PCI Express interface speed Select AUTO Gen 2 or Gen 1 PCI Express Port 3 This item will allow users to enable or disable PCI Express Port 3 Speed Change the PCI Express interface speed Select AUTO Gen 2 or Gen 1 High Precision Timer Enable or disable High Precision Event Timer HPET in the operating system Restore AC Power Loss This setting specifies whether y...

Страница 69: ...you to configure and improve your system and allows you to set up some system features according to your preference 4 5 1 Administrator Password Administrator Password controls access to the BIOS Setup utility 4 5 2 User Password User Password controls access to the system at boot and to the BIOS Setup utility ...

Страница 70: ...ings 4 6 1 Setup Prompt Timeout Use this item to set number of seconds to wait for setup activation key 4 6 2 Bootup NumLock State Select the Power on state for Numlock 4 6 3 Full Screen Logo Show This item allows user to enable or disable full screen logo show 4 6 4 Fast Boot This item allows user to enable or disable Fast Boot option ...

Страница 71: ...p after saving changes 4 7 2 Discard Changes and Reset This item allows user to reset system setup without saving any changes 4 7 3 Restore Defaults This item allows user to restore load default values for all the options 4 7 4 Save as User Defaults This item allows user to save the changes done so far as user defaults 4 7 5 Restore User Defaults This item allows user to restore the user defaults ...

Страница 72: ...Product Application Chapter 5 ...

Страница 73: ...p F81866A configuration registers the following configuration procedures must be followed in sequence 1 Enter the Extended Function Mode 2 Configure the configuration registers 3 Exit the Extended Function Mode The configuration register is used to control the behavior of the corresponding devices To configure the register use the index port to select the index and then write data port to alter th...

Страница 74: ...DC 1100 Compact Size Fanless Computer User s Manual 74 Chapter 5 Product application 5 1 1 3 Relative Registers To program the F81866A configuration registers see the following configuration procedures ...

Страница 75: ... write twice to enter Extended mode Select Logic Device WriteByte AddrPort 0x07 WriteByte dataPort 0x06 Select logic device 06h Input Mode Selection Set GP74 to GP77 input Mode WriteByte AddrPort 0x80 Select configuration register 80h WriteByte DataPort 0x0X Set bit 4 7 0 to select GP 74 77 as Input mode input Value WriteByte AddrPort 0x82 Select configuration register 82h ReadByte DataPort Value ...

Страница 76: ...ed mode Select Logic Device WriteByte AddrPort 0x07 WriteByte DataPort 0x06 Select logic device 06h Output Mode Selection Set GP80 to GP83 output Mode WriteByte AddrPort 0x88 Select configuration register 88h WriteByte DataPort 0xXF Set bit 0 3 1 to select GP 80 83 as Output mode Output Value WriteByte AddrPort 0x89 Select configuration register 89h WriteByte DataPort Value Set bit 0 3 0 1 to outp...

Страница 77: ...ion register 61h Low Byte address WriteByte DataPort 0x00 Leave the Extended Function Mode WriteByte AddrPort 0xAA Note Cincoze DIO Port base address is 0x0A00h 5 1 1 6 DATA Bit Table DI O DI1 Base Address 3 0xA03 7 6 5 4 3 2 1 0 bit 0 0 0 1 value h 1 X DI2 Base Address 3 0xA03 7 6 5 4 3 2 1 0 bit 0 0 1 0 value h 2 X DI3 Base Address 3 0xA03 7 6 5 4 3 2 1 0 bit 0 1 0 0 value h 4 X DI4 Base Address...

Страница 78: ...n Definition 7 6 5 4 3 2 1 0 Data Bits DI DO DIO 0xA03 0xA02 I O Port address 4x Digital Input Source Type Input Voltage Dry Contact Logic 0 Close to GND Logic 1 Open Input Voltage Logic 0 3V Min DI to COM 4x Digital Output Supply Voltage 5 30V Sink Current 580mA max per channel DIO Max 30V 5 2 DC 1100 series Digital I O DIO Hardware Specification ...

Страница 79: ... Cincoze logo is a registered trademark of Cincoze Co Ltd All other logos appearing in this catalog are the intellectual property of the respective company product or organization associated with the logo All product specifications and information are subject to change without notice www cincoze com ...

Отзывы: