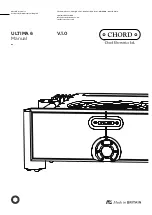
Chord ULTIMA 6 Скачать руководство пользователя страница 15

Chord Electronics

ULTIMA 6 | 

Manual

_

The rear panel offers a 
comprehensive connectivity 
suite, featuring both standard 
connections and those which 
are used with other Chord 
Electronics’ devices.

When installing any cable, you 
must make sure that they securly 
click into place, especially 
optical. 

3.1   Getting to know ULTIMA 6

3.2   The front panel

3.3  The top panel

3.4  The rear panel

The rear panel

3.4

15 // 24

Right channel

positive speaker terminal

Right channel

negative speaker terminal

Left channel

negative speaker terminal

Left channel

positive speaker terminal

12V Trigger input

Mains IEC input

Balanced XLR Right

input

Balanced XLR Left

input

Unbalanced RCA Right

input

Unbalanced RCA Left

input

WARNING:

 You must 

keep all vents clear.

Содержание ULTIMA 6

Страница 1: ...d Electronics Product Communication English The Pumphouse Farleigh Lane East Farleigh Kent ME16 9NB Great Britain 44 0 1622 721 444 info chordelectronics co uk chordelectronics co uk ULTIMA 6 Manual V...

Страница 2: ...tering 09 your purchase 2 2 Making a claim warranty exclusions 10 0 0 Contents 3 0 Getting to know ULTIMA 6 11 3 1 Getting to know ULTIMA 6 12 3 2 The front panel 13 3 3 The top panel 14 3 4 The rear...

Страница 3: ...ectronics ULTIMA 6 Manual _ 1 1 Introduction 1 2 Protection against liquids heat 1 3 Dismantling Radio Frequency interference 1 4 Connecting your equipment 1 0 Safety instructions Safety instructions...

Страница 4: ...mplification ownership with a dual feed forward error correction topology Before operation we strongly advise that you read this user manual thoroughly storing it in a safe place along with your origi...

Страница 5: ...ns power supply and connected equipment and contact Chord Electronics for further advice The ULTIMA 6 has internal thermal protection that will cut the power supply if reached Never operate the ULTIMA...

Страница 6: ...her advice 1 1 Introduction 1 2 Protection against liquids heat 1 3 Dismantling radio frequency interference 1 4 Connecting your equipment Dismantling radio frequency interference 1 3 With a thick sol...

Страница 7: ...his cable or an appropriate alternative Failure to do this could be hazardous in the unlikely event of a fault The supplied region specific 16A mains IEC cable can be substituted for an alternative po...

Страница 8: ...Chord Electronics ULTIMA 6 Manual _ 2 1 Warranty period registering your purchase 2 2 Making a claim warranty exclusions 2 0 Warranty Warranty 2 0 8 24...

Страница 9: ...overs defects in materials and workmanship through fair wear and tear The warranty is transferable with proof of purchase however is not available on ex demonstration products Please use the form belo...

Страница 10: ...ice centre to guarantee the quality and safety of the repair WARRANTY EXCLUSIONS The warranty does not cover connected equipment personal injury or development natural patina of the metalwork and will...

Страница 11: ...Chord Electronics ULTIMA 6 Manual _ 3 1 Getting to know ULTIMA 6 3 2 The front panel 3 3 The top panel 3 4 The rear panel 3 0 Getting to know ULTIMA 6 Getting to know ULTIMA 6 3 0 11 24...

Страница 12: ...ou read this user manual thoroughly storing it in a safe place along with your original receipt of purchase should you require assistance in the future 3 1 Getting to know ULTIMA 6 3 2 The front panel...

Страница 13: ...r the brightness of the feature lighting to suit the ambience of your listening room Please view page 23 to learn how to do this 3 1 Getting to know ULTIMA 6 3 2 The front panel 3 3 The top panel 3 4...

Страница 14: ...ings illuminate If you find that these rings are too bright for your listening room you can control the brightness via the front panel 3 1 Getting to know ULTIMA 6 3 2 The front panel 3 3 The top pane...

Страница 15: ...lace especially optical 3 1 Getting to know ULTIMA 6 3 2 The front panel 3 3 The top panel 3 4 The rear panel The rear panel 3 4 15 24 Right channel positive speaker terminal Right channel negative sp...

Страница 16: ...Manual _ 4 1 Placement 4 2 Connecting ULTIMA 6 to ancillary equipment 4 3 Audio inputs 4 4 Audio outputs 4 5 Power on sequence and 12V trigger 4 6 Earthing issues in Europe 4 0 Setting up ULTIMA 6 Set...

Страница 17: ...egs it is recommended that ULTIMA 6 is allowed to breathe with 10cm of space around it to convection cool during operation 4 1 Placement 4 2 Connecting ULTIMA 6 to ancillary equipment 4 3 Audio inputs...

Страница 18: ...me setting is operated to its lowest setting before slowly being raised to a comfortable listening level Always observe partnering manufacturers guidelines 4 1 Placement 4 2 Connecting ULTIMA 6 to anc...

Страница 19: ...tputs 4 5 Power on sequence and 12V trigger 4 6 Earthing issues in Europe 4 7 Adjusting the brightness of the LED s Audio inputs 4 3 19 24 WARNING ULTIMA 6 must be connected to a dedicated preamplifie...

Страница 20: ...4 7 Adjusting the brightness of the LED s Audio outputs 4 4 20 24 Connect the black negative terminal from ULTIMA 6 to the negative terminal on your loudspeaker and the red positive terminal from ULT...

Страница 21: ...and 12V trigger 4 6 Earthing issues in Europe 4 7 Adjusting the brightness of the LED s Power on sequence and 12V trigger 4 5 21 24 12V Trigger A 12V trigger can be used to remotely turn ULTIMA 6 on o...

Страница 22: ...ent is connected via a good quality multi way mains block which contains an earth point at every socket outlet We recommend that an earthing method for your building is implemented 4 1 Placement 4 2 C...

Страница 23: ...elow insert a thin object and push until you hear an audible click The light ring and power button will cycle between low and high brightness modes 4 1 Placement 4 2 Connecting ULTIMA 6 to ancillary e...

Страница 24: ......

Отзывы: